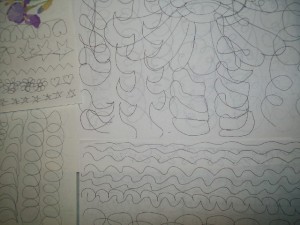
Ok, internet is up and running again! Thanks Lorrie for coming up with a last minute post! So, how did it feel to sew free motion straight lines? Was your stitch length consistent? Did you eventually adjust your hand speed or needle speed without thinking? Did you use your previous line as a guide -did it help keep the next one straight? Lorrie’s lines look great and I’m so glad Gail sent in pictures of her doodling (below). I see feathers – very ambitious – fun aren’t they? You are very close to achieving them too -great job! After we get thru the basics I will post three feather techniques from various designer I teach at the local quilt store, I’m sure you will find one that works best for you.
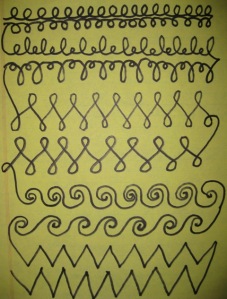
Now that you have 4 sandwiches prepared I bet you are wondering what’s next. Well, let’s start sewing doodles in between the lines. Imagine these lines as the outer boundaries of sashing in your quilt and start doodling the following shapes – practice each shape on two lines.
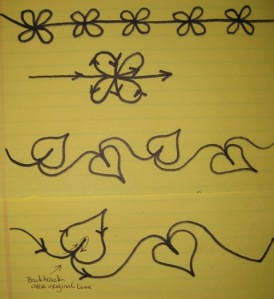
I started sewing left to right then continued down to the next line without stopping and sewed the next line from right to left. You can see in the drawing below I mirrored the loops on the second line to mixed up a bit and to get use to sewing shapes in different directions. Continue with the “L’s” and “e’s” , lace, waves, zigzags, flowers, then leaves on a vine. If you have extra space at the bottom create your own shape and repeat.
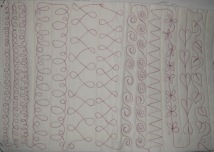
Here is one of my first practice samples…
As you sew each shape watch the stitch length and the overall consistency in the shapes. Depending on what you used to based the sandwich with be sure to watch for pins and remove them as you go. If you are finding it challenging to move your fabric around try using quilting gloves – I fought them for a long time because they made my hands hot but they’ve come a long way over the years and are much lighter in weight and more comfortable to wear. They will help reduce hand fatigue as well.
Use your 4 practice sandwiches and continue practicing throughout the week – if you get bored don’t limit your practice to just the shapes above definitely explore others – flip thru quilting magazines/books or images on the internet to find more examples. Many times I find inspiration from catalogs with metalwork designs.
Here are a few tips:
1) I highly recommend keeping a stash of practice sandwiches by your sewing machine so when you have the urge to doodle everything is ready to go!
2) Make sure you work space is clutter free so your fabric will move freely.
3) Adjust your chair height or sit on pillows to insure your elbows are at a 90 degree angle this will reduce wrist and shoulder fatigue.
4) Set up plenty of light so you don’t strain your eyes.
5) Watch your thread tension during free motion quilting you will find you may have to adjust. Start by adjusting your top thread tension as needed then bobbin thread.
6) Don’t quilt if you are stressed or have other things on your mind you won’t enjoy the process!
Remember, this is practice so don’t be hard on yourself. As you progress thru the steps you will look back at your first few sandwiches and smile at what you have accomplished! Practice Practice Practice!


3 comments
Comments feed for this article
December 6, 2010 at 9:49 pm
Sonia
Hi there, thanks so much for this post. I can’t do too much right now but all these posts are kept in my computer ready and waiting. My free motion foot is broken so I am waiting to buy a new one. I am so unsure about free motion quilting and I am sure that this advice will have me quilting like crazy. Thank you so much : )
December 7, 2010 at 9:50 am
Nicole
Lots of practice is what it takes to become good at machine quilting. I am a beginner myself, and should devote an hour a day to practice!
December 7, 2010 at 11:25 am
Gail Lewis
Paige, this sewing left to right then right to left is quite a challenge and a lot of fun. I am a big fan of gloves and found mine at a yard sale.They are a pair of vintage gloves with an open weave so that have more texture than most gloves.They are cool and grip the fabric very well. Okay my break is over so back to the sewing machine !!!