
You are currently browsing the tag archive for the ‘tuffet pattern’ tag.

Tag Archive
I know you love the the round Tuffet but did you know there’s also a square one! Yes, it’s true. It’s hip to be square!

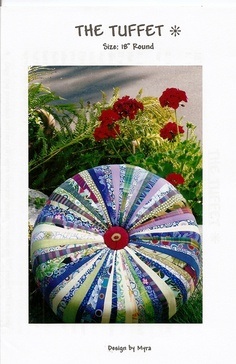
Reqiring basically the same supplies and techniques. Except, of course, it needs a square board! Pattern comes with 5 pages of detailed instructions and full size templates.
Click on the pattern pic above to order your tuffet today!
I get pretty dang excited when I sell a Tuffet pattern. Especially when I sell several of them to the same part of the country. Which means most likely, that a quilt shop is having a class. Somebody’s having a Tuffet Party!
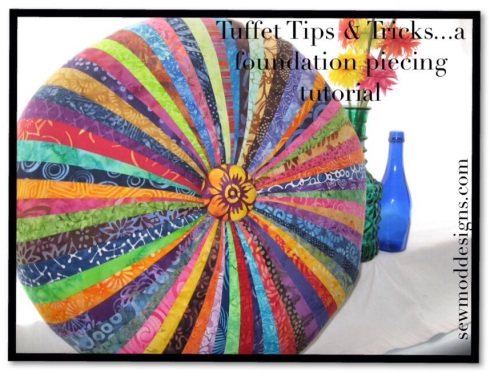
I get all kinds of questions about the innards and the how-to on assembling the Tuffet, where to buy supplies, what fabrics to use, etc. So today, I’m gonna kill two birds with one stone. I’m going to finish up my UFO Tuffet and answer some of my customers pressing questions.
Because let’s face it, this list of supplies might seem a little daunting. But don’t fret, everything can be easily found at your LQS, craft or hardware store. The only thing you might have trouble finding, is your handyman.
I put a supply chart together showing the Supply, The Use, Where To Buy, Cost, & any Comments I have that might help. **This is for guidance purposes only** You can buy whatever you want from whomever you’d like. I’m only stating what I purchased and from where to try to help anyone making the Tuffets. If you’re taking a class at your LQS, there will likely be a Tuffet kit available for purchase. I highly recommend buying the kit. Unfortunately, for our party, we weren’t that lucky and we had to figure it out on our own. I hope this helps and you enjoy making your Tuffets as much as we did!
So let’s get this party started, shall we?
First you need The Tuffet pattern by Myra Mitchell. The foundation piecing demo and tips provided does not, in any way, replace the fact that you still need the pattern! I’ve only provided you with TIPS for building your Tuffet, not instructions on assembly. You don’t want to invest all your time and $$ in this project, only to realize that your missing key steps and correct templates. Even I still refer to my pattern for each Tuffet I assemble!
UPDATE: 01/04/18 SewMod is sold out of the Tuffet patterns. Please visit Etsy.com to purchase a tuffet pattern from a sewing or quilt store.
UPDATE 3/8/16: Myra has changed the board dimensions on the most RECENT patterns from a 18″ round plywood to a 17″ round plywood. All other supplies remain the same including the 18″ foam pieces. PLEASE NOTE this when printing off the PDF below.
SUPPLIES:Click on the table below to enlarge OR download the PDF as a reference HERE
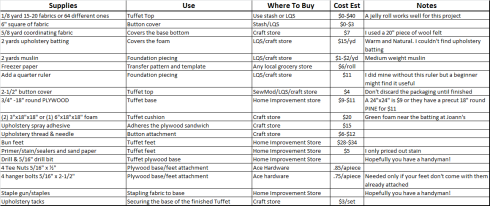
**Remember that if you’re buying items from your local big box fabric & craft store, to use your coupons to significantly reduce the prices on select items.
**Items such as needles, adhesive spray, stain, & freezer paper can be shared if you’re making Tuffets with your friends!
FOUNDATION PIECING:The method of stitching your fabric pieces directly onto a foundation fabric such as muslin.
Foundation piecing onto the muslin will provide support and stability to this project and keep the fabrics from stretching when you begin to attach them to the base. Muslin will not pull apart.
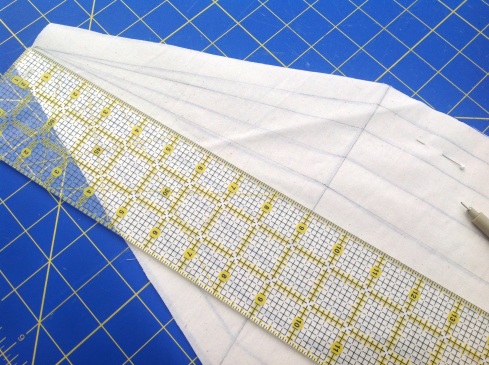
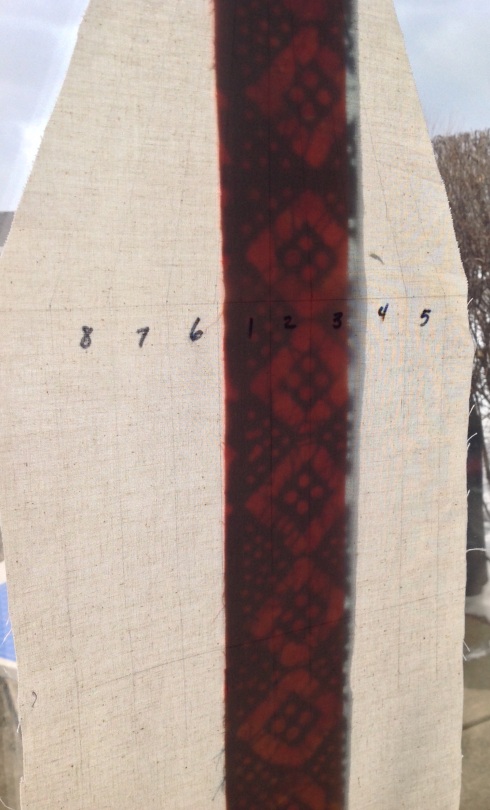
Once you’ve traced your foundation template onto freezer paper and cut the muslin fabric pieces, trace the stitching lines. You can see from the pic that if you use a Sharpie to trace the stitching lines onto the freezer paper, you will be able to easily see through the muslin for tracing. I used a ruler and a Pigma pen to trace my lines onto the muslin. Make sure to trace the numbers from the pattern onto the muslin.
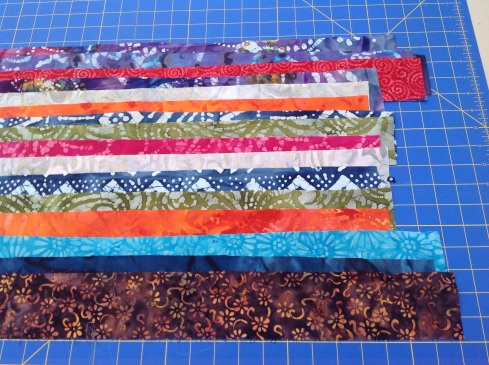
I used my leftover Batik scraps from various projects to make this Tuffet. I like using scrap pieces that are at least 2-1/2″W x 22″L . It makes my foundation piecing a lot easier!
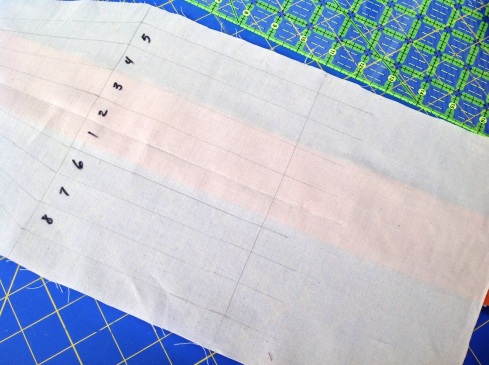
Take your first two strips and layer them right sides together. These will be #1 & #2. Now take your muslin piece and with the drawn lines facing you, hold it up to a light source. I used my patio door as my light source for these pics. Place the layered strips behind the muslin. Make sure that these two pieces cover the stitch lines for #1 & #2. Pin in place to secure.
Shorten the stitch length on your machine. I set mine at a 1.8. Starting at the widest end of the strip, sew towards the narrow end through all of the fabrics. When you foundation piece, your fabrics are on the back of the muslin foundation and you stitch on the drawn foundation lines. Remember to back stitch.
Flip the muslin over and press the two strips open. You can see that they both completely cover #1 & #2.
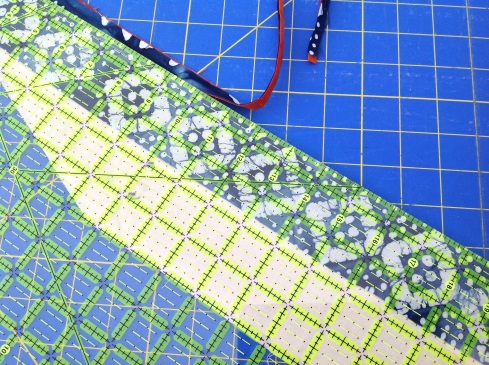
Now the tricky part is trimming your seam. **I mentioned earlier in my Supply Chart notes that I did not use the Add-A-Quarter ruler so you won’t see me demonstrating cutting my seam with it. Instead I used my large cutting ruler. To trim the seam, fold all of the fabric, including the muslin, to the left, exposing only the raw edges the two fabrics you just stitched. Take your ruler and trim to a 1/4″ from the stitch line.
Press open again and head back over to your patio door!
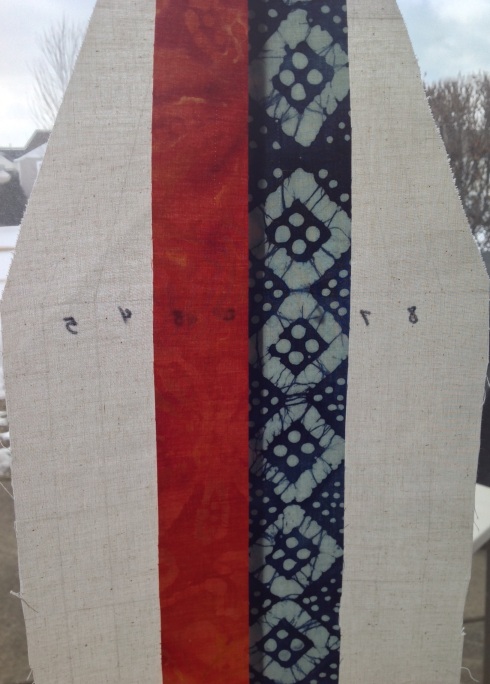
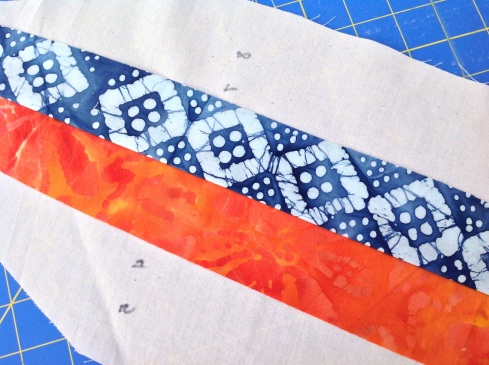
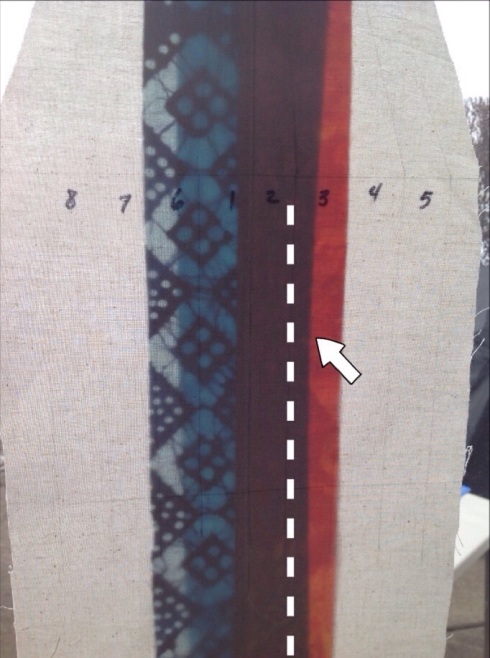
Position the #3 fabric behind first two sewn strips. Notice that in the pic below that the #3 fabric is at least a 1/4″ beyond the #2 line that I will be stitching on. Pin in place and sew on the #2 line. Once again, starting from the bottom up towards the narrow end and back stitching. Trim seam. Press well!!
Repeat this process until all 8 strips are added. The last stitch line on each side of the muslin foundation are the stitch lines for piecing all 8 sections together. You only add 8 strips to each foundation piece.
Trim the block up to the muslin foundation. It’s ok to leave the bottom edge untrimmed. It will help when you are covering the Tuffet and can be trimmed after it’s stapled to the base. Sew 1/8″ around the edges to secure.
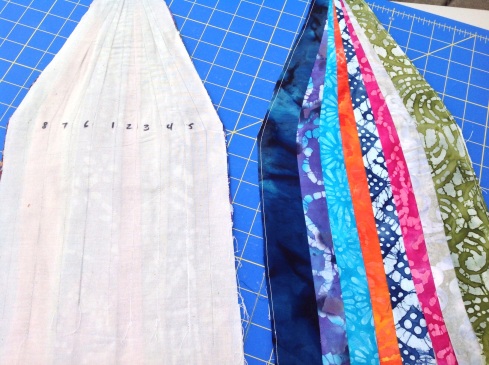
Here’s a pic of two completed sections…one from the front and one from the back. Refer to your pattern to complete the assembly of your pieced top.
TUFFET BASE:
Trace your template onto the foam and cut out 2 round cushions.
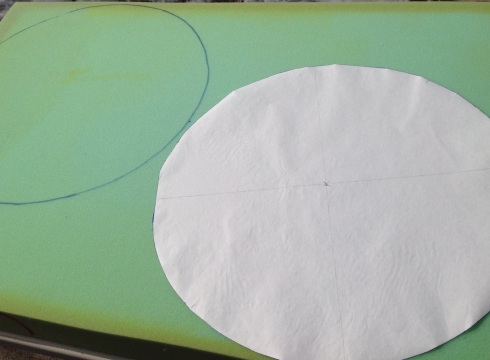
To make cutting easier, use an electric knife..you know, the kind Grandma cuts the turkey with? It’s perfect for this job too!…but I never cut meat with mine lol!

It’s ok that they’re not pretty cakes. They will be covered with batting and fabric to smooth out the rough edges.
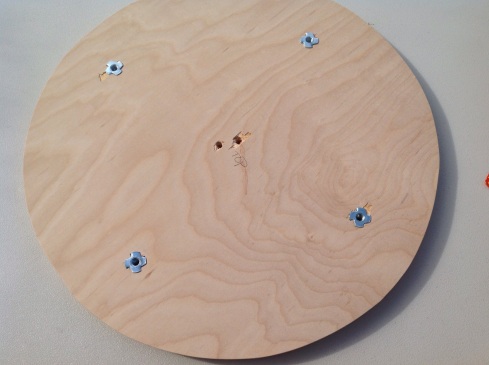
Before using your spray adhesive, make sure that you are adhering the foam to the Tuffet top. I marked them as shown in the pics below.
The top of the Tuffet is where you will see the Tee Nuts.
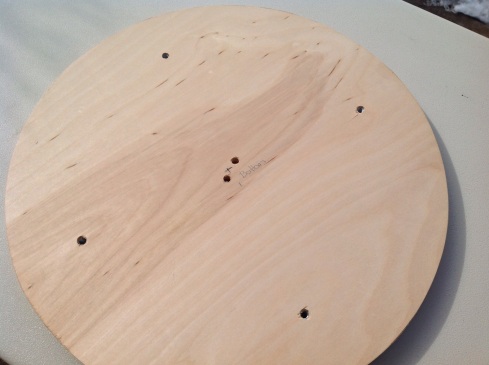
The bottom of the Tuffet is where you will attach the Bun feet after you’re finished. The 2 small holes in the center are for the button attachment.
COVERING THE TUFFET: From the lyrics of Rob Base and DJ EZ Rock…🎶🎶”It takes two to make a thing go right“🎶🎶…you need a partner!
As I noted previously, I used leftover Warm & Natural batting because I couldn’t find upholstery batting. Upholstery batting is supposed to be more durable and won’t break down but I figured how bad can it be? It’s not like I’m going to be letting the kids jump on it or anything.
After your batting is on, ease the pieced top over it, keeping it centered. It helps if one of you stretch the pieced Tuffet onto the base while the other staples. Work from one side to the opposite. Pull tightly, add about 4 staples, turn 180 degrees , add a few more staples. Keep stapling until your top is securely attached. Try to staple about 3/4″ away from the edge of your base. If you go any further in, you risk getting too close to the drilled holes where the feet screw in. Keep working at it from opposing sides until you’re finished. Use lots of staples. Your arm will get tired! Check, double check, and even triple check to make sure that you’re keeping the piece centered. The last thing you want to discover after all your hard work is that your Tuffet is tipsy to one side. Trust me, I know..
ATTACHING THE BUTTON:
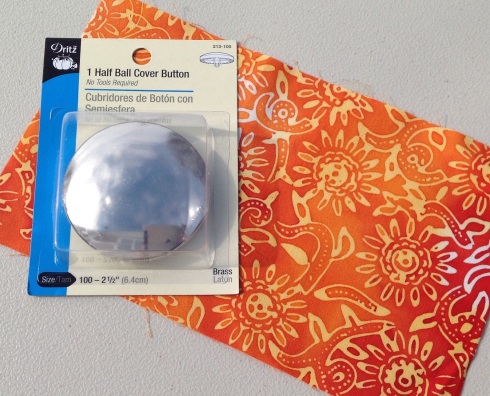
Follow the instructions in your Tuffet pattern to cover and attach your button using the upholstery thread. Pull tightly to secure and staple underneath.

COVERING THE BASE:
Using your 18″ freezer paper template, cut out a piece of coordinating wool felt to cover the wood base for the finishing touch. This step is completely optional but well worth it! Center your felt on the base. I used a bit of the upholstery spray to keep it from shifting too much while I worked. Using a mallet, hammer the tacks around the edge of the felt. Locate the drilled holes for the feet by touch and use small scissors to clip the holes where your Bun feet will be attached. I did this last because your felt may shift/stretch a little while your attaching it. Trim the felt close to the Tuffet edge if necessary.
For a more professional look, it’s best if you buy 2 boxes of the tacks. You’ll only use about 1/2 of the second. I misplaced my second box and as you can see from my photo, my Tuffet could have used a few more tacks. But that’s an easy fix for later, right!
Screw your Bun feet into the base.

And you’re all set!
🎶🎶It takes two to make a thing go right
It takes two to make it outta sight🎶🎶
**UPDATE 6/12/2015 The Tuffet classes are Closed at this time.
Please visit here for the pattern and the blog post with Tips & Tricks for piecing and assembly of your Tuffet! Thank so much. Lorrie:)
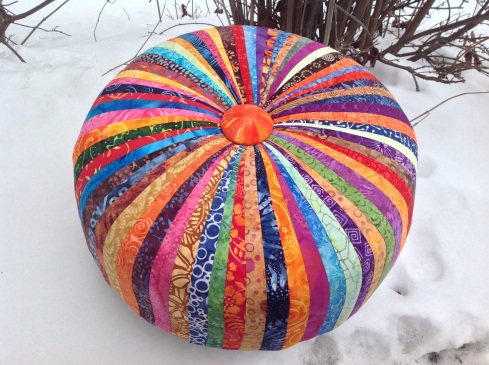
Paige finished her tuffet this week! She used a full range of bright batiks. Can you believe that all 64 prints came from her stash! It looks like a jewel and I really love how she centered the flower batik as her button.

The only thing left to add now is the tuffet feet. But I don’t think Paige’s Kitty minded:)

For all you lucky local residents of the Chicagoland area, SewMod is interested in holding a Tuffet Class using the pattern by Myra Mitchell. We were thinking a Saturday or Sunday in the month of May or June. We are flexible. If we get 3 or more interested then we will hold the class. **Class requirements are intermediate sewing levels with knowledge of foundation or paper piecing. Please contact us below if you are interested in the class simply fill out the fields and clicking submit. Have a great weekend everyone!


