
You are currently browsing the tag archive for the ‘embroidered coffee cozy tutorial’ tag.

Tag Archive
**UPDATE 5/1/15 To make the coffee cozy without embroidery stitches and view the updated tutorial click here.
Welcome back to Handmade Holidays on Friday! We’ve got just the project to keep you busy this weekend. Coffee sleeves and cozy’s to fit your favorite cup or mug. Or maybe you have someone you’d like to give this to as a gift,… a teacher, a neighbor, or your favorite coffee lover?
We’ve made this sleeve unique by adding simple embroidery stitches to the seams. If you prefer not to embroidery, that’s fine too. Embellish any way you like. Have fun with it by making it your own!
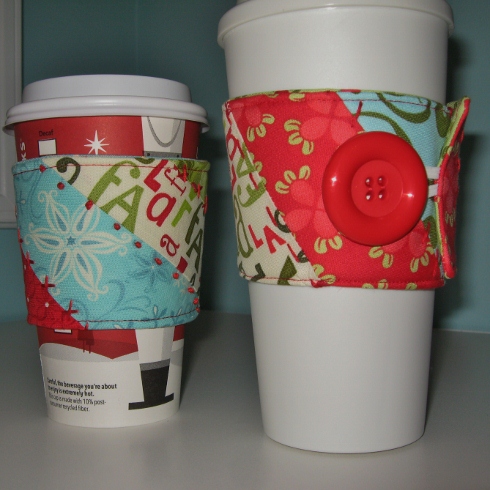
This pattern fits a Starbucks disposable coffee cup. We’ve also made one to fit an Eco-friendly one as well. If you’re making the Eco-friendly sleeve, add 1/2″ seam allowance all the way around the pattern lines.
You will need….
Pattern
7 to 8 scrap fabrics varying in width from 1-1/2″ to 3-1/2″ and approx. 13″ long
Fabric for the backing
Scrap piece of batting
Elastic hair tie, Button and Embroidery floss
Let’s begin!
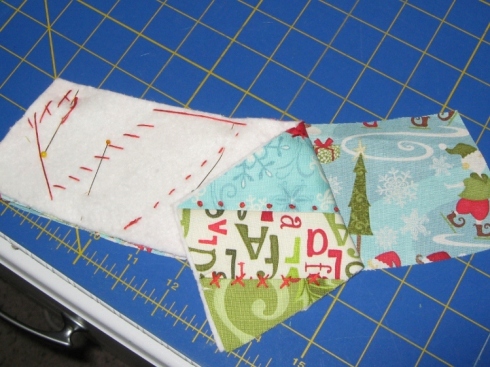
Cut your fabrics into strips and sew them with right sides together as shown.
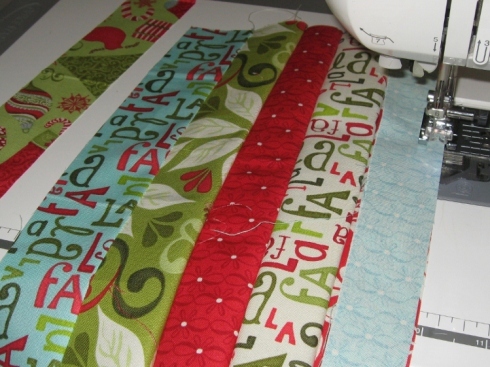
Press all your seams in one direction. Layer your batting and then your pieced fabric with right side up.

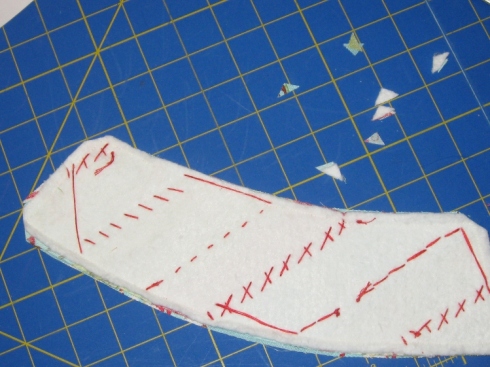
Place your pattern on top and position it on the fabric at a diagonal. Pin. Cut the fabric and batting using your pattern as the guide.
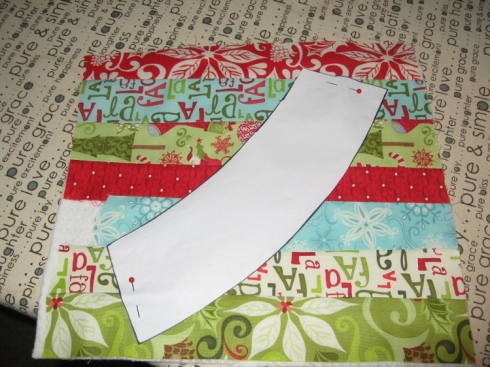
Keeping your cut pieces layered and using 4 strands of floss, embroider on top or close to all your sewn seams. I used a french knot, whip stitch, and back stitch. We’ve added a few helpful stitch guides on the pattern for you. Be Creative!
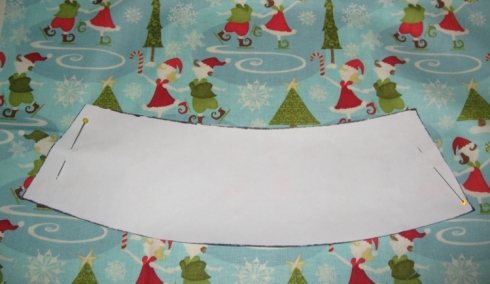
Cut out your backing fabric by placing the pattern facing down on the right side of your fabric.
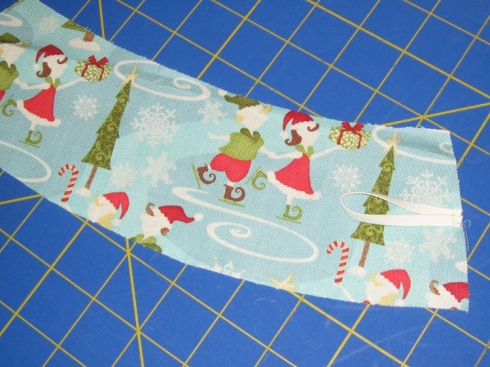
Place elastic tie as shown with the loop facing toward the sleeve and on the right side of fabric. Sew across to secure.
Layer your embroidered fabric piece and the backing right sides together and pin.
Using a scant 1/4″ seam, sew around the sleeve, leaving a 3″ opening for turning.
Clip the corners and turn right side out. Making sure to push your corners out.
Iron flat. Top stitch around the sleeve to secure the opening.
With your sleeve positioned on your cup, mark the button placement, making sure that its snug.
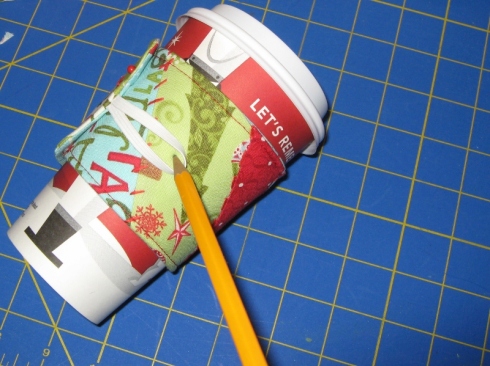
Sew on your button and you’re finished! Now, go show off your hard work! Or, place a gift card inside the Eco-friendly cup and you’re one present ahead of the season:)
If your interested in crocheting a mug cozy and coffee sleeve, we found a couple on these links..cozy & sleeve
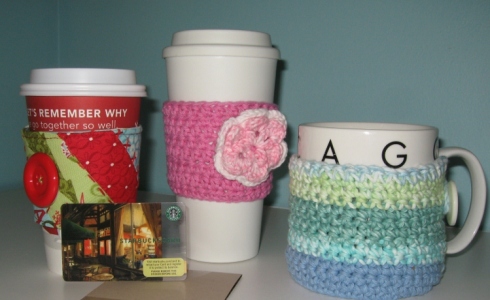
My mom was gracious enough to demo those out for us. They turned out so cute. She added the big flower on the pink one. Be creative and add something special of your own. Maybe a crocheted stocking since it’s Christmas. There are lots of free crochet patterns out there. I love the mug cozy too because I can still read the Chicago around the rim and it’s made in our favorite colors here at SewMod…blue and green!
I hope you’ve enjoyed our tutorial this week. Have a great weekend everyone and try to stay warm!


