
You are currently browsing the tag archive for the ‘tips for Atkinson classmate’ tag.

Tag Archive
Playing catch-up…better late than never.
whew..the end of 2015 went by so fast my head is still spinning. And while I feel like I accomplished quite a bit over the holidays, I definetly slacked when it came to blogging, so I’m going to try to play catch up over the next couple of weeks. Which, btw, did you realize it’s already the third week in January!?!
First up is the Classmate pattern from Atkinson designs. I can’t say enough about how well her patterns are written. Step-by-step instructions that are clear as day make something that looks a little difficult, seem sooo easy!
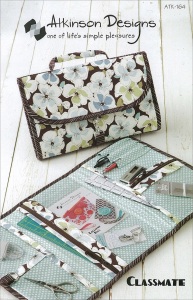
So ‘easy’ in fact that I made 4 of them in about 3 days! What a great tote to keep all your tools and supplies in for that quilt class or to take along with you to guild sew-ins.
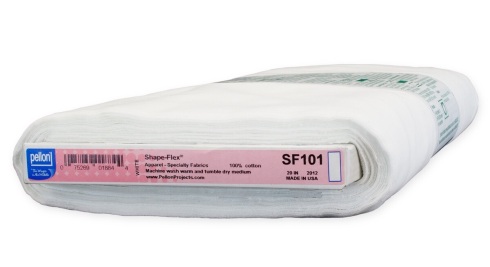
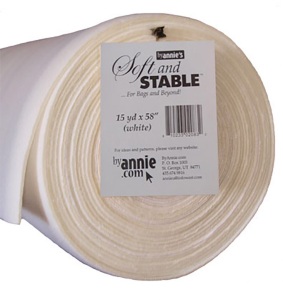
The first thing I want to talk about is some of the ingredients needed for this project that I haven’t used before.
Annie’s Soft And Stable and Pellon’s Shape-Flex.
Shape-Flex is pressed onto the back of the fabrics before cutting. This is the best interfacing y’all! I’m totally going to use this more often and I’m just wondering how the heck had I not heard of it before now?! I read that it’s great for purses and backing my embroidery projects before stitching. It’s so nice and flexible. I think it just might help with that icky wrinkly effect that some interfacings give you even after its pressed onto the fabrics.
Annie’s Soft And Stable gave my project the stability it needed without feeling stiff. This is used as a replacement for your batting in projects like bags and totes. I wish you could touch my finished Classmate to see for yourself!
And never fear the zipper installment when working on a Atkinson pattern. Once you sew a zipper with her method, you’ll always refer back to it on all of your other patterns that need a zipper.
There’s also a great tip for sewing with vinyl. Just layer tissue paper between the presser foot and the vinyl. This helps the foot glide along without sticking. I just sewed mine right on top of the vinyl and pulled it away after I was was finished.
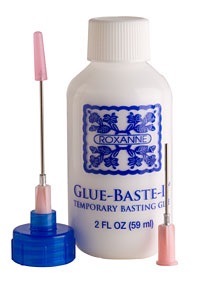
The other tip I have is to skip the basting and use the Roxanne’s Glue Baste-it. This sped up my sewing and didn’t give me any issues whatsoever for taking the short cut of not pinning anything. I glue basted the entire thing!!
I did skip the step on adding the pen pocket. I never carry marking utensils and if I did, I’d keep them zippered up, so I just made that an extra pocket.
One last bit of advice…take the time to hand bind it and don’t forget to add your label. That’s the finishing touch.
My Classmates came out looking so professional if I do say so myself! I gave them away to the girls for Christmas presents this year. But don’t take my word for it. Check ’em out!
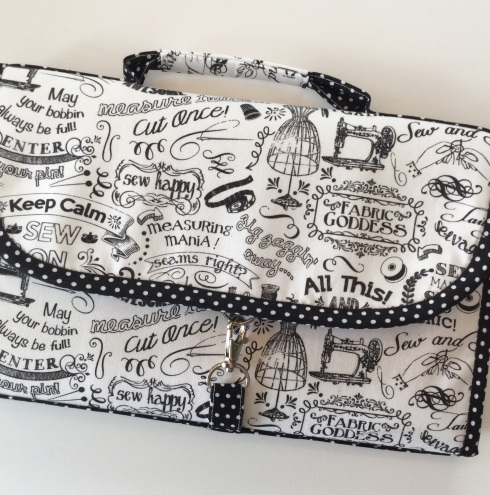
This one was made for Paige using Timeless Treasures ‘Sewing Words‘ fabric. Which I’m almost out out of, so if you love it like we do, then you’d better hurry!
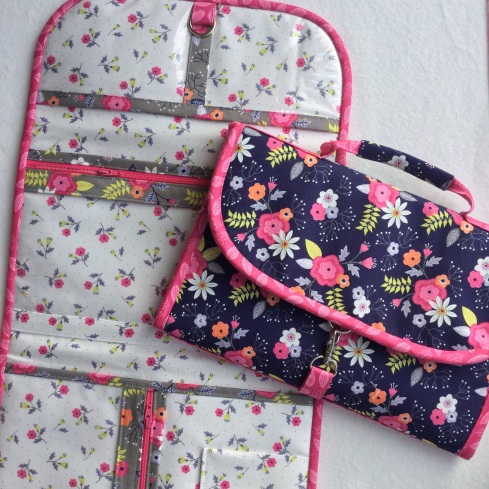
I made these two for Shelley & Wendy using two different prints from the Paradise line from Camelot Fabrics.
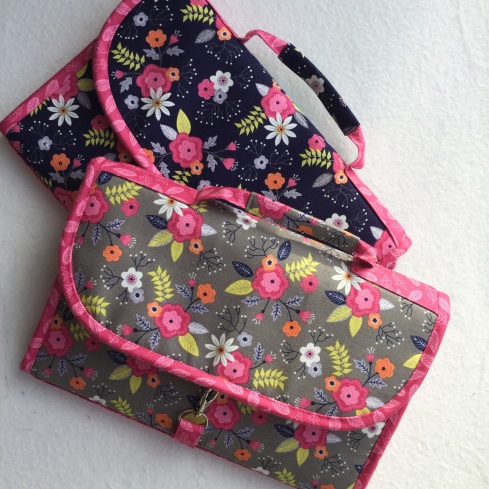
I just love that little white floral print for the inside.
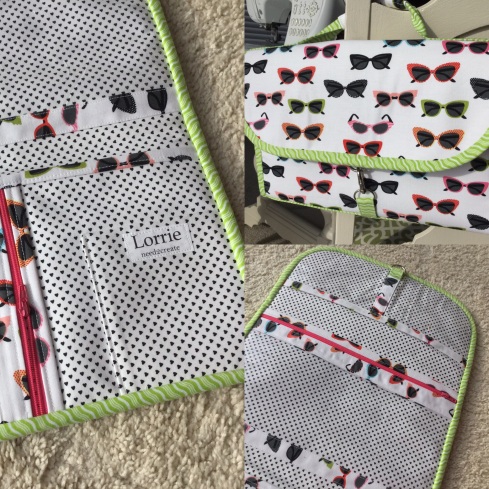
And this one I kept for myself!
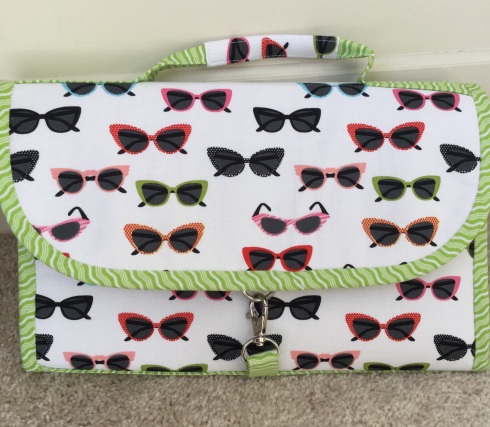
Made with Riley Blake’s retro Sunglasses fabric and coordinating crimped green binding. And how cute are those tiny black hearts for my inside?…swoon…
I do hope that you take some time this year to make one of these. You won’t regret it. I promise!
Oh, and I also hope this year doesn’t speed by as fast as 2015. How do we make time slow down? Is there a secret?


