
You are currently browsing the tag archive for the ‘flange how-to’ tag.

Tag Archive
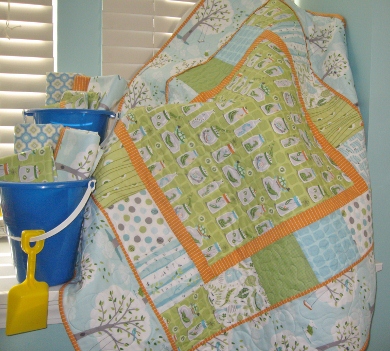
A quick way to add some dimension and decorative flair to your quilt is by adding a flange. On the pattern, Backyard Baby, we add it as one of the ways to transition the borders from one to the other. A flange can be used between borders or before you attach your binding. Using Backyard Baby as our pattern, I’m going to show you just how easy adding a flange is!
Cut (3) 1″ strips WOF.

Connect all 3 strips on the diagonal…just like you would when you prepare a binding.

Trim the seam to 1/4″ and press open.

Press your flange wrong sides together lengthwise.

Starting on one side of the quilt, place raw edges together and lay the folded edge of your flange facing in towards the quilt.

At this point we’re basically going to baste the flange to the quilt. I use a normal stitch length and about an 1/8″ seam allowance.

When you come to the end of the first side of the quilt, stop and trim the flange even with the bottom.
You’ll notice that I did not cut and measure my flange according to the length of each side, but instead left all three lengths a continuous piece and trimmed as I went. Since Backyard Baby is a small quilt, I feel the risk of stretching it out of proportion is minimal…and I’m a wee bit lazy… But if you feel you’d rather cut the specific flange lengths, then you would first cut (4) 27-1/2″ pieces and proceed with the following steps. If you are adding a flange to a larger quilt or the binding on a different quilt, please measure your sides and pre-cut your flange accordingly to ensure that you do not stretch your sides. This will keep your quilt ‘squared up’.

Turn the quilt to work on the next side. Place your flange right on top of the first flange, and continue basting this side until you reach the bottom, and trim again.

Repeat for all four sides of your quilt.

At this point, you’ll begin adding your borders, right on top of the flange, using a 1/4″ seam allowance. Basically pretending your flange isn’t even there. And your end result should look something like this…


