
You are currently browsing the tag archive for the ‘equilateral baby quilt’ tag.

Tag Archive
I want to thank the Country Quilters of McHenry quilt guild and all of our customers who stopped by last weekend to see us! We had a very successful show and we couldn’t have done it without you.
This coming weekend we will be in Minooka IL. please stop by if you’re in the area. We’d love to see you too!
“Fall Splendor” Quilt Show
Sponsored by Pieces From The Heart Quilt Guild
October 2, 2015 – 9:00 – 5:00
October 3, 2015 – 10:00 – 4:00
Chapin’s East
502 Twin Rail Drive
Minooka, IL. 60447
Here’s a few pics from last weekend if you couldn’t make it out.
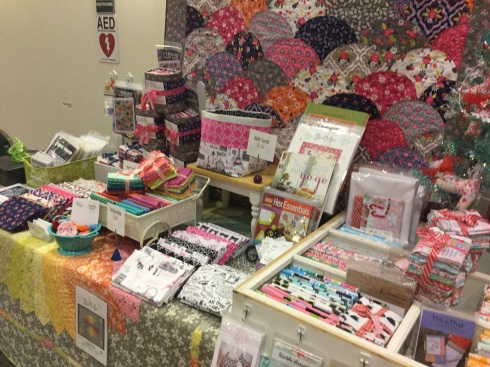
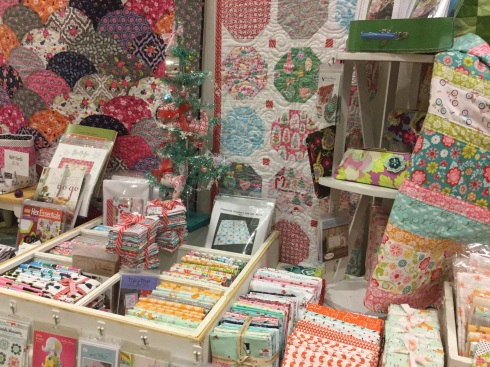
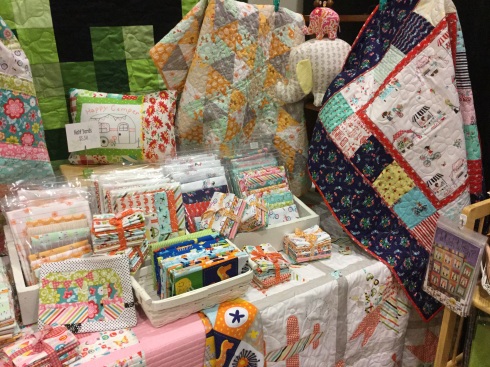
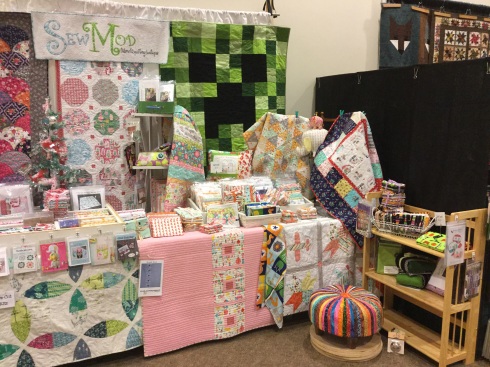
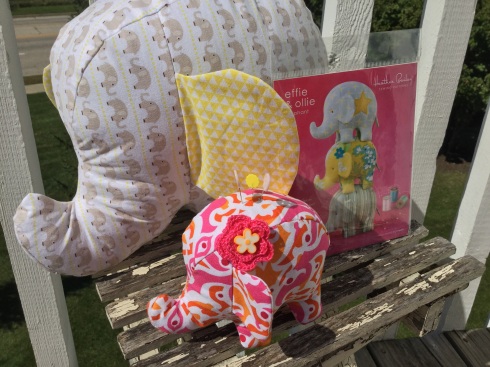
Our biggest sellers last weekend was just about anything that my mom made as a shop sample!
Effie The Elephant was a big hit. A cute little pincushion pattern by Heather Bailey. The pattern comes with the template for the small one but we thought it would be fun to enlarge it 175% and make a big softie for baby too!
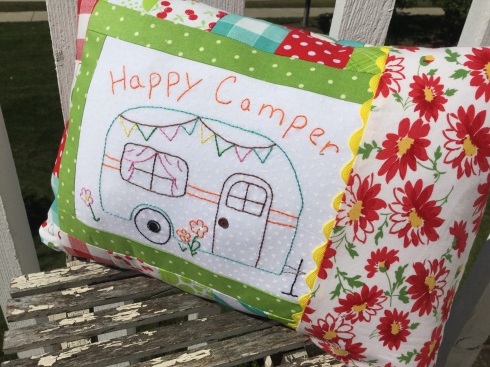
Happy Camper embroidered pillow from This & That.
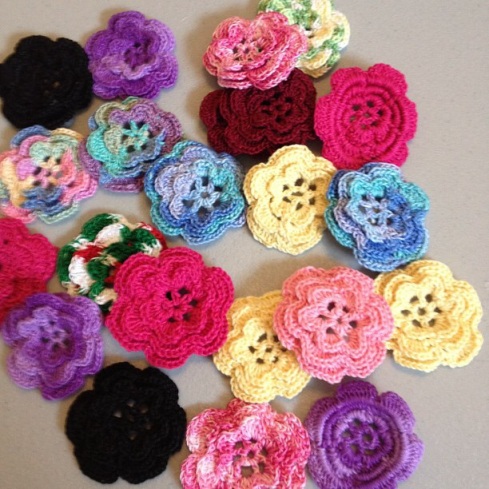
Of course her hand crocheted flowers. These make great embellishments for just about anything.
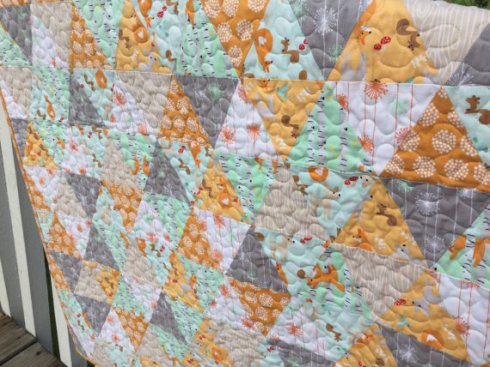
And the Good Natured Equilateral Baby Quilt kit.
We sold out of all of these except the kits. There’s a few of those still in stock (here) and I’ve reorded all the patterns. I’m hoping to get those in by Friday’s show. I did ‘reorder’ the crochet flowers but you just can’t rush handmade!
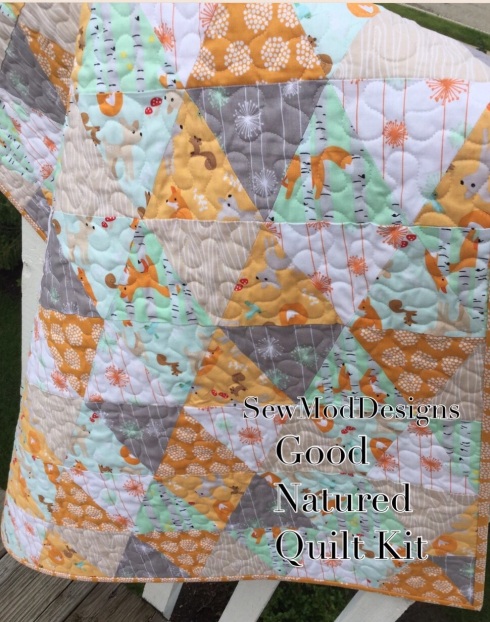
Equilateral?! Yuck. Geometry. Pretty much the only class I actually cheated in during high school. If I’d only known I’d be doing it as a business and hobby! The truth is, we use geometry & math every time we quilt…hexagons, triangles, squares & fractions. But sometimes we tend to get hung up on the ‘words’ until we’ve tried it. An equilateral triangle simply means that all 3 sides are equal. I’m going to be showing you a 60 degree equilateral quilt today with 2 methods to cut out the triangles.
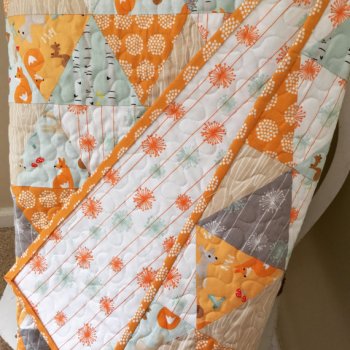
I wrote this ‘little‘ tutorial for a new baby quilt KIT for the shop using equilateral triangles and Riley Blake’s fabric line called ‘Good Natured”. It really is a sweet quilt with the orange & mint…adorable nature friends… squirrels, baby deer, sweet little bluebirds and playful foxes among birch trees!
I was both excited and nervous to make something with so many bias edges but it went together beautifully! Now that I know just how awesome it was, think of all the scrappy triangle quilts I could make. Oh, if I only had more time!
Since I learned a few tips along the way to make this quilt, I figured I’d pass it along to you guys.
Fabric supplies needed for a 35″x42-1/2″:
3/8 yard of 7 different fabrics
3/8 yard Binding- Cut (5) 2-1/2”
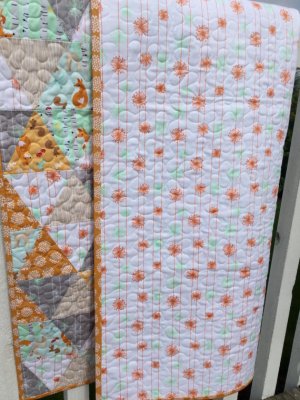
1-3/8 yard Backing
60 degree Creative Grids triangle ruler (method 1) or…
The Template. Grab some colored paper or craft foam & double sided tape (method 2)
Cut each of your 7 different fabrics into 3 strips of 4-1/4” wide. This is the same height as your triangle template or ruler.
A ¼” seam allowance is used for sewing and ALL seams are pressed open. Do not iron your triangles or rows. This will cause stretching. Press.
There are two methods I like to use to cut 60 degree triangles. To make the cutting as precise as possible, choose only one method per project to cut all of your equilaterals.
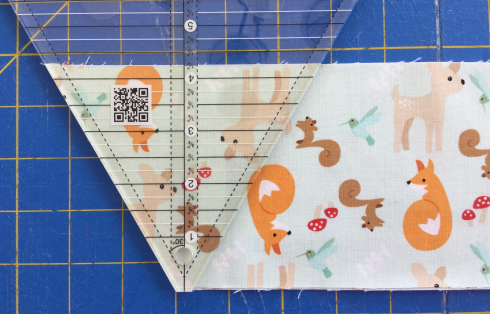
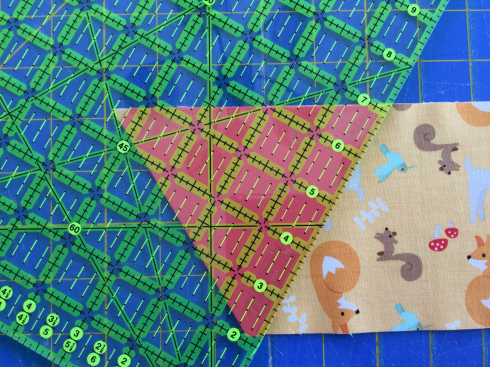
Method 1: Creative Grids 60 Degree Ruler
This ruler is found in the SewModDesigns Etsy shop. Place the ruler on the strip of fabric. The 4-1/4” mark should line up with the bottom of the strip and the squared off tip of the triangle should line up with the top of the strip.
The first thing we need to do is cut a 60 degree angle. Discard the extra fabric with the selvage on it.
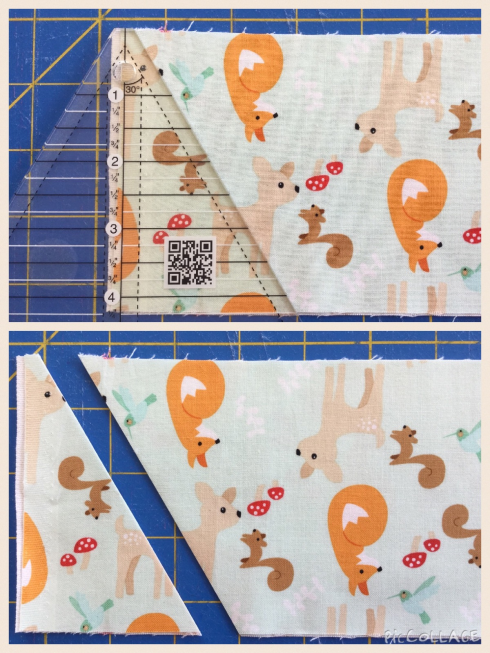
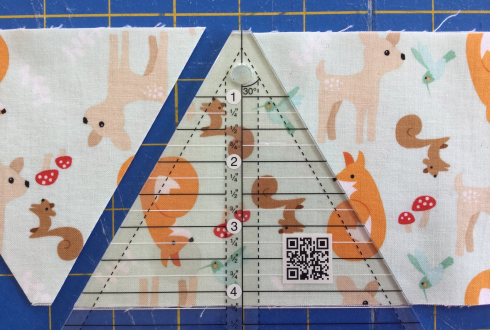
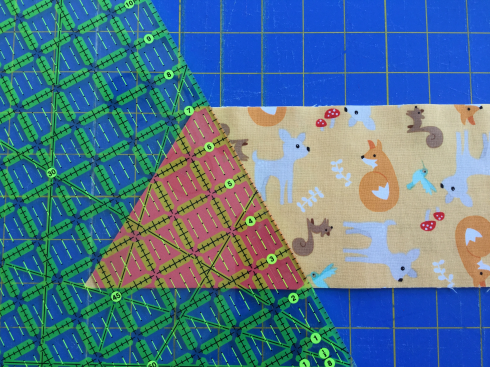
Rotate your ruler so that the top of the fabric strip lines up with the 4-1/4” marking and the squared off tip lines up with the bottom of the strip. Use the edge of the ruler to cut your triangle out.
Flip your ruler, line up the markings, and cut again. Repeat this flipping method until you have made 6 cuts with the ruler, giving you 12 triangles per strip.
And for all of you hittin’ it old school…
Method 2: Using the template, found here, & a ruler
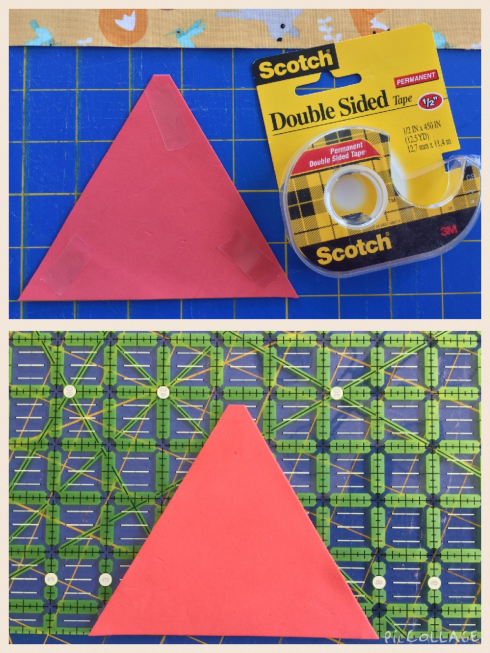
Cut the provided template out onto colored paper. We want it to be colored so that we can see it easily through the ruler. It makes it difficult to see if we use clear template plastic. I used a piece of craft foam for mine. I like the foam because it ‘sticks’ to the fabric while I’m cutting. These sheets can be found at your local craft & hobby store.
Place three pieces of double-sided tape to the back of your template. Turn your ruler over to the backside and adhere the template to it, lining up the bottom edge of the template along the side of the ruler. Don’t worry. It won’t leave your ruler sticky after you remove it.
The first thing we need to do is cut a 60 degree angle. Line the 60 degree mark on your ruler with the bottom of your 4-1/4” strip and trim off the selvage angle. Discard the extra fabric with the selvage on it.
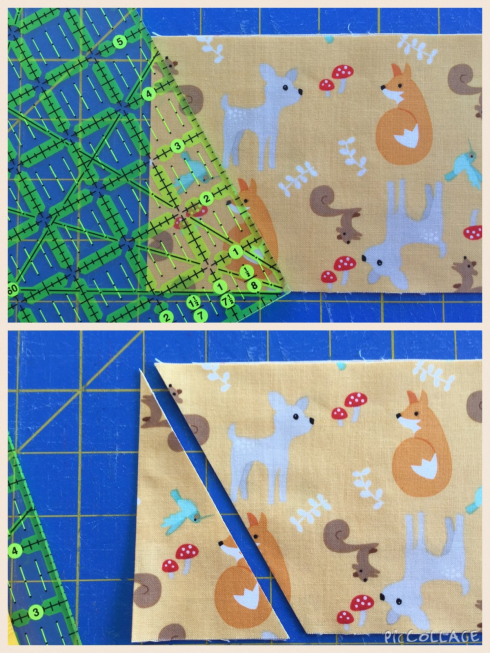
Using the colored foam as the guide, line the foam triangle up with two sides of the strip…the top and the left side as shown in the photo. Cut.
Turn the ruler and line up the foam triangle with two sides of the strip…the bottom and the left side. Cut.
Repeat this turning method until you have made 6 cuts with the ruler, giving you 12 triangles per strip.
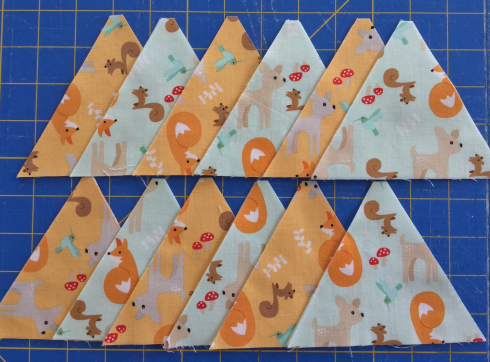
**All of your triangles have the top squared off. It determines the top & bottom of the triangle and keeps the straight of grain going in one direction for minimal stretching.
Using your preferred method, cut at least 216 triangles from the fabrics. The fabric requirements provide enough fabric for you to cut as many as 252 triangles so that you can mix it up to your liking and play with the placement or make baby a matching pillow with the extras!
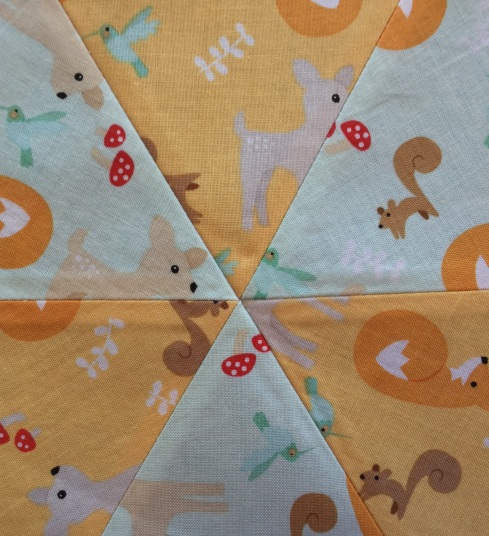
Lay your quilt out in a setting of 18 triangles across by 12 rows down.
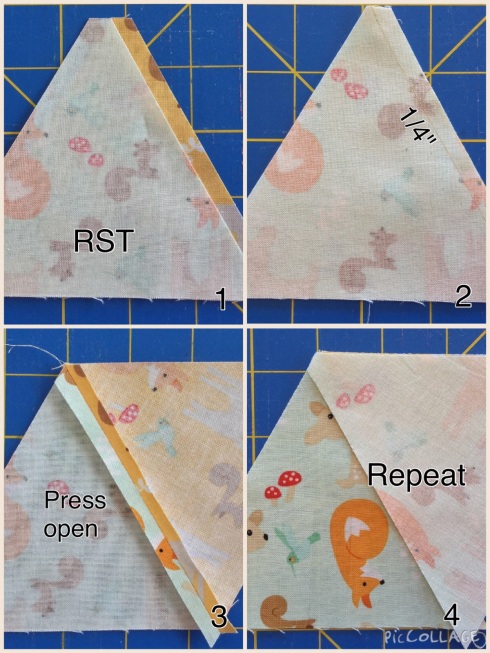
Referring to the photo…
1. Place triangle 1 & 2 of the first row right sides together, matching up the top and all the edges.
2. Sew these together down the side using a 1/4” seam allowance.
3. Press the seam open.
4. Layer triangle 3, right sides together, on top of triangle 2. Sew. Press open. Repeat this process until you have 18 triangles pieced together and 12 rows total.
Join your rows together.
Trim off all of the ‘rabbit ears’ and threads.
Here are a few tips I use to line up the points on the equilateral triangles.
1. Place row 1 & 2 on your ironing surface right sides together.
Match up the triangle points. Insert a pin directly into the back of the triangle point on the top row. This is your ‘push pin’.
2. Now insert that same ‘push pin’ into the bottom row directly into its matching triangle point.
3. Push that pin onto the ironing surface to secure the row at that spot.
4. Place one pin on each side of the ‘push pin’. Remove the ‘push pin’.
Do this for all of the triangle points in each row.
5. Sew a ¼” seam right through the intersecting point. Press your seams open.
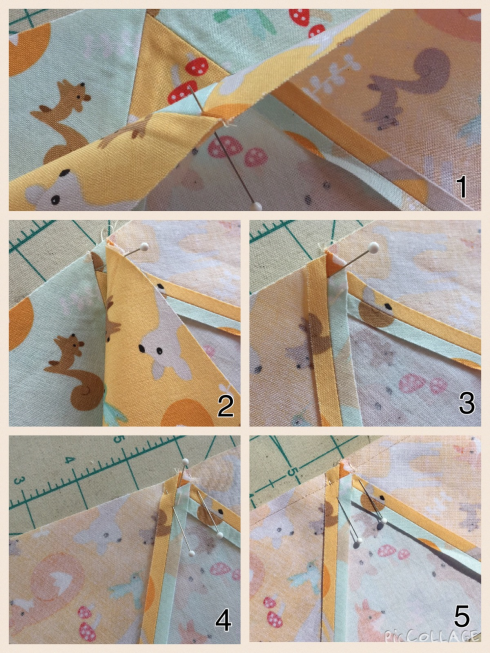
That looks like a pretty good matching point, don’t ya think? Yes! It really is that easy!
Trim the side edges of the quilt top. Make sure to leave a 1/4 “seam allowance from the triangle points on the sides to attach the binding.
Quilt & Bind. I want to give a shout out to my friend Isis, who did the fabulous quilting on the sample!
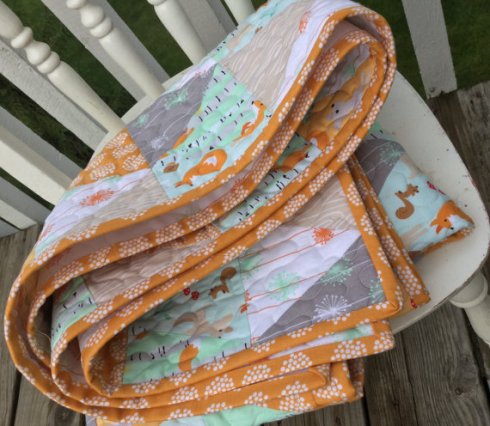
If you’d like the complete kit featured in the post and a free copy of the pattern, it can be found in the Etsy shop. Each kit comes complete with quilt fabrics, binding and backing.


