You are currently browsing the tag archive for the ‘scarf’ tag.

Tag Archive
These scarves are sooo easy, and the best thing…. is that you get to use more of those scraps!
Supplies:
Scrap pieces of fabric
½ yard linen
Thread & basic sewing supplies
Pieces are sewn using ¼” seams.
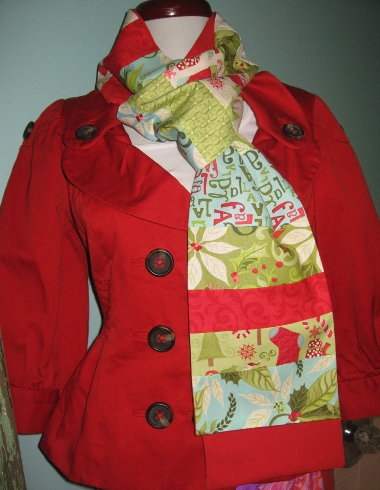
The fun part is gathering your fabrics. I chose Kate Spain’s 12 Days of Christmas fabrics and a red linen background which I bought on sale at Joann’s. I like the linen because it gives the scarf a nice weight to it.

Cut your fabric scraps into 2” to 4-1/2 inch wide x 7” long. The number of pieces you cut will be determined by how long you want your scarf to be. I stopped cutting when my scarf came out to be approx. 87” long.

Cut your linen into (2) 7” strips WOF. Sew them, right sides together on one of the short ends. Press the seam open, set aside.

After you’ve arranged your scrappy pieces to your liking, sew them, right sides together in a row.

Iron all your seams in one direction.

Measure your pieced scarf and cut your linen to that measurement. With right sides together, pin the scarf to the linen. Pin well, all the way around. Linen tends to slide a bit.

Place the pieced side up under your machine. This will help you see and keep all those seams gpoing in one direction. Starting at the beginning of one side and working your way around, sew the scarf to the linen. Leave one end open for turning.

Clip your corners on the sewn end.

Turn your scarf inside out and press. Turn the seams under at the open end. Press and whip stitch closed.

Enjoy your new scarf!
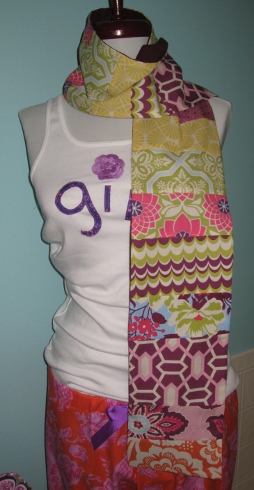
Here’s one I made using Joel Dewberry’s Heirloom line. I used plum linen on the back of it.

I think it’s time to hit the gym. My dress forms shouldn’t look better than I do in my own clothes!