
You are currently browsing the tag archive for the ‘scraps’ tag.

Tag Archive

I’ve used cloth napkins so long, I feel GUILTY when I reach for a paper towel. My Grandma made me some for Christmas about 15 years ago with matching place mats and after I moved away from OKC to Chicago I thought about her every time I used them. So not only are cloth napkins the “green” way to go but I’ve also developed a sort of comfort attachment in some way I guess.. I tucked those napkins and place mats away for safe keeping and I’ve just gotten around to replacing them and I’m going to give you an easy tutorial on how to make some for yourself.
Over the years, I’ve used several methods for making napkins. From one-sided to the fancy ones that are doubled-sided with mitered corners..these are reserved for the holidays,

but today we are just going to make double-sided with a top stitch.

The pic above is from the “I Glimma All Over The Place” blog post about a month ago and those napkins have been tried and tested through many washes and I am here to tell ya that they look and feel like new! So don’t hesitate on going green yourself… let’s get started on your own set!
I used fat quarters for mine but you can use up some of that fabric from your stash by cutting 18 ” squares. You will need 2 per napkin.

Place your (2) 18″ squares right sides together. Pin so it doesn’t shift while sewing.
Using a 1/4″ seam allowance sew all the way around the fabric, leaving a 3-4 inch opening for turning.

Clip the corners, being careful not to cut through the stitches.

Turn right sides out through the opening. I used this handy little thingamajig to poke my corners out nicely. Just make sure you don’t push too hard. You’ll push right through your seams.

Press, making sure to turn in the openings raw edges.

Top stitch close to the edge on all sides to secure the opening. This helps keep the fabric from shifting and will help it lie nicely over time.

And you’re all finished! Now go make a nice meal for your Babe or Sweetie to compliment your pretty napkins!


Make sets for your holiday table..

Or gifties for your friends. They’re sure to be impressed!
One last handmade Friday before Christmas. It flew by so fast. I can’t believe we’re only a few short days away. There may not be time to make these super cute and quick placemats, but you can add them to your list for next year. Or why wait for Christmas. These would be great for any occasion you need a quick gifty. I whipped these up pretty fast and all made from mostly scraps. I even quilted them myself, which if you know me, usually involves some degree of whining. No whining or naughty words. I promise…easy peasy!

This free pattern comes from Elizabeth Hartman from the Oh Fransson! blog. You can find the pattern here.
I rolled them up, tied them with a pretty ribbon and gave them away with a casserole dish.

Here’s a set that my SewMod friend Andrea made up with some of the Bespoken fabrics. Check out her Funky Placemats Flickr page. She’s made several cool ones!

Very nice! Thanks for great idea Andrea. I will definitely be making more.
These scarves are sooo easy, and the best thing…. is that you get to use more of those scraps!
Supplies:
Scrap pieces of fabric
½ yard linen
Thread & basic sewing supplies
Pieces are sewn using ¼” seams.
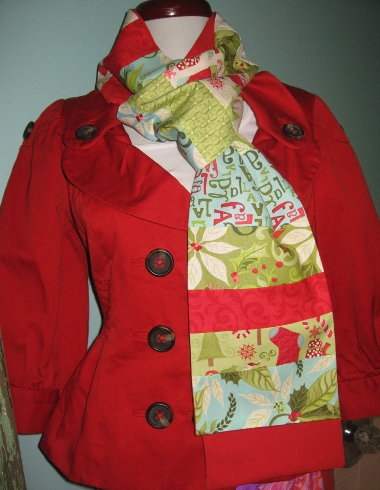
The fun part is gathering your fabrics. I chose Kate Spain’s 12 Days of Christmas fabrics and a red linen background which I bought on sale at Joann’s. I like the linen because it gives the scarf a nice weight to it.

Cut your fabric scraps into 2” to 4-1/2 inch wide x 7” long. The number of pieces you cut will be determined by how long you want your scarf to be. I stopped cutting when my scarf came out to be approx. 87” long.

Cut your linen into (2) 7” strips WOF. Sew them, right sides together on one of the short ends. Press the seam open, set aside.

After you’ve arranged your scrappy pieces to your liking, sew them, right sides together in a row.

Iron all your seams in one direction.

Measure your pieced scarf and cut your linen to that measurement. With right sides together, pin the scarf to the linen. Pin well, all the way around. Linen tends to slide a bit.

Place the pieced side up under your machine. This will help you see and keep all those seams gpoing in one direction. Starting at the beginning of one side and working your way around, sew the scarf to the linen. Leave one end open for turning.

Clip your corners on the sewn end.

Turn your scarf inside out and press. Turn the seams under at the open end. Press and whip stitch closed.

Enjoy your new scarf!
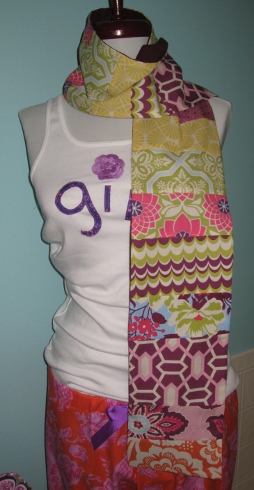
Here’s one I made using Joel Dewberry’s Heirloom line. I used plum linen on the back of it.

I think it’s time to hit the gym. My dress forms shouldn’t look better than I do in my own clothes!
We can’t forget our favorite friends can we? Daisy adds so much joy to my life, I can’t even imagine not including her in the festivities of Christmas.
An easy gift that you can make with your leftover fleece scraps is a doggie rope.
You will need 3 pieces of fleece cut 3″ x 22″ for a smaller dog or 3″ x 40″ for a bigger dog.

Tie a knot in one end.

Begin by braiding the strips, which I’m surprised at how easily I remembered to do this. It had been so long!

After you completed your braid, tie another knot at the end.

Next…play with your pup! Daisy loved it! I made 2. One for her and her BFF!


I also ordered her a doggie toy from a shop in Etsy. Her very own Ipod! Isn’t that just the cutest?

Enjoy your weekend everyone!
If you haven’t noticed by now, my recent projects and Handmade holiday’s have been made using scraps or fabrics from our stash. I didn’t plan it that way. It just must be the mood I’m in. I know everyone out there has a stash they’d like to bust through. Sometimes you just need a little inspiration, right?
Well, Paige was off work for the week of Thanksgiving and we accomplished sooo much! We worked almost everyday from morning till night trying to finish up some Christmas projects, client projects and doing SewMod planning. We busted, dented her stash! We worked on 4 quilts using fabrics she had collected over the years and I gotta say, I’m a little jealous of her stash. A closet full of fresh, modern fabrics. Like I’ve said before, she has a great eye for color and matching fabrics and it shows in these quilts.
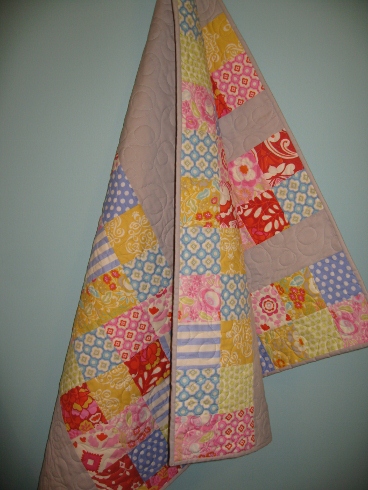
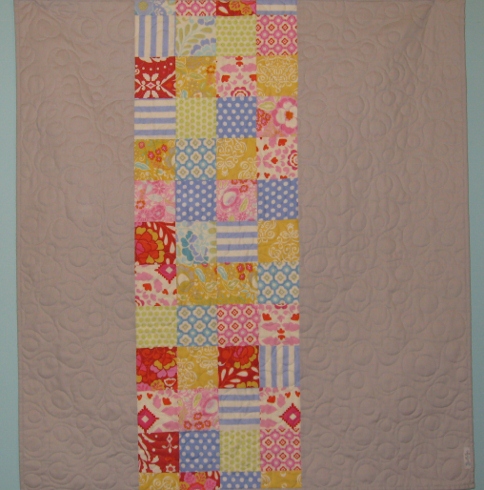
These quilts are easy to assemble using mostly 3-1/2 ” to 4-1/2″ strips pieced together to make a 12-1/2″ block. Alternating the directions of the blocks adds interest. These quilts can be made any size by adding as many blocks as you have fabric for or adding borders. They can be quilted or put some Minky on the back, turn it inside out and tie it off with embroidery floss for a quick gift. We even used the leftovers for the backing.
We named this one, Gypsy Road, and it is backed with a chocolate Minky and tied off. No quilting or binding!


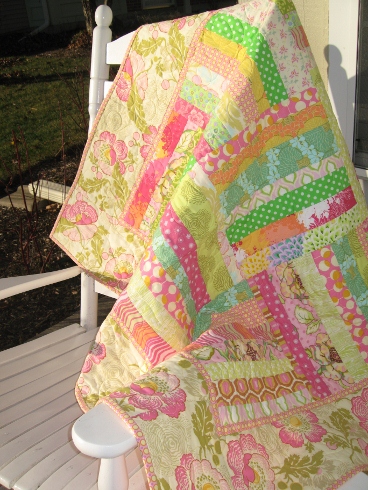
Candy Jar is a quilt for sale now in the Etsy shop. It’s made with a lot of Amy Butler fabric. Paige quilted this one on her longarm and the binding is hand stitched to the back. Very girly!
Urban Garden’s backing and batting was cut the same size as the top, sewed around the edges and turned inside out. It was stitched around the edges and through all the intersecting seams using the decorative wave stitch on your machine.

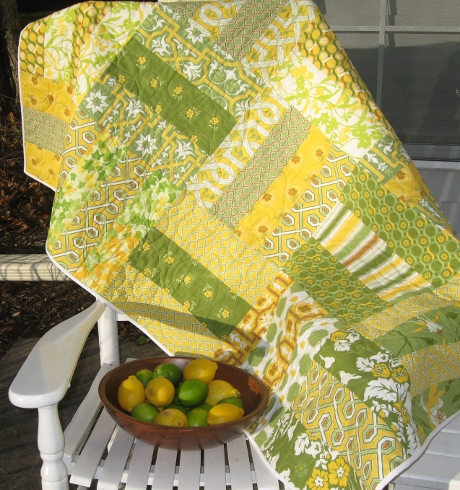
Lemon Grass turned out so fresh. I wasn’t sure about it at first when we started since the greens and yellows were so similar, but it’s one of my favorites now. Paige also longarm quilted this one and it has hand stitched binding.
I loved how easy these were to piece and the different ways to finish them off. So, start pulling out all those coordinating fabrics and get busy! There’s still time!
Looking for an easy Hostess gift to impress your neighbors and friends with at your next Holiday party? How about Christmas Tree Hot Pads! Whip these up in no time, then add your favorite recipe to go along with them.

Finished size: 9″ x 9″ Download the pattern here, or find it in our Tutorials at the top of the page.

This is a great stash project – combine festive fabrics for the trees with contrasting backgrounds and tree trunks. Use easy paper pieced blocks and finish with binding, quilting and simple embroidery.
Add some wooden spoons, mixing bowl, and your favorite cookie recipe with these hot pads for a great gift!

And they even look great as mini quilts for my hutch decorations!

Here’s one of my favorite cookie recipes. I found this in the Gooseberry Patch Christmas Book 9. Sooo yummy!! Enjoy!

Vanilla Dipped Gingersnaps
2-1/2 C. Sugar-divided
1-1/2 C. Oil
2 Eggs
½ C. Molasses
4 C. All-Purpose Flour
4 tsp. Baking Soda
1 TBSP Ground Ginger
2 tsp. Cinnamon
1 tsp. Salt
2 11-oz Pkgs. White Chocolate Chips
¼ C. Shortening
Combine 2 cups sugar and oil in a mixing bowl; mix well. Add eggs, one at a time, beating well after each addition. Stir in molasses.
Combine flour, baking soda, ginger, cinnamon and salt in a separate bowl; gradually blend into molasses mixture. Shape dough into 1” balls and roll in remaining sugar; place 2” apart on ungreased cookie sheets. Bake at 350 degrees for 15-20 minutes or until cookie springs back when lightly touched. Remove to wire racks to cool.
Melt white chocolate chips and shortening together in a small saucepan over low heat, stirring until smooth. Dip each cookie halfway into mixture; allow excess to drip off. Place cookies on wax paper to harden. Makes about 7 dozen.
Paige and I were commissioned to do a Christmas gift for Kylee, the 8 year old daughter of Paige’s friend. Her mom wanted a quilt for Kylee that she could grow with and have as a keepsake when she got older. Something girly, with peace signs.

We used a Moda Bake Shop recipe found here called I’m Blushing by Natalia Bonner. Check out Natalia’s blog if you haven’t been by. She does awesome quilting and some pretty cute patterns too! Lot’s to drool over:)
Since Kylee wanted peace signs added to the quilt, we changed the pattern up a bit by replacing the circle flowers with giant daisies. We added peace fabric to the centers. Paige quilted in an all-over playful loop with some special attention around the daisies.

We added all the leftover fabric to the back. The backing turned out just as cute as the top!

Merry Christmas Kylee! We hope you love your new quilt!
I knew when I was cutting all my scraps into useable pieces that one day I would be glad I did all of that work. That day came when I decided to make The Color Book.

It takes 2-1/2″ squares for the pages, which is exactly what some of my smaller scraps were cut into, so you can imagine how easy it was to get this project going. I think I spent the most time on deciding which 2-1/2″ square to use.

Batting scraps in between the pages make it soft and flexible for baby. A little hand stitching and a pieced log cabin cover to finish it up and you have a handmade, unique gift for baby’s Christmas.

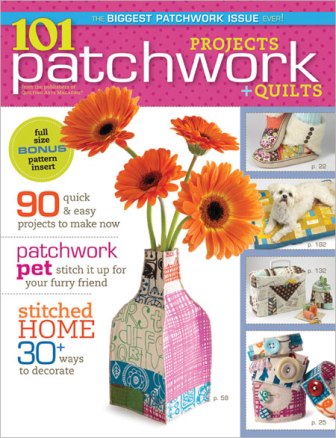
This is one of the many fun and inspiring projects that come from 101 Projects Patchwork & Quilts magazine, which is available at your local craft or bookstore. You won’t be disappointed in this girls! It’s often rare you find a magazine that has more than a couple of ideas you might make in it, but this one is loaded with them! And if you notice by the front cover, there are lot’s of opportunities to use your scraps!
A quilt I worked on during our SewMod sewing day was this quilt called Taza Baby. I cut all my Taza scraps into 4″ squares and sewed them together. The Kona Ash gray arrived in the store last week and was the perfect addition to calm this quilt and allow your eyes to rest.
Get your scraps out and use them, play with them. This quilt was on my design wall for a about a week before I finally realized it needed the gray. I knew it was missing something. I’m glad I didn’t give up. It turned out great! Paige did an all-over playful loop with the quilting. It doesn’t need anything more than that and this quilting can easily be done on your machine as well.

I even used the rest of the scraps on the backing.
Now, all baby has to do is pick which side she likes best!
About a week ago, a couple of the SewMod girls came over for lunch and a sewing day. We worked on a few projects including these cute bags from Terry Atkinson’s pattern Zippy Strippy.

Love this pattern! It has 3 bag sizes and best of all, you get to use more scraps! Since the strips are only 2-1/2″ x 6-1/2″, I can even use some of those jelly roll pieces I have left over. And don’t be scared of the zipper girls. It’s super easy to put in. Terry Atkinson has her own line of zippers and can usually be found at your local quilt store in an impressive variety of colors.
I made mine using my scraps from the line Ginger Blossom by Sandi Henderson.

Andrea made her’s from fabrics with dress forms on it and added a gray flange to finish it off. I don’t know how I ever missed this fabric in the quilt shop…cute!

And this is one that Shelley had made Andrea last year for her birthday. Pretty fall colors and she went the extra step to quilt it.

Several of these bags could easily be completed within a day. So these would make great gifts for a sewing group, fill them up for a beginner quilter with all your favorite notions or a travel bag for the teen on your list. Make the small one for your co-worker to toss in her purse. Use one to tote around your latest hand project.
Rummage through that giant pile of scraps and make a day of it!


