
You are currently browsing the tag archive for the ‘wonky wildflowers’ tag.

Tag Archive
It feels sooo good to mark something off the list as finished. There was a whole lotta that going on around here this week! Three to be precise.
BackYard Baby Quilted, bound & kitted.

I kitted these for our upcoming show in the sand pails with a shovel. After all it is called BackYard Baby. So cute! Hopefully it will draw some attention into the booth.

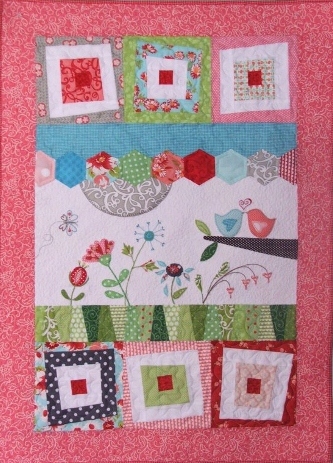
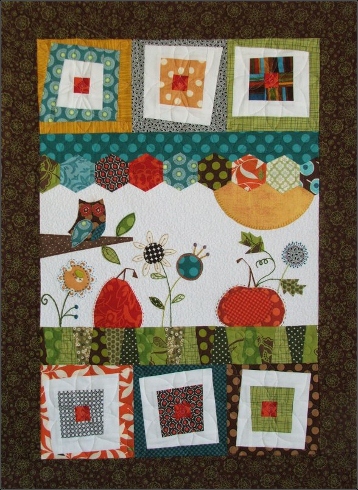
Wonky WildFlowers Borders on, quilted and bound. Super cute!

Paige meandered the center around the embroidery work to make it pop out.

And I did a little wonkiness in the log cabins.

Spring Dresden Table Runner
We made this with the new fabric line Lush by Patty Young using our pattern, North Garden Dresden Table Runner.
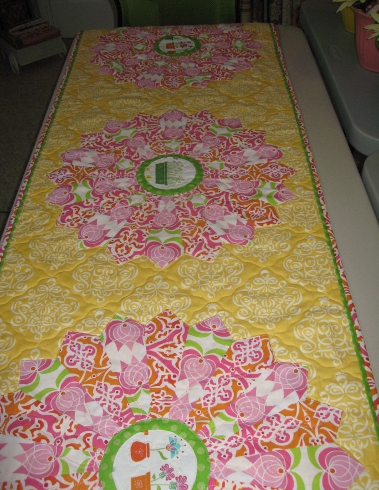
A pretty, butter yellow background with bright creamsicle & pink dresdens.

We fussy cut the Flower Shop fabric for the dresden centers.

Bright and cheery! The perfect project during winter while wishing for spring. And I kitted these inside flower pots and added a cute yellow daisy.

These kits should be available at Etsy and SewModDesigns soon.
Now, on to cutting out my next project. Talk to ya tomorrow:)
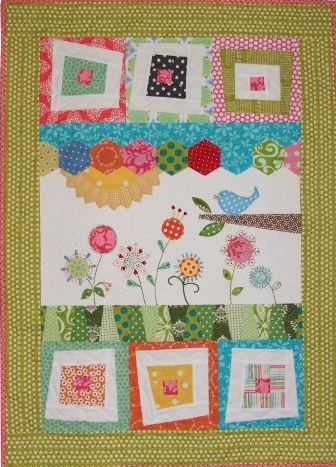
I made another weekend finish, Wonky Wildflowers. Have you ever seen anything soo dang cute!


I really enjoyed doing this. This pattern has many techniques in it that kept me interested. Embroidery of course, applique, both hand and machine, making the hexagons, and using the easy dresden to make all the wedges for the grass and the sun. The one thing I had never done was make the wonky log cabins. I saved them for last and as you can tell by this middle blue and pink one, my first attempt was a little not so wonky.

It’s more difficult than you think to make something not straight! I did let go and not be so uptight when it came to whacking off my edges and finally got the hang of it. But I did notice when I was finished that all my blocks tend to only wonk to one side:)
The only thing left to finish this up is the border. I spent all day Sunday hem hawing over which fabric to use. If you know me, that can be tedious. It has to be right or forget it. After all, I spent all that time and love making it. I’m not going to settle. I did really want to use something from my stash. I had one tiny scrap piece of fabric from the Favorites collection by Me And My Sister and it had to be that.

I had to order it. So I should be able to complete this adorable little wall hanging this week. Then of course the dreaded quilting..ugh! Let the whining begin:)
Can’t wait to show off the finished piece. That will be my motivation!
Next Wonky is…Wonky Winter.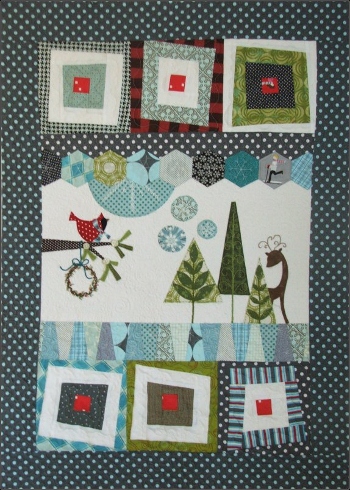
The SewMod group is going to tackle this as a sew-in project hopefully in March. This will be exciting to see all the different versions from our talented group. I already have an idea for mine!
The Wonky Wildflowers sample has been on my list of to-do’s so yesterday I got myself in the mood to make it happen.
I dragged out my 2 tubs of scraps, convinced I could make this entire quilt from what I already had. Scraps need homes too!

First up was to make the hexagon strip that separates the sun from the sky. Now, I’ve done many, many hexies so, I thought I’d give you a little how-to.There are lots of different ways to do these. Some with glue sticks, some with plastic templates and so on, but I’m going to just give you the way I prefer best after trying some of the other methods over the years.
1.) Trace the template provided on a sheet of regular copier paper.

Mine called for a 1-1/4″ hexie. The way to measure a hexagon is from point to point along one side as shown.

2.) After you’ve cut the paper templates out, gather your fabrics and cut at least a 1/4″ around on all sides of the template for easy turning. Use a small pin to secure the paper to the fabric.

3.) Either finger press or if it makes you feel more comfortable until you get the hang of it, iron down all the sides. Once you’ve mastered the hexies you’ll no longer need to iron.

4.) Thread your needle and make a small knot. Starting on one of the points work your way in and out around the hexagon and through the paper.

5.) It’s as easy as that! Hexagons are a great project to pre-cut, stash in a small bag and take with you while your waiting for the kids or to take on a trip!

6.) To attach the hexagons, layer right sides together and whip stitch, grabbing just enough fabric to keep them together, but not going through the paper this time.

Tiny whip stitches make all the difference to make sure your stitching is barely visible from the front. Practice, practice:)
7.) Once your hexagons are attached to one another, clip the threads and release the paper. Iron back into shape.

And here’s the progress I’ve made so far. Hopefully this weekend I’ll have the embroidery done and on my way to another finish!

Have a great weekend everyone!
New SewMod Stacks! Everyone really seems to like the stacks, so I got busy yesterday building this one. Besides, what else was I going to do now that our weather went from nice to naughty, 55 degrees one minute and snowing all day the next…bummer. I really didn’t think we’d make it through a January without snow did I?
I was in a blue and plum mood yesterday:) A little mix of Secret Garden, Artful Home and Joel Dewberry.

This 1/2 yard bundle of 7 is available in the Etsy shop & SewModDesigns.com. 15% off regular prices, $31.26, $26.57.
New patterns arrived in the shop too! A super cute Wonky series from Pine Mountain Quilts. Boy, do I have plans for these.
Wonky Love. Isn’t that cute! Perfect for the upcoming holiday…Valentine’s Day.
 Wonky Wildflowers

Wonky Fall
Wonky Winter.

Each $9.00 and they are small enough to finish up in no time, 23″x32″.
A new featured product this week is L’Amour De La Vie White Bicycles by Timeless Treasures.
Bicycle Love.
On sale 1/13/12-1/19/12 for $7.25. Patterns and fabric available at Etsy & SewModDesigns.
Have a great weekend everyone:)


