
You are currently browsing the tag archive for the ‘crabapple hill’ tag.

Tag Archive

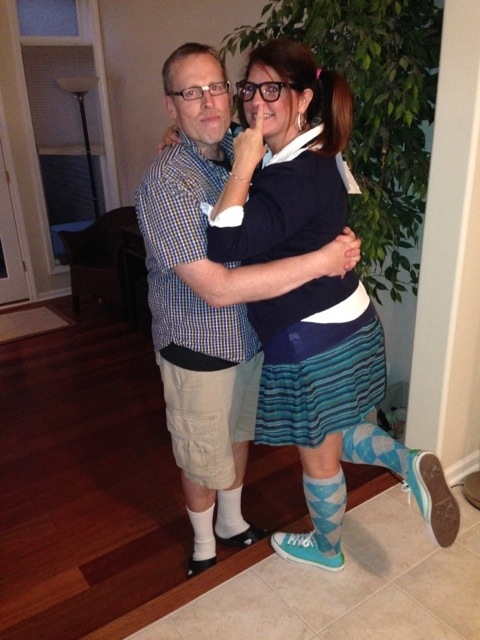
Have you carved your pumpkins, dressed in your costume and ate too much candy already? Ya, me too! Last weekend we had a small get together, ate, drank, and watched scary movies.
I was a nerd, which really didn’t require too much of a wardrobe change. Although I hope you guys don’t think I run around with my finger up my nose all the time.
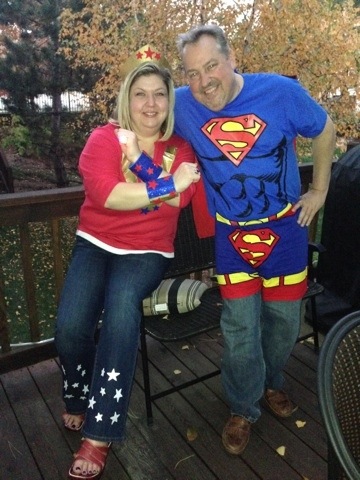
Paige was Wonder Woman and she came in her invisible jet! What,…I’m serious;)
And Daisy was a princess in a tutu!

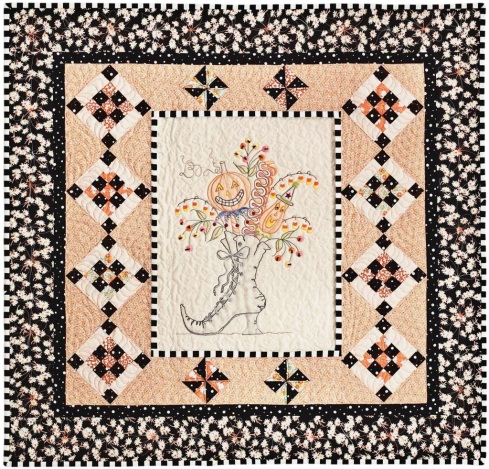
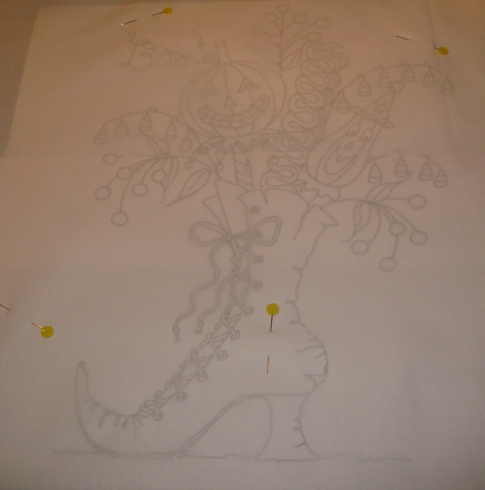
I finally finished that Which Witch’s Boot embroidery that I started quite some time ago for Paige. I think it turned out really well.
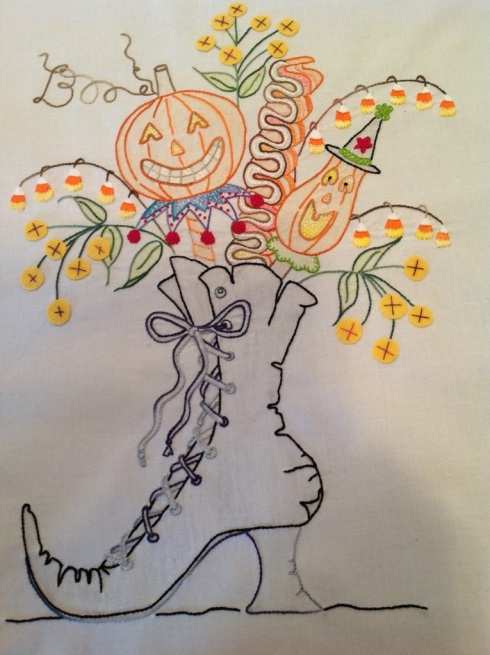
I do wish I’d been more heavy handed on the crayon technique. Live and learn. Next time I’ll try not to be so careful on the coloring. I found this image on Pinterest and I like how dark the boot turned out. It looks so real!
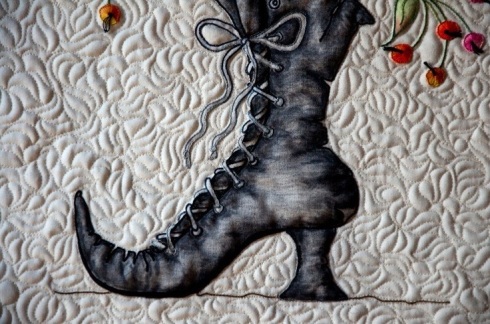
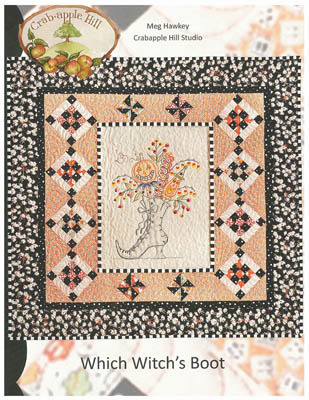
It’s in Paige’s hands now and she gets to choose the colors and quilting. I pulled a couple pics from the Internet for ideas to help with her decision. This is from the original pattern by Crabapple Hill.
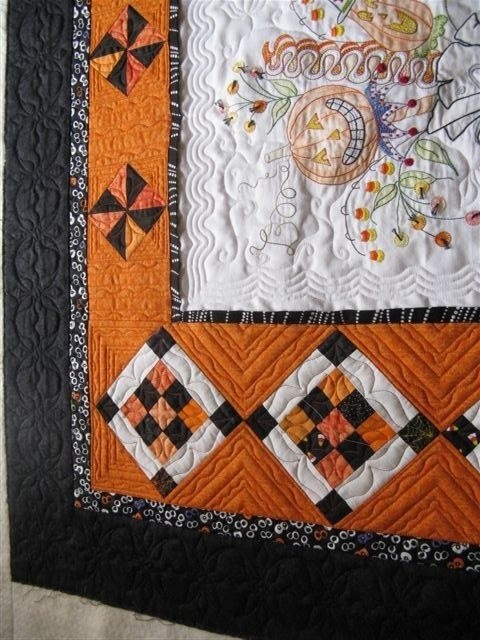
And here’s some pretty cool quilting done on this one..
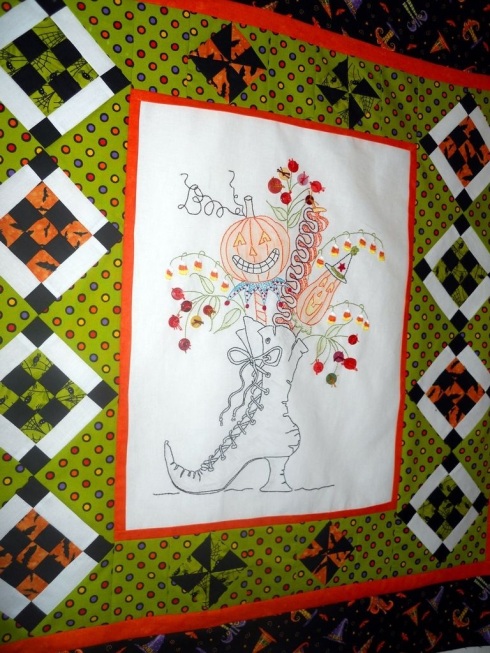
But this color combo is my fave! I love the green!
Have a safe & Happy Halloween everyone! No tricks…just treats!
Do you yearn to pull out those Crayons and relive your grade school days? Well we can! Tinted embroidery is a great way to spruce up those open spaces in a project and add a little color without all the work of filling in spaces with filler stitches like satin stitching.
So go grab your supplies and let’s get started!
Crayons
Embroidery pattern
Pencil or brown .01 Pigma Pen
Pins
Iron
White paper towels
Floss
I’m working on Crabapple Hill’s Which Witch’s Boot.
1) Pin your pattern to your fabric.
2) Using a light box, transfer your pattern using a #2 pencil or Pigma pen. Remove pins and pattern.

3) Using a white Crayon, color heavily the areas that will be tinted with color. If your fabric is pulling, try taping your fabric down.

4) Tint the areas with the Crayons. Use light strokes. Remember we are tinting, not coloring. I’ve made this mistake a couple of times. I have a heavy hand. If you’re not following pattern instructions and choosing your own colors, always start tinting with lighter colors first. For example, my leaves are tinted green. Light green first, shaded with a darker green and tinted at the tips with a bit of red.
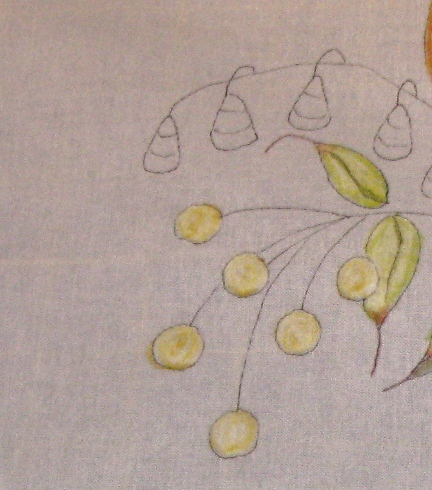

**tip** Check your work carefully. If you find flakes of the Crayon on the fabric, blow them off. You don’t want them to stick to the fabric. Another of my mistakes. I ended up with bits of orange on my gray boot. According to Crabapple Hill, if you need to remove any coloring mistakes, do so before you iron. Heat setting it makes it permanent! Remove mistakes by mixing a paste of baking soda and water. Dip a Q-Tip in the paste and rub the area until the color disappears. Rinse that area with cool water and air dry. Re-color and proceed to step 4.
4) Place your tinted embroidery face up on ironing surface. Cover your tinted areas with white paper towels and press well with a hot iron.

Check the paper towels for crayon residue or bleeding. If there is some, then repeat step 4 with new paper towels until there is no sign of Crayon on the towels.
Now it’s time to start stitching!

I’m a lucky girl! I sent my mom the supplies to make this envelope by CrabApple Hill, which I had every intention of making at some point in my life. I guess I got tired on waiting on me and she’s so darned good at it. I love wool items but I just can’t bring myself to enjoy Thank goodness she picks up my slack and completes them for me!
I don’t know how else to describe it but beautiful!

Lots of embroidery and beading on it. Intricate work between all of the cutting, attaching rick rack, and buttons.

It’s pretty big. It measures 9″ x 15″ and holds everything you’d need for a trip, which is perfect for me! A place for scissors, a pen, needles. It has an envelope inside for a small notepad or your flosses. It even has a pincushion.

A this is so clever…the needle case is detachable for smaller projects.

And mom, if you’re wondering what I’ll be sending home next for you to work on, I’ve already got something picked out! I just can’t help myself.
The tree is down, decorations put away and the house is spotless. Time to focus and reorganize. I’m telling myself…stay on track.
Do you know how hard that is when the weather for Chicago this January has been amazing! Walks without snow boots and sitting outside on the patio. I actually saw my neighbors sitting around a fire pit a couple of evenings ago!
So please forgive me for my lack of postings. I’ve been preoccupied with chirping birds and long walks:)
I have been working on this years list of projects. Although, I have to admit that I didn’t finish one thing on 2011’s list, so I’m going to keep it simple this year.
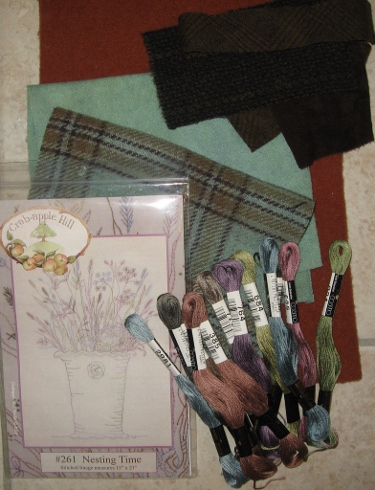
One of last years projects has been moved to 2012. CrabApple Hill’s pattern, Nesting Time. I’m determined on this one!
I want to make a Kaffe quilt. I’m thinking a scrappy Carpenters Star would be fun.

And last, get a jump start on all those handmade Christmas gifts this year. I’ve already got some ideas!
My work list is much, much longer!
Did you make your list yet? We would love to know what you’ve got planned for 2012.
Doesn’t that title make you smile:) It’s a new embroidery book I found one day while shopping at Joann’s with Paige. I can’t tell you how thrilled and excited I get when I stumble upon new embroidery designs. And this one has stitches in it that I’ve never tried before! Yay!!!

It’s Japanese dimensional embroidery.
If you ever come across Japanese craft and embroidery books, don’t hesitate to pick one up. Most are written in Japanese but a seasoned quilter/embroiderer can figure it out. It’s even worth it if you want to just look at the pictures. They do amazing handwork!
Have you tried the Cosmo Floss from Japan? There is none better. The good ole stand by, DMC, doesn’t even compare. If I had a local dealer of these, I’m afraid I’d be broke. It’s like candy. All the colors we’re used to but it doesn’t knot, it slides through the fabric like butter, and lays flat. This floss is about $1.00-$1.20, but well worth it. It’s available at the Stockroom on Etsy.

Cottage Garden Threads from Australia. I bought these from her Etsy shop. I had been stalking this floss for a while now, and figured, why not? I might have a disorder though. I’m not sure if I’ll actually be able to use these. They are just too pretty to cut into and it would have to be a seriously special project! They’re sooo soft. Yes, I’m petting them right now:)

Remember my post on this cuteness? My life Embroidered.

I found its sister on Etsy, and it’s on it’s way to my home! It translates to My True Nature. These french embroidery books are adorable and I can’t wait to make something supercute from this one too.
Let’s not forget the USA on our trip. Crabapple Hill is my favorite embroidery designer. I must have this latest piece. Dresden Poinsettias!

And last, here are my latest embroidery purchases from the quilt store. A quilt pattern from This and That Pattern Company called “simple Things” and a redwork called “Winter Twitterings” by Pearl Louise Krush.

Time to get to work. I need more than 2 hands or 24 hours in a day to get all this hand work done!


