
You are currently browsing the tag archive for the ‘scrap quilt’ tag.

Tag Archive
I have to say I’m pretty proud of myself for keeping up with this commitment. Last month, although, was quite the challenge to get everything finished on time.
Our task was Scrappy Stars, the color orange and incorporate this ‘not so me‘ fabric in somewhere.

Well the fabric is not so much the problem but keeping the stars small was a bit of an issue. Since the majority of my quilt is bitty sized, I didn’t want to add a 6″ star around it. I’m trying to keep with a theme here ya know! And, I didn’t want anything that would come across as ‘chunky’ like a sawtooth star. So I searched the Internet and found that Quiltmaker has a feature they did on bitty blocks and thank gawd that one of them was a friendship star. It’s perfect for scrappy and it’s only 3″ finished!! Woo hoo win!!
My stars look like they’re twinkling around the border. I love it! I’ve only used two whites in this quilt, a ‘less than bright‘ white tone on tone dot from LakeHouse Fabrics which I hoard and only use on special projects, and a white and aqua dot from Riley Blake. I figured the two different whites would give it a more scrappy and vintage feel. I think that’s working for me…


Wondering where the ‘challenge’ fabric is? Can you find it? It blends in so well. That’s one of the advantages of starting with your medallion in a variety of colors. You don’t end up boxing yourself into one color combo and it’s less stressful when the next color task is picked because you know it can be incorporated into your quilt somewhere.

Scrappy Star✔️
Orange✔️
Challenge fabric ✔️
The next task chosen for us this past Sunday at our guild meeting is hand applique and/or crosses and the color peach and/or yellow. Yes. You heard that right…we get to choose one or both tasks & colors. Hmmm…the possibilities.
Maybe a Cross variation with a picket fence like the one from this Shabby Fabrics block.
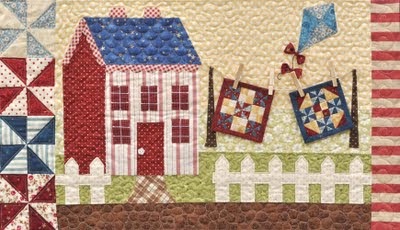
Or I could just skip the Cross block altogether and hand applique all of the hexies I’ve been working on for this quilt. Either way I’m guessing it’s the same amount of time for each. Any suggestions?

I’d better get a move on it. I still have to finish the embroidered corners and my last border before our next meeting on June 12th to be eligible to stay in the running.
This will be our last task for this challenge and then it will be time to get this baby quilted and bound for a quilt show. Wish me luck this month!
My quilt now measures 36″.
You can find the previous border tasks here…
Border task 1
Border task 2
Border task 3
Border task 4
If you haven’t noticed by now, my recent projects and Handmade holiday’s have been made using scraps or fabrics from our stash. I didn’t plan it that way. It just must be the mood I’m in. I know everyone out there has a stash they’d like to bust through. Sometimes you just need a little inspiration, right?
Well, Paige was off work for the week of Thanksgiving and we accomplished sooo much! We worked almost everyday from morning till night trying to finish up some Christmas projects, client projects and doing SewMod planning. We busted, dented her stash! We worked on 4 quilts using fabrics she had collected over the years and I gotta say, I’m a little jealous of her stash. A closet full of fresh, modern fabrics. Like I’ve said before, she has a great eye for color and matching fabrics and it shows in these quilts.
These quilts are easy to assemble using mostly 3-1/2 ” to 4-1/2″ strips pieced together to make a 12-1/2″ block. Alternating the directions of the blocks adds interest. These quilts can be made any size by adding as many blocks as you have fabric for or adding borders. They can be quilted or put some Minky on the back, turn it inside out and tie it off with embroidery floss for a quick gift. We even used the leftovers for the backing.
We named this one, Gypsy Road, and it is backed with a chocolate Minky and tied off. No quilting or binding!


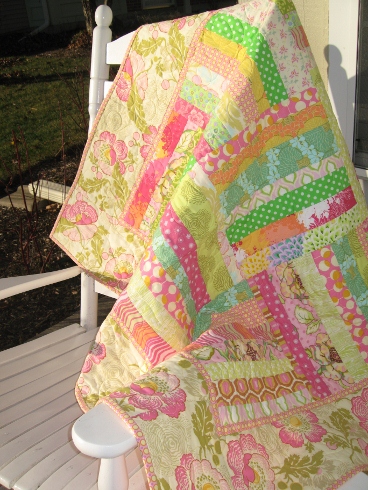
Candy Jar is a quilt for sale now in the Etsy shop. It’s made with a lot of Amy Butler fabric. Paige quilted this one on her longarm and the binding is hand stitched to the back. Very girly!
Urban Garden’s backing and batting was cut the same size as the top, sewed around the edges and turned inside out. It was stitched around the edges and through all the intersecting seams using the decorative wave stitch on your machine.

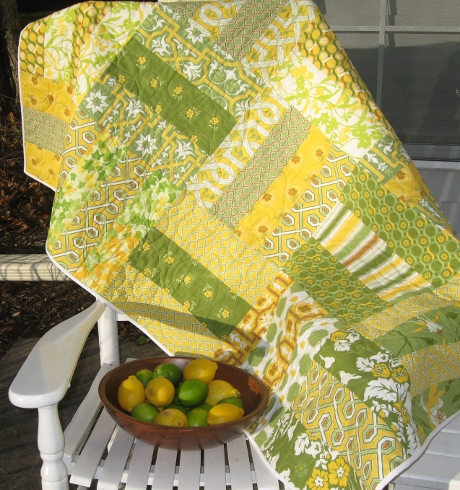
Lemon Grass turned out so fresh. I wasn’t sure about it at first when we started since the greens and yellows were so similar, but it’s one of my favorites now. Paige also longarm quilted this one and it has hand stitched binding.
I loved how easy these were to piece and the different ways to finish them off. So, start pulling out all those coordinating fabrics and get busy! There’s still time!
A quilt I worked on during our SewMod sewing day was this quilt called Taza Baby. I cut all my Taza scraps into 4″ squares and sewed them together. The Kona Ash gray arrived in the store last week and was the perfect addition to calm this quilt and allow your eyes to rest.
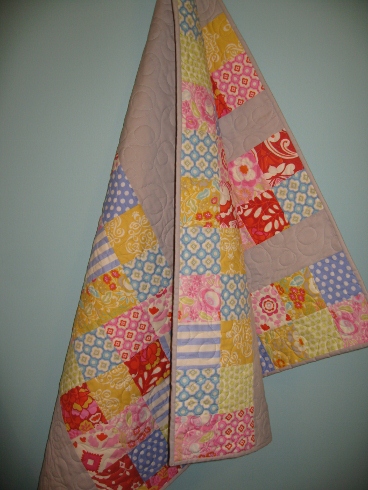
Get your scraps out and use them, play with them. This quilt was on my design wall for a about a week before I finally realized it needed the gray. I knew it was missing something. I’m glad I didn’t give up. It turned out great! Paige did an all-over playful loop with the quilting. It doesn’t need anything more than that and this quilting can easily be done on your machine as well.

I even used the rest of the scraps on the backing.
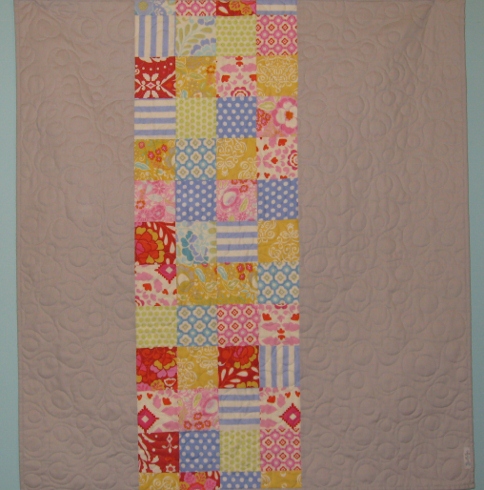
Now, all baby has to do is pick which side she likes best!
I went from this………
To this……….
I cut all my scraps into usable sizes, 5″ and 2-1/2″ squares. I decided on this because I seem to use these the most and these sizes will still allow me to use these as applique scraps.
I thought a lot about this and knew I would have a considerable amount of waste. But what’s even more wasteful is the fact that I’d collected all these scraps and wouldn’t even open the bin because it was so unorganized and overflowing. It was too overwhelming to go through. At least now I can see what I have.
I bought a container at Joann’s but ideally I want to make a trip to the Container Store for a better one because I think I would prefer to not only have the squares organized by size but also color. If I need a red square for applique, I would know exactly where it is. But this will have to do for now.
Someone told me once to save all of my extra bindings and if I was to ever make a scrap quilt, I could just sew them all together. You wouldn’t believe how many strips of those I had.
And if there is any doubt that a scrap quilt can be amazingly awesome, just check out the one my mom made from her scraps a few years ago.


