

Crayon Tinted Embroidery Tutorial
Do you yearn to pull out those Crayons and relive your grade school days? Well we can! Tinted embroidery is a great way to spruce up those open spaces in a project and add a little color without all the work of filling in spaces with filler stitches like satin stitching.
So go grab your supplies and let’s get started!
Crayons
Embroidery pattern
Pencil or brown .01 Pigma Pen
Pins
Iron
White paper towels
Floss
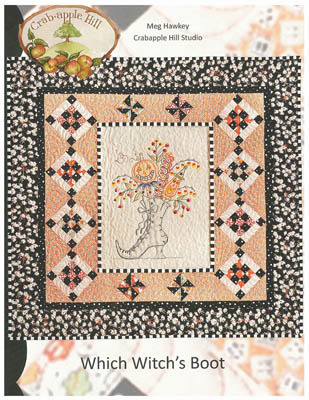
I’m working on Crabapple Hill’s Which Witch’s Boot.
1) Pin your pattern to your fabric.
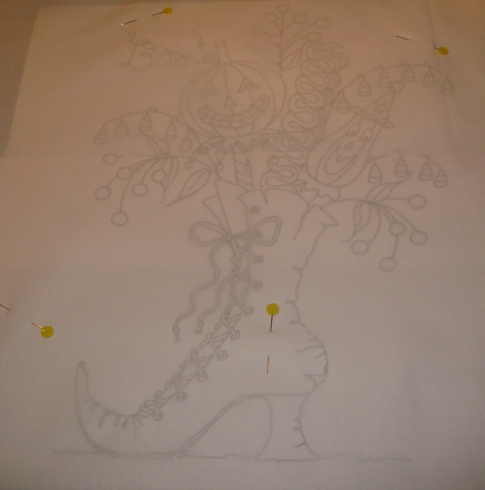
2) Using a light box, transfer your pattern using a #2 pencil or Pigma pen. Remove pins and pattern.

3) Using a white Crayon, color heavily the areas that will be tinted with color. If your fabric is pulling, try taping your fabric down.

4) Tint the areas with the Crayons. Use light strokes. Remember we are tinting, not coloring. I’ve made this mistake a couple of times. I have a heavy hand. If you’re not following pattern instructions and choosing your own colors, always start tinting with lighter colors first. For example, my leaves are tinted green. Light green first, shaded with a darker green and tinted at the tips with a bit of red.
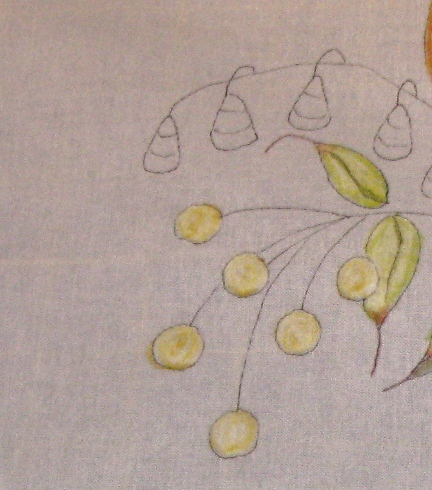

**tip** Check your work carefully. If you find flakes of the Crayon on the fabric, blow them off. You don’t want them to stick to the fabric. Another of my mistakes. I ended up with bits of orange on my gray boot. According to Crabapple Hill, if you need to remove any coloring mistakes, do so before you iron. Heat setting it makes it permanent! Remove mistakes by mixing a paste of baking soda and water. Dip a Q-Tip in the paste and rub the area until the color disappears. Rinse that area with cool water and air dry. Re-color and proceed to step 4.
4) Place your tinted embroidery face up on ironing surface. Cover your tinted areas with white paper towels and press well with a hot iron.

Check the paper towels for crayon residue or bleeding. If there is some, then repeat step 4 with new paper towels until there is no sign of Crayon on the towels.
Now it’s time to start stitching!


26 comments
Comments feed for this article
February 27, 2012 at 8:12 am
deloreswall
Lorrie,
Thank you for this wonderful tutorial. Makes me want to go and get the crayons out right now.LOL
February 27, 2012 at 2:14 pm
Lorrie
Your welcome Dee! I’m glad you enjoyed it:)
February 27, 2012 at 5:52 pm
uniquebabyquilts
Thanks for the tutorial. I enjoy learning new and different quilting ideas.
March 1, 2012 at 1:30 am
Celtic Thistle
Thanks for the tutorial I have been wondering how to do this since I saw it mentioned in a magazine. Now I know!
April 20, 2012 at 6:58 am
jimsgimlet
I’m going to try this as soon as I finish the hexagon quilt I’m working on now. I made a quilt using iron on transfer pattern and ball tip paints and it turned out pretty good. I have lots of the iron on patterns as your project will be a great idea for me. Thanks for sharing
July 26, 2012 at 1:46 am
Kavitha
Thanks for the nice tutorial…
June 14, 2013 at 8:53 am
Coloring in the lines – crayons & embroidery | Carmen Aida Creates
[…] /2012/02/27/crayon-tinted-embroidery-tutorial/ […]
August 27, 2013 at 4:30 pm
Jessuca
Do you know if it is washable after finishing?
August 30, 2013 at 5:29 pm
Lorrie
Yes. I believe the piece if necessary could be hand washed gently in cold water with mild detergent.
September 5, 2013 at 11:39 pm
Cathy
Good work! I have the lures to do. I like to use a Frixon pen ( removes with heat ) for tracing – guess it won’t work here!
March 2, 2014 at 4:34 pm
Crayon and Embroidery BOM Month 1 | quirksandquilts.com
[…] Sew Mod crayon embroidery and Urban Threads Crayon Tinting […]
May 30, 2015 at 2:57 pm
meggiecat
Your warnings make this a clear tutorial. Thanks for the hard work!
May 30, 2015 at 3:26 pm
Lorrie
You’re very welcome! I always hope my mistakes can benefit someone else. I ended up making three of these because I didn’t think the first two were good enough.. Oh boy, but it was definetly worth it because the end result came out fabulous! Good luck with your project!
June 3, 2015 at 11:41 am
Elaine Stueven
I am so excited to start my first crayon project. Thanks for all the tips.
June 3, 2015 at 11:54 am
Lorrie
Hi Elaine! I’m so glad you found us and I hope your project is a fun success. If you run into any questions, I’m happy to help.
Lorrie
July 2, 2015 at 11:44 pm
Katie
Where can I get just the pattern for this. My mom loved it and I would love to make this one for her but in embroidery. Thanks
July 3, 2015 at 7:11 am
Lorrie
Hi Katie
I am currently out of stock for this pattern but if you visit the Crabapple Hill Studio, she sells it directly, and you can purchase it there.
http://www.crabapplehillstudio.com/which-witch-s-boot.html
Thanks so much!
Lorrie
August 31, 2015 at 1:12 pm
Melaine Clark
Thank you for this great tutorial! Can you please tell me how many strands of Cosmo embroidery floss you used? I started my stitches and 2 looks so thin. Do you have a embroidery tutorial 😊. You are a great help for us beginners!
Thank you so much!
Mel
August 31, 2015 at 1:14 pm
Lorrie
Hi Melanie
I’m so glad you stopped by and are using the tutorial! I used 2 strands of floss, although I’m a huge believer in making things ‘our own’ and if you want to use three, I’d certainly suggest following your creative instincts! I typically use most patterns as a guide and often change colors, thread, and floss recommendations to suit my taste.
As of now, I haven’t gotten around to demo any embroidery techniques on the blog but I know there are some good ones on YouTube.
Good luck with your boot!
Lorrie
January 6, 2017 at 8:42 am
Bonnie
If I want to do this on a tea towels that will be washed a lot is there a better pen/crayon to use so the color stays on? Lovely technique!
January 9, 2017 at 1:29 pm
Lorrie
Hi Bonnie
Thanks so much for stopping by. I have used his technique for tea towels and just like anything washed repeatedly, it will fade to some degree. I haven’t heard of a better crayon that won’t.
I hope this helps,
Lorrie
January 10, 2017 at 6:28 am
Patricia Landriault
I tried using baking soda found it left a mark. It is still on pattern . My mistake .
Used the putty worked much better.
January 10, 2017 at 8:42 am
Bonnie
I don’t understand the baking soda / putty comment above. What does the putty do?
October 15, 2017 at 11:45 am
sewcraftyme
Reblogged this on Sewcraftyme’s Weblog and commented:
I’ve been doing this for years, my Grandma Viola taught me this technique using crayons and a brown paper bag. I use a lot of line art machine embroidery patterns and make coloring books out of them using stabilizer and give them as gifts. You’ll find your own favorite way. The main thing to remember is “HAVE FUN” and there is no wrong way if it works and you enjoy it. Ila in Maine
November 26, 2017 at 2:12 pm
Shehla Tanveer
Brilliantly explained …..specially where you point out your mistakes is what I found very helpful.
And beautiful work!
Thanks a million!
November 30, 2017 at 7:57 am
Lorrie
Thanks so much Shehla! I hope you give it a try. It really is fun!
Lorrie