UPDATE: 12/30/2016 All MineCraft kits are currently sold out!

Looking for a quick birthday or Christmas present for your little gamer this year? If your kids and adults..you know who you are…have been hit by the MineCraft craze, then I know they’d be super excited to have this throw to snuggle up with on the couch. It also makes perfect decor for their bedroom or game room.

I’ve made a lot of MineCraft quilts! And I’ve had a few questions on size and cutting, so I thought I’d share with you how easy this is to make! A great beginner project from start to finish.

MineCraft Creeper Quilt

Supplies:
1 Half Yard Black
5 Half Yards Assorted Kona Greens in Honeydew, Basil, Grass, Tarragon & Chartreuse
Binding: scrappy or 1/2 yard, cut into 2-1/2″ strips
Backing 2-2/3 yards for machine quilting.
Batting 48″ x 57″

Quilt measures approx. 45″ x 54″

With a 10 x 12 setting, you will need (120) 5″ (charm) squares…
20 black & 100 green. I used a variety of Kona Cottons in green to create the pixel effect.


1/2 yard = 24 charm squares
Minecraft needs (5)-1/2 yards for variety

Cut each half yard into 3 strips of 5″ WOF.

You will have a little strip left over after cutting the (3) 5″ strips. Save those for your scrappy binding.

Trim the selvedge from your 5″ strips.

Cut each strip into (8) 5 inch squares. These are doubled from cutting…Each half yard will yield 24 squares.

Lay your quilt out according to the drawing in a 10 x 12 block setting. And if you’re wondering…why, yes, I was working on this at Starbucks and all this green talk made me thirsty for a Green Tea Frappuccino!

Sew your charm squares together into rows, Pressing each row in alternating directions.

Sew the rows together. Press.

For the backing fabric, cut the 2-2/3 yards into (2) 48″ long pieces. Trim the selvedge edges and sew the pieces together lengthwise. Press your seam open. Now you should have a pieced backing that measures approx. 48″ x 84″. We only need a backing that measures approx. 48″ x 57″, so let’s trim about 26″ off of the bottom of the backing. (See photo).

The backing seam will run horizontally in the middle of the back of your quilt instead of vertically. This saved us a little bit of $$ and if your backing is not directional, then it’s no biggie!

**TIP: Use the extra backing and scraps fabric to make a cute matching pillow!

Layer your quilt top, batting and backing.

I can give you a few tips that I use to help me with successful quilting.
This quilt is small enough so that you can work at your kitchen table. I begin by placing a well pressed backing face down. If desired, tape the backing to the table with painters tape. Next, I add batting, smoothing out from the middle so that there are no wrinkles. Finally, I add my pressed quilt top, right side up, on top of the batting, once again smoothing the fabric out from the middle to make sure there are no bumps or wrinkles and taping the top down to decrease puckering.


Pin your quilt sandwich well, making sure you’re catching all the layers. The more pins you use, the less likely you will have any puckers as you’re quilting. I use a pin in each of the squares on my Minecraft quilt. ….sorry for the icky pic…indoor lighting in the winter here is, well, icky! I really do need a crash course in Photoshop…

**a note on pins..buy the ‘fine wire‘ pins from the notions wall. They are not the same pins as the ones found in the office supply section at Walmart..no matter how hard your boyfriend tries to convince you that they are lol!

Some of you may need to attach your walking foot at this point to quilt.

To begin quilting, I increase my stitch length .5 and always work from the middle out. So this means when quilting the Minecraft quilt, I start at the top, 5 rows over, and work my way down the quilt and all the way over to one side. Then I work toward the other side from the middle out.

I quilted mine with straight lines approximately 3/8″ on each side of the ‘ditch’, horizontally and vertically to keep with the pixel effect of the game using green thread. I eyeballed it by sewing with the edge of my presser foot butted against the seam as my guide.

Bind your quilt. I like scrappy binding so I pieced all of my leftover strips together. I typically like to cut my binding at 2-1/4″- 2-1/2″ depending on which technique I bind with, whether it be by machine or by hand.


If you’re machine binding, you might find this tutorial helpful.

And in keeping with the ‘theme of the game’, the backing is a black and white skull fabric. So perfect!

sssSSSsss…BOOM you’re finished!

**********************INTERNATIONAL CUSTOMERS**************************

KIT SHIPPMENT: Once again, if you are an international customer, please convo me as shipping rates are different for each country. International shipping rates are set by the USPS and KITS are mailed in a flat rate mailer. SewMod does not charge our customers for any ‘handling fees’. USPS prices for Canada are $20.85 and “everywhere else” including Australia and Europe are $25.25. A separate PayPal invoice will be made available to you after you convo me with the package destination. I’m happy to help! Thanks.

***If you’d like a MineCraft Quilt KIT, twin/full size 54″x72″, click on the PayPal button below. The full size KIT is 68.50 plus $12.25 in shipping for U.S. customers.THIS SIZE KIT IS SOLD OUT and no longer available. 

***Standard mattress sizes for a twin measure at approx. 39″x75-79″ and a full measures at 54″x75″.
This quilt KIT will fit a twin and provide a drop over the mattress on the sides. It will be a few inches shy on the length, but a pillow at the top fixes that:) We keep the sample MineCraft quilt on the twin in the studio, and it looks great!!

***If you’d like a MineCraft Quilt KIT, throw size 45″x54″, click on the PayPal button below. Each KIT is $48.50 plus $5.05 in shipping for U.S. Customers.-THIS SIZE KIT IS SOLD OUT and no longer available. 

KITs include enough fabric to make a complete MineCraft quilt, including top, backing, scrappy binding and tutorial. Batting NOT included. If you’d like to replace the Cobblestone grey option below with one of the greens used in the kit as your backing fabric, convo me. I’m happy to help!

To choose your backing fabric, convo me in the ‘Contact Us’ tab at the top of the blog or send me an email at SewMod at hotmail.com. If no backing choice is chosen at checkout or by convo, the kit will be sent with the cobblestone grey.

Attention: The PayPal buttons are for U.S. customers only! Please convo me in the ‘contact us‘ tab or by leaving a comment in this blog posting if you need a shipment outside the U.S.  Thanks!

7/31/15 Update! We’re happy to have the Enderman kits available as well as the Creeper. If you’re interested in the Enderman, please click HERE for the blog post. Thanks so much! Lorrie:)

This Clutch was made using the demo from the Martha Stewart show and pattern provided by UpStyle Design. You can find the printable PDF under Tutorials and Free Patterns.

Supply List:
ONE FQ Non-directional Decorative fabric for outside of clutch. (Cotton may be used)
ONE FQ Cotton fabric for lining.
1/2 yard Heavy weight fusible stabilizer Pellon 808
1/2 yard Fusible fleece Pellon TP971F
UpStyle Clutch Frame

Basic supplies including: Sewing machine and standard foot. We will not be sewing 1/4″ seams. Coordinating thread, iron, tape, small binder clips, Rotary cutter, cutting mat, E-6000 glue.

*A note about glue…original pattern suggests Gutermann Textile HT2 which is imported, expensive and only sold online. The Martha Stewart show suggests Bond 527 Multi-Purpose Cement and I used E-6000 which has always been very dependable for any project.

Don’t forget any embellishments that you might want to ‘bling up’ your clutch with!

Cutting:
Cut your outer clutch fabric and lining to 13″H x 13-1/2″W
Cut your fusible stabilizer to 12-3/4 x 13-1/4″. (Your stabilizer should be 1/8″ smaller than your outer clutch fabric on each side)
Cut your fusible fleece to a 10″ x 13″ piece

*I recommend back-stitching your project.

Let’s begin!

Fuse your stabilizer to the back of your outer clutch fabric according to manufacturer’s directions. Center your fusible fleece and press into place on top of the stabilizer.

Layer the lining fabric and the outer clutch fabric right sides together and pin into place.
Sew 1/2″ seam along the top and bottom edges…the 13-1/2″ edges.

Making The French Seams:
Turn right side out and press. Fold the clutch in half matching the seams. Use small clips to secure the top of the clutch. This will prevent it from slipping while you sew.

Sew a 3/8″ seam along the short edges (sides).

Trim seams to 1/8″ and clip corners. Snip through the corner seams about 1/8″ to create a tiny opening. This helps the fabric lay flat after turning.

Turn the clutch so that the lining fabric is on the outside and sew 3/8″ side seams. Turn right side out.

With the corners of the bottom of your clutch flat, use a pencil to mark a 1-1/2″ diagonal line ACROSS the point as shown. *If you mark more than 1-1/2″ across it will alter the dimensions of your finished project.

Sew on the line creating the gusset. Repeat for the other point. Sewing across the marked line is easier if you place the bulk of the fabric under the machine as shown.

Trim the points to 1/8″.

Turn once more so that the lining is on the outside and sew a 3/8″ seam. Sew slowly through all the layers. Turn right side out and press your clutch well before adding the frame.

Mark the center of your fabric with a pencil. My clutch measures 11-1/2”, so my center is 5-3/4”.

Center your frame on the clutch with the clasp opening in the middle and insert your fabric. Place a piece of tape on each side where the ends of the frame are. This is your guideline for frame placement after you insert the glue and the tape will help protect the fabric from any glue that may ooze out.

Remove your frame. Working one side at a time, apply the glue into the channel of the frame, starting 1/2″ in on each outer edge. Do not add too much glue. Work the glue towards the edges.

*I used the cut off end of a Q-tip. It doesn’t take too much glue for the fabric to bond. Use the Q-Tip to spread the glue into the channel. Do not fill the entire channel with glue y’all! Less is more!
It’s best to be patient and if it seems like it’s not adhering after the recommended bonding time, remove and add more glue.


After applying glue into the channel, center the frame and insert the fabric. Secure with tape. Allow glue to set for 30 minutes before repeating the process for the other side.

Remove the tape, open the frame and tuck the corners in under the hinges and close the frame.

Pattern and hardware can be purchased from Robin Grawunder @ UpStyle.Etsy.com.

Here’s a quick YouTube video for this demo from the Martha Stewart show. Happy sewing everyone!


This week, Susan and I made cupcakes. Pumpkin Spice Latte cupcakes. These turned out as beautiful as they tasted with homemade whipped cream & caramel, displayed with a fall theme. You want one, don’t you? We’ve made a plan to bake at least once a month. My diet’s gone to hell in a hand basket cause it’s all downhill from here with the holidays coming up.

After my visit to northern Minnesota, I wanted to work on a little Scandinavian Christmas project, especially after seeing that cute Scandinavian cottage on my trip!

I signed up for an October holiday block swap for the CLMQG guild. We need (3) 12-1/2″ blocks for the upcoming holidays. With halloween at my heels, I decided to focus on Christmas. I had started a bom from Shabby Fabrics a while ago, which I never finished. I didn’t even make it to block two. And guess what?… It’s a little Scandinavian cottage! When I rediscovered this I knew it was going to perfect…perfectly adorable!

I found this demo from Northern Deb Quilts, headed to Joann’s to get my Tri-Rec ruler, and made 2 tree blocks to accompany the cottage. The fabrics used for the blocks was Flora by Laura & Jessie Jung from my personal stash.

I hope my swap partner loves it! Just don’t look too closely at my work…I was also working on a bottle of wine at the time.

I also prepped for the clutch demo on Sunday’s meeting by writing a tutorial for the blog so that y’all can follow along too and I finished up Paige’s clutch.

Don’t you just love it? Of course I’ll make anything I can attach one of moms crochet flowers to:)
The surprise is the purple polka dot I used for the lining and the brooch is something special from Paige’s collection.

Look for that tutorial coming next week and pics from the demo. If you’d like to order the clutch frames, they can be found at UpStyle. A seriously easy clutch that can be used for a classy holiday get together or a night out with the girls. You can design your clutch with the fabrics you choose! I think my next one will be more whimsy. Maybe some novelty prints from Michael Miller.

And today, I’m hanging at Starbucks. Getting computer work wrapped up for the week while I enjoy my coffee.

So tell me girls… How did you spend the week? Did you make progress on a quilt? Work on any Halloween costumes for the little Zombies? Or maybe you could share your favorite cupcake recipe!

For the October CLMQG meeting, Wendy and I will be doing a demo on how to make this super cute and easy clutch.

Now I know that y’all have someone that would really enjoy recieving something this pretty…for christmas maybe, bridesmaids gifts, or a birthday coming up?

If you’re in the Chicagoland area, join us on October 12th, from 11-4 for the Crystal Lake Modern Quilt Guild meeting where several demos will be taking place. We meet at the Home State Mortgage center on route 14. Guests are certainly welcome!

Shelley has posted a supply list on the CLMQG blog and on Facebook. We must have a confirmed number of attendees who would like to participate in the clutch demo by October 1st. An order will be placed for the frame handles in advance and to ensure you receive one, please RSVP on the MQG site or you can leave a comment here on this blog posting. The cost is only $5 for the frame which can be paid at the time of the class.

Here are the other supplies needed:

The deadline for ordering a handle set is
Wednesday October 1

Supply List:
ONE FQ Non-directional Decorative fabric for outside of clutch. (Cotton may be used)
ONE FQ Cotton fabric for lining.
1/2 yard Heavy weight fusible stabilizer Pellon 808
1/2 yard Fusible fleece Pellon TP971F

Please prep before demo:
Pre-cut your outer clutch fabric and lining to 13″ x 13-1/2″
Pre-cut your fusible stabilizer to 12-7/8 x 13-3/8″. (Your stabilizer should be 1/8″ smaller than your outer clutch fabric)
Pre-cut your fusible fleece to a 13″ x 10″ piece.

Basic supplies:
Sewing machine and standard foot. We will not be sewing 1/4″ seams.
Rotary cutter
Ruler
Coordinating thread

SewMod will bring additional supplies including iron, transparent tape, mat, glue and your pre-ordered clutch frame.

Don’t forget to bring any embellishments that you might want to ‘bling up‘ your clutch with!

We will be making a clutch that is not pieced. Piecing the clutch results in too many seams to work around. So please, for your first one, bring the supplies stated and prepped before class.

It’s so simple, you will be leaving with a finished gift! Thanks so much and we look forward to showing you something new!

The SewMod inventory sale is winding down. Don’t miss out on all the great savings going on in the shop!

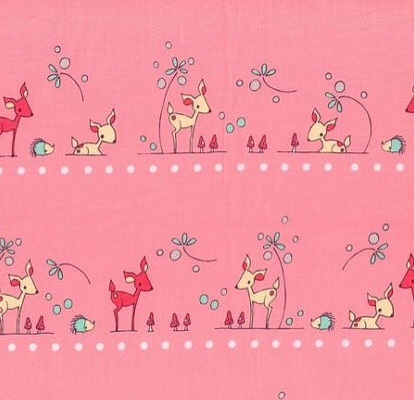
Woodland Deer in pink from Cinderberry Stitches $6/yard

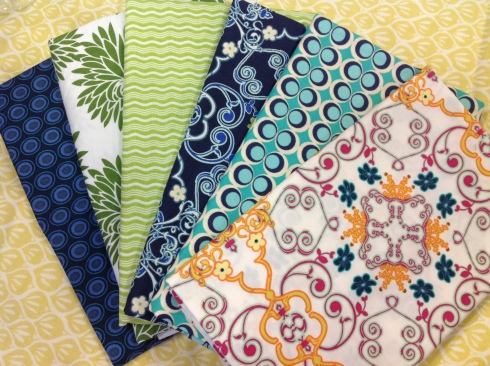
Girl Crazy fat quarter sets $10.80

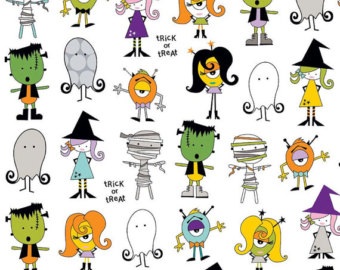
Get your spooky on with these cute trick-or-treaters $6/yard

Most patterns are marked at $7.20

And don’t pass up the cute quilt kits we still have in stock $28

I worked on a birthday present for my nephew. Another Minecraft Creeper…sSSSSsss BOOM! This time I used a variety of greens instead of solids. I like it. It looks more like grass:)

I drooled over a Janome Hello Kitty machine..in turquoise:)

I worked. I did some blogging, cut some fabrics and prepped for a guild meeting. My embroidery demo is all ready to go. Can’t wait to see everyone again. Wow the months are just flying by! I’m starting to feel a bit pinched for time with the holidays creeping up on me…sSSSSsss BOOM!

There are a few things I’d like to check off my list before the end of the year… 2 t-shirt quilts and our CLMQG BOM, not including other crafty things that I want to do too! So I need to get busy…
We had a sewin/sleepover on Saturday and we made some good progress on the BOM.

I only have 1 block left to complete and my printer is unable to print the template…figures…

Paige is working on the layout and, hopefully soon, I’ll be able to get it ready for quilting.

Then, us girls went out to celebrate and unwind at the Blues Bar for dinner. The Bluesmobile is actually in the bar y’all! Very cool place with some tasty BBQ.

So tell me, …what projects would you like to complete before the holidays roll in? Christmas will sneak up on us before we know it! sSSSSsss BOOM!

Yes. I’m a couple of months late on this beachy keen post. Even as I write this I’m thinking of fall, pumpkins, what to dress up for Halloween & wearing my Uggs, oh and apple cider doughnuts! Yumm..

So let’s take it back a bit. All the way to the middle of July. Schools out, the sun’s shining & the weathers warm. All we wanna do is hang out for lunch, have margaritas and enjoy the lazy afternoons….and it’s time to celebrate Paige and Wendy’s birthday!

I wanted to make their gifts this year…well, my mom did most of the making. I mostly did some attaching:)

Something fun & colorful was a must! I found these totes out shopping one day and scored big time with the robins egg blue handles. I bought them, a lot of them, and knew exactly what I wanted to do with them.

From that to this…nailed it, right?!

I embellished them with some bright and modern crochet doilies and flowers handmade for this project by my mom.

A bag to use as a purse for a day out shopping or to use as a tote for a fun take-along project! Wouldn’t these make great bridesmaids gifts too?

I didn’t stop with the totes. I took dollar store flip flops, crocheted flowers, and a bit of blue yarn..

and turned that into a sweet pair to be worn with white capris or a sundress.
All I did was wrap the flip flops with the blue yarn and hand sew the flowers on…easy peasy!

Toes to match;)..blue of course!

I took so many feet pics I’m convinced my neighbors thought I’d lost my mind for sure this time.

A huge thank you to my mom for doing the crochet. She’s always eager to help with all my ideas! Even as I write this blog, she’s working on another project for me. I get so excited when we can collaborate. We need-2-create!

Keep checking in to see what we come up with next…

We will be at the Crystal Lake Modern Quilt Guild this Sunday, September 14th. If you’re in the area come see us! I will be giving a demo on a few hand embroidery techniques and I will also be vending so everyone locally can take advantage of all the great sale prices we have going on.

I will be bringing all of the half yards, which are just $3/each.

Samples of all the new arrivals and kits are coming along too!

And we have a little shop game for everyone to participate in and win some fat quarters.

If you are coming and see something on the shop site, like extra yardage, just convo me and I’ll be happy to bring it with me. No one will blame you…I mean who can resist yardage at just $6/yard and new arrival fabrics at $7.20!

So bring a friend and make a list and expect to have a fun time on Sunday! Meeting is from 1-4 p.m. A few of the member techniques include..embroidery, half square triangles, machine binding.

Guests are also welcome for a nominal charge..$5.

We hope to see you there!

During the Inventory Reduction Sale, we have all of our kits on sale. The newest arrivals are 20% off and all of the others are 50% off! Don’t miss out!

Our latest kit is Girl Crazy. Girl Crazy is Riley Blake’s newest fabric line. The line features all things girly!..roller skates, balloons, bubble gum, scooters, & so much more. And it’s pink!

Sugar and spice and everything nice. That’s what little girls are made of….

Looking for an adorable girls quilt that is quick and easy to put together? Then the Girl Crazy quilt kit is just right for you!

The border fabric has pink, yellow & blue daisies and the backing is fun bicycles!

Quilt is a perfect for the beginner & measures 40″ x 40″ .
Everything is included with your quilt including, backing, binding, quilt front and a free pattern!
The only thing needed is the batting.

Girl Crazy has complete step by step instructions to ensure you have a great time creating a one of a kind baby heirloom that’s handmade by you! this kit is on sale for $27.99

Folk tale and Rosalie are going at great prices. We have about 3 left of each one. Folk Tale is only $22.50!

And Rosalie is on sale for $31.48. Those are seriously great prices!

Check out the rest of our sale here!

Enter your email address to follow this blog and receive notifications of new posts by email.

Email Address:

MineCraft Tutorial

Crayon Embroidery Tutorial

Machine Binding Tutorial

Blog Archive