
You are currently browsing Lorrie’s articles.

Author Archive
This weekend went by in a blur! That’s what happens when you’re having fun, I guess. It especially seems to fly by during the holidays too.
Paige and I spent some time this weekend finishing up some projects and working on new ones, which I’ll be showing off this week. Sunday, Paige’s sewing group came over for lunch and a full day of catching up on projects. When you get a group together dedicated to working, a lot gets done.
We also spent some time choosing groups of fabrics, different color combinations and patterns from a variety of lines. Starting with a focus fabric and working different fabrics in with it. I don’t know about you, but I think the fabric company’s amazing marketing has just about left me incapable of mixing and matching my own colors! Don’t get me wrong, I love the way the companies group all their lines together so it’s a no-brainer for us and sometimes I need that, but I also don’t want to lose my ability to do it on my own. Remember when you did do it on your own? No bundles, no pre-matched fat quarter stacks, it was all you?
Paige is a pro at that and is helping me regain my confidence in choosing. So we are going to start showing you some of the lines that we have picked and pulled and put together from the SewMod shop.
We are offering the “pick’s“ 15% off in Etsy and SewModDesigns.com. Check them out and let us know how we did!
Paige’s Pick

Lorrie’s Pick

Be sure to LIKE US on Facebook to receive your coupon code for 15% off your 1st order!

**UPDATE 5/1/15 To make the coffee cozy without embroidery stitches and view the updated tutorial click here.
Welcome back to Handmade Holidays on Friday! We’ve got just the project to keep you busy this weekend. Coffee sleeves and cozy’s to fit your favorite cup or mug. Or maybe you have someone you’d like to give this to as a gift,… a teacher, a neighbor, or your favorite coffee lover?
We’ve made this sleeve unique by adding simple embroidery stitches to the seams. If you prefer not to embroidery, that’s fine too. Embellish any way you like. Have fun with it by making it your own!
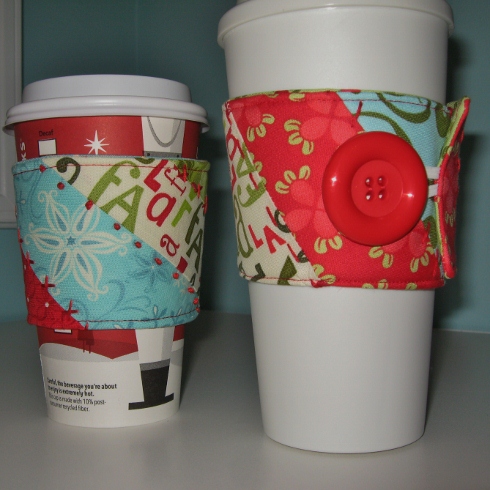
This pattern fits a Starbucks disposable coffee cup. We’ve also made one to fit an Eco-friendly one as well. If you’re making the Eco-friendly sleeve, add 1/2″ seam allowance all the way around the pattern lines.
You will need….
Pattern
7 to 8 scrap fabrics varying in width from 1-1/2″ to 3-1/2″ and approx. 13″ long
Fabric for the backing
Scrap piece of batting
Elastic hair tie, Button and Embroidery floss
Let’s begin!
Cut your fabrics into strips and sew them with right sides together as shown.
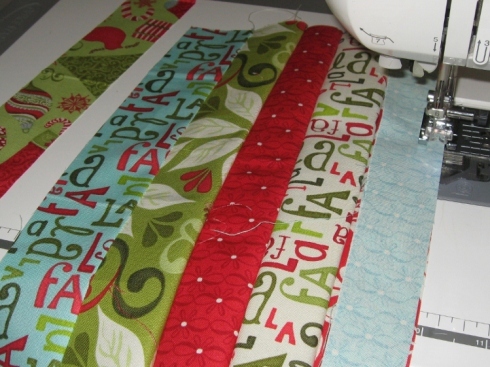
Press all your seams in one direction. Layer your batting and then your pieced fabric with right side up.

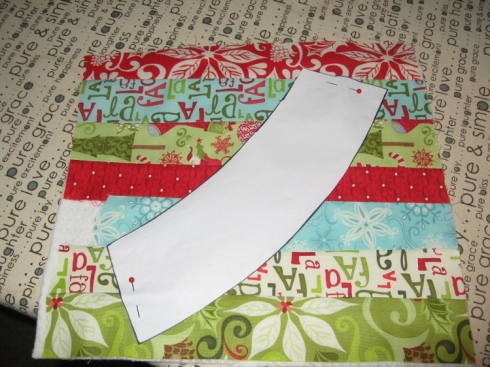
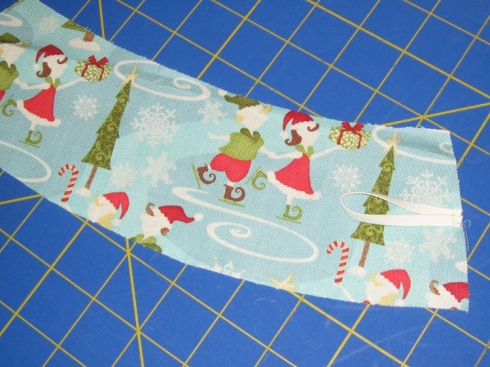
Place your pattern on top and position it on the fabric at a diagonal. Pin. Cut the fabric and batting using your pattern as the guide.
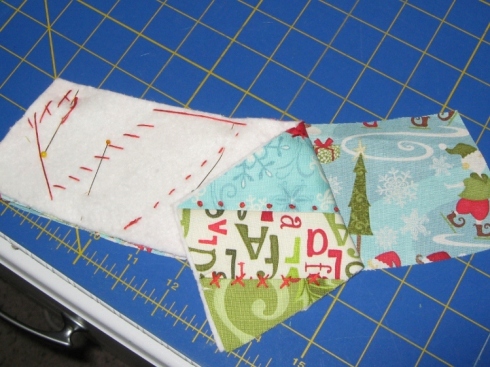
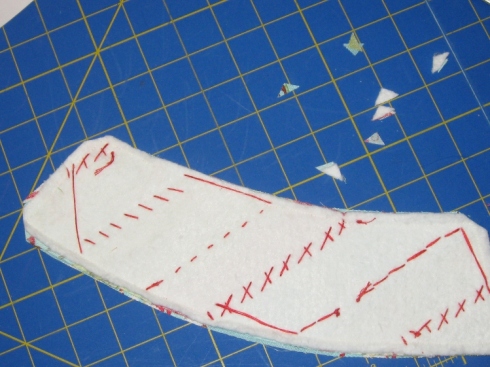
Keeping your cut pieces layered and using 4 strands of floss, embroider on top or close to all your sewn seams. I used a french knot, whip stitch, and back stitch. We’ve added a few helpful stitch guides on the pattern for you. Be Creative!
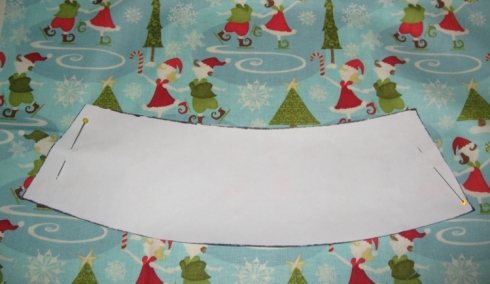
Cut out your backing fabric by placing the pattern facing down on the right side of your fabric.
Place elastic tie as shown with the loop facing toward the sleeve and on the right side of fabric. Sew across to secure.
Layer your embroidered fabric piece and the backing right sides together and pin.
Using a scant 1/4″ seam, sew around the sleeve, leaving a 3″ opening for turning.
Clip the corners and turn right side out. Making sure to push your corners out.
Iron flat. Top stitch around the sleeve to secure the opening.
With your sleeve positioned on your cup, mark the button placement, making sure that its snug.
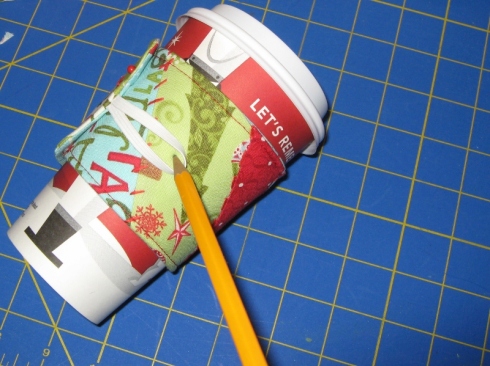
Sew on your button and you’re finished! Now, go show off your hard work! Or, place a gift card inside the Eco-friendly cup and you’re one present ahead of the season:)
If your interested in crocheting a mug cozy and coffee sleeve, we found a couple on these links..cozy & sleeve
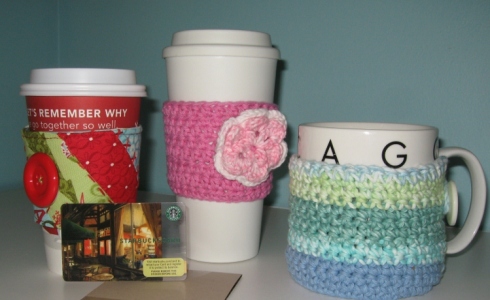
My mom was gracious enough to demo those out for us. They turned out so cute. She added the big flower on the pink one. Be creative and add something special of your own. Maybe a crocheted stocking since it’s Christmas. There are lots of free crochet patterns out there. I love the mug cozy too because I can still read the Chicago around the rim and it’s made in our favorite colors here at SewMod…blue and green!
I hope you’ve enjoyed our tutorial this week. Have a great weekend everyone and try to stay warm!
About a week ago, a couple of the SewMod girls came over for lunch and a sewing day. We worked on a few projects including these cute bags from Terry Atkinson’s pattern Zippy Strippy.

Love this pattern! It has 3 bag sizes and best of all, you get to use more scraps! Since the strips are only 2-1/2″ x 6-1/2″, I can even use some of those jelly roll pieces I have left over. And don’t be scared of the zipper girls. It’s super easy to put in. Terry Atkinson has her own line of zippers and can usually be found at your local quilt store in an impressive variety of colors.
I made mine using my scraps from the line Ginger Blossom by Sandi Henderson.

Andrea made her’s from fabrics with dress forms on it and added a gray flange to finish it off. I don’t know how I ever missed this fabric in the quilt shop…cute!

And this is one that Shelley had made Andrea last year for her birthday. Pretty fall colors and she went the extra step to quilt it.

Several of these bags could easily be completed within a day. So these would make great gifts for a sewing group, fill them up for a beginner quilter with all your favorite notions or a travel bag for the teen on your list. Make the small one for your co-worker to toss in her purse. Use one to tote around your latest hand project.
Rummage through that giant pile of scraps and make a day of it!
Do you have a tea lover on your Christmas list?
I do too and these little tea wallets are perfect for them. The wallets hold up to 4 packaged tea bags.

It only takes (4) 5″x 7″ pieces, 5″ x 7″ fusible interfacing, button and elastic or ribbon. These were really easy to whip up. I actually made all of these last night. It would have gone much faster too if my machine wasn’t being so angry with me! We had a couple of fights last night:)

I made myself one too. Since I’ve given up soda/caffeine, I’ve been drinking a lot of water. That gets old real fast so this seemed like a great idea to take with me when I’m on the go. Especially since there are a lot of teas out there that are decaf.
Here’s the tutorial I used for these if you’re interested.
Toss this in your purse and you might just find yourself asking for a mug of hot water instead of soda the next time your out for lunch!
Can you believe it’s November?!
I’m a bit in denial, although I do Love my holidays. I’m usually ahead of the game by this point. At the beginning of every year I make a Christmas list of all friends and family I’m buying for and add ideas next to their names throughout the year that I think they would like. That way, I’ve at least given some thought to the gift and I’m never rushed to just pick something up. There’s nothing worse than a gift without a little thought behind it, right?
I have started my list but I’m definitively behind on my handmade items. One of my SewMod friends is doing a handmade holiday. It’s so hard for boys and men though! Any suggestions out there? I’d love to hear some ideas.
I’m going to have to kick it into high gear over the coming weeks before Christmas and hopefully by following our blog, we will be able to inspire you as well with some ideas!
Our 1st handmade item is from Stitch Craft Create magazine. I picked this up at Joann’s the other day. I love it! Lots of ideas for stocking stuffers for your favorite quilter and crafty project ideas. I love to craft!
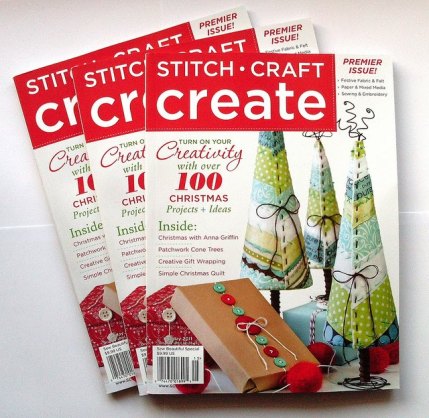
The 1st thing we had to make was those adorable trees on the cover. Paige chose whimsy blue and green Christmas fabrics from the stash and we were off from there onto our 1st Christmas craft. Don’t ya love being able to use scraps for a project?
The directions were easy to follow and I found all the ingredients at Joann’s. The wire is available in the jewelry making section of the store and available in a variety of colors too. The only issue I had making these was the wire is not sturdy enough to balance these trees, so I just left that part out.

The trees are strip pieced, then decoratively stitched at the seams with embroidery floss pinned to the cones and whip stitched up the back. Add a snowman scene as the backdrop and we have our 1st Christmas display:)

And I must say…super cute, right? A little time consuming but most of the work is in the hand stitching, which can be done while watching your favorite holiday movie! Well worth it!
Keep checking back with us. My goal up until Christmas week is to provide a Handmade Holiday craft or sewing project every Friday and sometimes during the week too.
Have a great weekend everyone!
It’s cold & blustery today. It reminds me of that Winnie the Pooh episode. I expect to see Piglet and his scarf fly by my window at any moment:)
We’ve been working on a few projects recently. A commission quilt for one of Paige’s friends, which I hope to show off soon and a couple of other things in the works. Recently, I found this back issue of American Patchwork & Quilting that had a cute purse made from tea towels in it and we really wanted to try it out.


We were just dying to use Sandi Henderson’s Secret Garden, so we made a little adjustment for fat quarters and went for it.
It has divided pockets on each side and these big wooden handles, which I love.


All that’s left now is to find the perfect embellishment for the front and Paige will have a stylish new bag!
Halloween remembered. You know, when they were little and wore cute costumes. Here’s a few of my fave’s from Halloween’s past.

Holy Batman Returns!

It's Alive, It's Alive!

Blues Brothers..they're putting the band back together.

Peace out
And then they grow up and want to scare people and wear gory ones:)

I hope all your kiddies bring home all your favorite candies. Happy Halloween everyone!
October Birdie is finished and I’m back on schedule. I do have to admit that my stitching was a little shaky trying to do both of these so blocks so close together. But I think it turned out cute.

I switched the moon to the other side and added a witch’s hat to Birdie. She had to have a costume for all that trick or treating she plans on doing!

What kind of candy is she hoping to get the most of this year? Reese’s cups seem to be my, um, her addiction right now!
I finally finished the September block from Little Miss Shabby’s BOM. September to me is apple picking time and back to school. And what kind of school does a Birdie attend? Well, Flight School, of course!

We have an elementary school in the neighborhood that rings the “bell” at the beginning of the school day. I enjoy hearing that while taking Daisy for her morning walk, so I had to incorporate the bell also.

Thanks again for another cute block! Can’t wait to get started on the October one now.


