
You are currently browsing the tag archive for the ‘hand embroidery’ tag.

Tag Archive
Do you yearn to pull out those Crayons and relive your grade school days? Well we can! Tinted embroidery is a great way to spruce up those open spaces in a project and add a little color without all the work of filling in spaces with filler stitches like satin stitching.
So go grab your supplies and let’s get started!
Crayons
Embroidery pattern
Pencil or brown .01 Pigma Pen
Pins
Iron
White paper towels
Floss
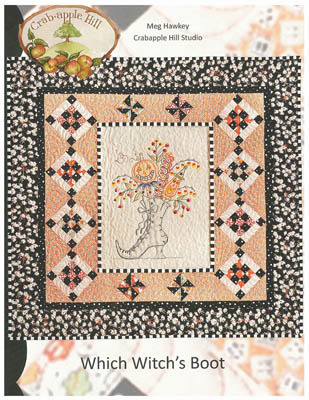
I’m working on Crabapple Hill’s Which Witch’s Boot.
1) Pin your pattern to your fabric.
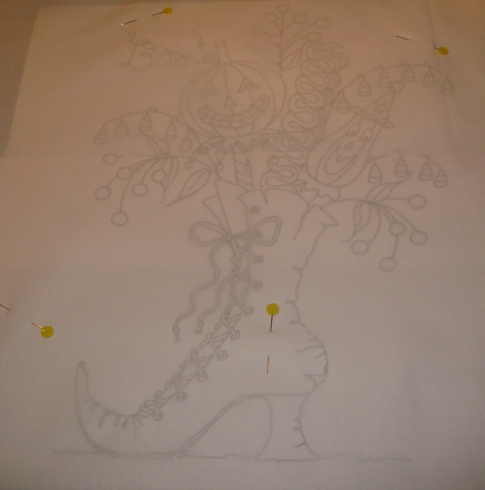
2) Using a light box, transfer your pattern using a #2 pencil or Pigma pen. Remove pins and pattern.

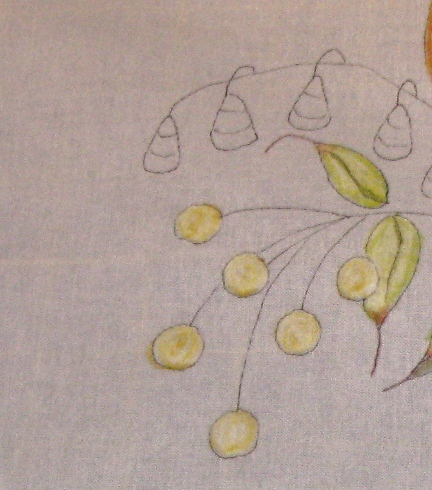
3) Using a white Crayon, color heavily the areas that will be tinted with color. If your fabric is pulling, try taping your fabric down.

4) Tint the areas with the Crayons. Use light strokes. Remember we are tinting, not coloring. I’ve made this mistake a couple of times. I have a heavy hand. If you’re not following pattern instructions and choosing your own colors, always start tinting with lighter colors first. For example, my leaves are tinted green. Light green first, shaded with a darker green and tinted at the tips with a bit of red.

**tip** Check your work carefully. If you find flakes of the Crayon on the fabric, blow them off. You don’t want them to stick to the fabric. Another of my mistakes. I ended up with bits of orange on my gray boot. According to Crabapple Hill, if you need to remove any coloring mistakes, do so before you iron. Heat setting it makes it permanent! Remove mistakes by mixing a paste of baking soda and water. Dip a Q-Tip in the paste and rub the area until the color disappears. Rinse that area with cool water and air dry. Re-color and proceed to step 4.
4) Place your tinted embroidery face up on ironing surface. Cover your tinted areas with white paper towels and press well with a hot iron.

Check the paper towels for crayon residue or bleeding. If there is some, then repeat step 4 with new paper towels until there is no sign of Crayon on the towels.
Now it’s time to start stitching!

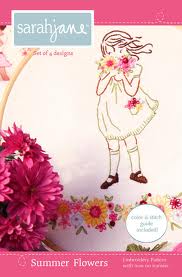
I received two Sarah Jane embroidery patterns from my mom for Christmas, Summer Flowers and On Parade.
![]()
I finally found some in between time to sneak one in and I loved every minute of it. I like a pattern that has several stitches involved and I even learned a new one, which is always exciting.
Here’s Summer Flowers in all her beauty!

I framed it in the hoop and her new home will be proudly displayed in the SewMod bathroom.

The new stitch I learned was the Bullion Stitch. It’s the little bunches of roses that appear to pop off the fabric. Really easy. It’s basically a french knot except wrapped about 15-30 wraps. Once it’s pulled through the needle, the stitch lays curved to create the flower.

If I had a manicure, I’d show you with a little demo, but I don’t and I’m not about to torture you with that sight:) I promise I’ll work on that and do a mini embroidery session for you!
After I finish up the Parade embroidery, this is the one I want to do next, called Make It Do.
![]()
So cute! But before I get started on those, I’m going to be working on a special embroidery project for Paige. So be sure to check back next week for that!
Tomorrow I’ll be showing you some of the prints we recieved from Art Gallery this week and what I worked on during my weekly sewing day with some of the SewMod girls. See you then.
I made another weekend finish, Wonky Wildflowers. Have you ever seen anything soo dang cute!


I really enjoyed doing this. This pattern has many techniques in it that kept me interested. Embroidery of course, applique, both hand and machine, making the hexagons, and using the easy dresden to make all the wedges for the grass and the sun. The one thing I had never done was make the wonky log cabins. I saved them for last and as you can tell by this middle blue and pink one, my first attempt was a little not so wonky.

It’s more difficult than you think to make something not straight! I did let go and not be so uptight when it came to whacking off my edges and finally got the hang of it. But I did notice when I was finished that all my blocks tend to only wonk to one side:)
The only thing left to finish this up is the border. I spent all day Sunday hem hawing over which fabric to use. If you know me, that can be tedious. It has to be right or forget it. After all, I spent all that time and love making it. I’m not going to settle. I did really want to use something from my stash. I had one tiny scrap piece of fabric from the Favorites collection by Me And My Sister and it had to be that.

I had to order it. So I should be able to complete this adorable little wall hanging this week. Then of course the dreaded quilting..ugh! Let the whining begin:)
Can’t wait to show off the finished piece. That will be my motivation!
Next Wonky is…Wonky Winter.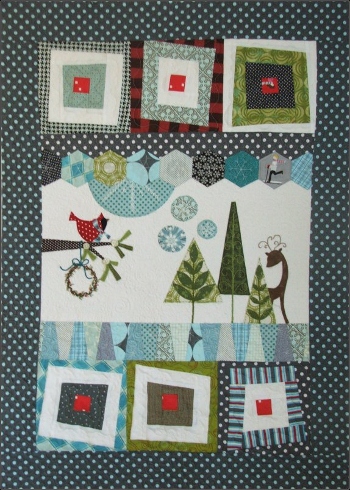
The SewMod group is going to tackle this as a sew-in project hopefully in March. This will be exciting to see all the different versions from our talented group. I already have an idea for mine!
I have a new handmade item to add to my Christmas decorations this year. A Framed button tree!

I saw this in a holiday magazine and it only requires a few items to make it, which I already owned. If you have buttons, scraps of Christmas fabrics, embroidery floss and an 8×10 frame you’re all set! I only had to purchase the frame and ,of course, I couldn’t find a red one, so I painted it.
I seem to be on a button/embroidery/tree theme this year!
My last birdie block is complete and on its way to a good home! I had a lot of fun stitching these and adding my own twist to some of the blocks. Thanks again Little Miss Shabby!


I can’t wait to see how Vicki puts all the blocks together!

I wonder what new and fun blocks await us for 2012?!

Here’s an easy gift to make. A button tree pillow. I make these easy little pillows and give them as hostess gifts, to friends or someone special. Give your pillow with a box of chocolates tied with a pretty ribbon.

Supplies:
pattern
White background fabric 9-1/2” x 9-1/2”
FQ for the backing
Buttons
Embroidery floss
Fiberfill
1-1/2” wide scraps of fabric
Trace the tree design onto your background fabric. Embroidery using 3 strands of floss. Add your buttons.
Just like making a log cabin block, piece the strips of fabric around the background until your satisfied with the size of your pillow. Mine was about a 13” square.
Lay your backing FQ fabric right side up. Lay your tree face down on top of backing. Cut out the backing fabric to the same size as the top and pin. Sew around all the edges leaving a space for turning, about 4 fingers length. Clip your corners and turn right side out. Stuff with the fiberfill and sew the opening closed with a whip stitch.
I’ve made several of these before. Here’s one I made with a leftover applique block.

And a couple of embroidered Santa pillows..

Looking for an easy Hostess gift to impress your neighbors and friends with at your next Holiday party? How about Christmas Tree Hot Pads! Whip these up in no time, then add your favorite recipe to go along with them.

Finished size: 9″ x 9″ Download the pattern here, or find it in our Tutorials at the top of the page.

This is a great stash project – combine festive fabrics for the trees with contrasting backgrounds and tree trunks. Use easy paper pieced blocks and finish with binding, quilting and simple embroidery.
Add some wooden spoons, mixing bowl, and your favorite cookie recipe with these hot pads for a great gift!

And they even look great as mini quilts for my hutch decorations!

Here’s one of my favorite cookie recipes. I found this in the Gooseberry Patch Christmas Book 9. Sooo yummy!! Enjoy!

Vanilla Dipped Gingersnaps
2-1/2 C. Sugar-divided
1-1/2 C. Oil
2 Eggs
½ C. Molasses
4 C. All-Purpose Flour
4 tsp. Baking Soda
1 TBSP Ground Ginger
2 tsp. Cinnamon
1 tsp. Salt
2 11-oz Pkgs. White Chocolate Chips
¼ C. Shortening
Combine 2 cups sugar and oil in a mixing bowl; mix well. Add eggs, one at a time, beating well after each addition. Stir in molasses.
Combine flour, baking soda, ginger, cinnamon and salt in a separate bowl; gradually blend into molasses mixture. Shape dough into 1” balls and roll in remaining sugar; place 2” apart on ungreased cookie sheets. Bake at 350 degrees for 15-20 minutes or until cookie springs back when lightly touched. Remove to wire racks to cool.
Melt white chocolate chips and shortening together in a small saucepan over low heat, stirring until smooth. Dip each cookie halfway into mixture; allow excess to drip off. Place cookies on wax paper to harden. Makes about 7 dozen.
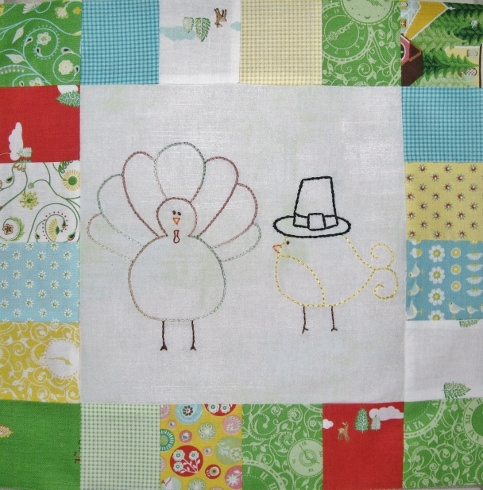

November Birdie block is finished. Only a few minor additions to the block this month. Birdie has a new pilgrim hat and a fat turkey for his feast, although Mr. Turkey is too pretty to eat! I stitched him in my Cosmo Seasons variegated floss. And birdie eating Mr. Turkey might be considered cannibalism…hmmm.
A big Thank you to Andrea’s husband Tom for helping us out with our extra Birdie drawings this month. And as always a big thanks to Little Miss Shabby for such a fun BOM. Only one more to go…Christmas Birdie!
Have a Happy Thanksgiving everyone!
October Birdie is finished and I’m back on schedule. I do have to admit that my stitching was a little shaky trying to do both of these so blocks so close together. But I think it turned out cute.

I switched the moon to the other side and added a witch’s hat to Birdie. She had to have a costume for all that trick or treating she plans on doing!

What kind of candy is she hoping to get the most of this year? Reese’s cups seem to be my, um, her addiction right now!
I finally finished the September block from Little Miss Shabby’s BOM. September to me is apple picking time and back to school. And what kind of school does a Birdie attend? Well, Flight School, of course!

We have an elementary school in the neighborhood that rings the “bell” at the beginning of the school day. I enjoy hearing that while taking Daisy for her morning walk, so I had to incorporate the bell also.

Thanks again for another cute block! Can’t wait to get started on the October one now.


