You are currently browsing Lorrie’s articles.
SewMod is taking a short break for the week but I will still be answering emails if you need to convo me.
🎄🎄🎄All orders placed Monday, December 14th-Sunday, December 20th, will be shipped Monday, December 21st. Thanks so much for your patience & have a Happy Holiday! 🎄🎄🎄
Are you ready to make pillows?
I’m going to show you how to stitch a 3-1/2″ Road To Tennessee quilt block and construct an 18″ pillow cover. Let’s begin!
To make each Road To Tennessee block, you’ll need (1) 3-1/2″ Dinosaur square and (2) 2″ background squares for a total of (36) 3-1/2″ Dinosaur squares and (72) 2″ background squares to complete your pillow top. Draw a diagonal line on the back of each square with a pencil.
With right sides together, place a white square on each opposite corner of an 3-1/2″ square. Stitch on the line.
Trim a 1/4″ away from the stitched lines.
Press your seams open. *This reduces bulk and makes it easier to match your seams on this particular block.
Lay your pillow out in a 6×6 setting and rotate the blocks as shown and sew.
Cut a 19-1/2″ piece of batting. This is where all those batting scraps come in handy!
Layer your pieced pillow on top of the batting, pin and quilt as desired. I quilted a 1/4″ on each side of my seams.

Cut (1) 18-1/2″ square of fabric. This will be your pillow lining. I use a lining on my custom orders because it hides all of the quilting/threads and batting for a more finished look.
Cut (2) 13″x18-1/2″ pieces for your pillow backing.
**Place your quilted pillow on top of the 18-1/2″ lining. ‘Square up’ and trim any excess to make them the exact same size. Sometimes after quilting your work, it ‘shrinks‘ a bit, so if your top doesn’t exactly measure 18-1/2″, that’s still ok. Just make sure that your pieces are the same size as your top. This will help when stitching through all of your layers when sewing your finished piece together.
For the pillow backing, turn under 1/2″ on the 18-1/2″ long side and press. Turn under again, press and top stitch the hem for each piece. Attach your label now if you have one. I stitched mine on the outer backing part of the hem. You now have 4 pieces for your pillow.
Layer them in the following order and pin, being careful to match all of your seams. Pin well.

Pillow liner right side down.
Pillow top right side up
Outer backing piece right side down
Inner backing piece right side down
Stitch around your pillow with 1/2″ seam. Clip your corners . Zig Zag around your raw edges to decrease fraying.
Turn your pillow cover right side out through the backing envelope. Push your corners out and insert your 18″ pillow form.
You’re all finished!
The possibilities are endless when it comes to these covers. Need a quick Christmas gift? Make them for any holiday. Make them with different 3-1/2″ quilt blocks or how about one quilt block. It just needs to be an 18-1/2″ unfinished square to make this pillow!
Here’s a patchwork Christmas pillow I made with some of my leftover Alpine Wonderland scraps.
Keep an eye on my Instagram feed. I’m sure there are more pillow examples coming this holiday season!
Christmas is fast approaching but there’s still time to whip up a special handmade gift for the baby in your life.
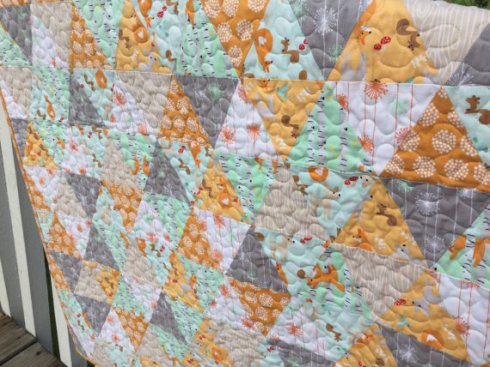
The Equilateral quilt kit that I kitted for the boys is a popular seller so why shouldn’t the girls get as just a cute quilt as the boys? The Wildflower Meadow line from Melly & Me and Riley Blake Fabrics is perfect for the triangles.
Comfort baby in all the goodness of theses adorable nature friends. The focus fabric in this line features hedgehogs, sweet little bluebirds and playful squirrels all tossed amoung the pretty wildflowers! Aren’t these little hedgehogs adorable!?!
The quilt top colors of this KIT are bright pink, blues, and yellows. The backing is blue wildflowers on white with tiny pink birds tied all together with a hot pink binding.
Complete KIT comes with enough fabric to make the quilt top, binding, backing and free quilt instructions. Batting NOT included. Quilt measures approx. 35″x 42.5″. $42 plus shipping.
Pattern includes step-by-step instructions for assembly. Equilateral triangle quilts are fun and fast to make. After you make one using the pattern, you’ll want to make more! The quilt can either be cut using the template provided in the pattern or using the Creative Grids 60 degree triangle ruler found here. The Equilateral tutorial can be found here if you’d like more info on how to assemble it.
Now…a new one for baby boy…Dino-Roar!
Dino-Roar is made using Riley Blake’s Dinosaur fabric line in a traditional Road To Tennessee quilt layout. A Road to Tennessee block is basically a Snowball block with only two of the corners replaced with a coordinating fabric instead of all four. So easy and perfect for any fabrics and especially scraps.
Dino-Roar uses 8 different fun prints in oranges, greens, browns & blues. There are Dinos tossed in different sizes, a sweet little leaf print and other coordinating Dino ‘egg’ prints. Kona Snow is used for the white. The binding ties it all together with Kona Chocolate.
Dino-Roar measures 45″ x 45″ and is a complete kit as well including the backing, binding and free pattern. $55 plus shipping.
The backing is available in any of the Dinosaur prints and can be selected here at the time of checkout.
Kit comes with bonus instructions for an 18″ pillow using your Dinosaur scraps! Check back tomorrow when I’ll be doing the step-by-step tutorial using a 3-1/2″ Road to Tennessee quilt block.
Easy, fast & fun and just in time for Christmas! Feel free to convo me if you have any questions.
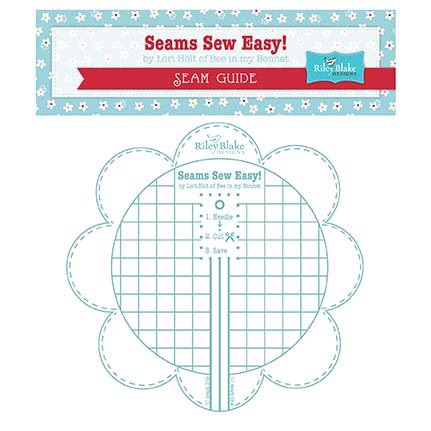
I just love me a good quilting tool! Especially one that promises to help me sew a straight line;) and this is where Lori Holt of Bee In My Bonnet’s ‘Seams Sew Easy’ seam guide saves my day.
Now I have a 1/4″ foot to do most of my work for me on the straight lines and good seam allowance bit but I definetly can use something that tells me I don’t have to mark a diagonal line with a pencil on the back of a gazillion blocks!
If you follow Lori’s directions for adhering the guide, you can ditch the time spent tediously marking your blocks. Toss the pencil and get started sewing!
Set your needle down in one corner and line up the opposite corner with the straight line.
Keep the point on the line while stitching and you’ll have perfect blocks. It took a little practice to keep my eye on the line instead of staring at my presser foot.
Forgot your 1/4″ foot? The guide will serve as one. Jus keep the edge of your block lined up with line on the guide. Yes! It’s just that easy.
I do have the slight delima of having a bottom bobbin case. Ugh. But my guide had four adhering stickers on it and when my bobbin needed replacing, I only lifted half of my guide up and it didn’t shift on me.
There are super cute ideas on her blog so go check it out if you’ve never been.
Another fab idea she had was to make mini design boards to take to class with you. And of course they’re adorable! When I demo at the guild, I use a flattened cardboard box covered with a scrap piece of batting that’s pinned to the back of the box. Oh the horror! How could I have been so ‘uncute’ during a demo!?!
Well, after seeing hers, I upgraded my cuteness level and made a new one. All you need is foam board, which can be purchased at any hobby store or Walmart, batting, binding and hot glue. Her directions can be found here.
Beware. They’re addicting. I think I made 6 in one day-4 for friends, one for myself, and one to give out along with a Seam Guide as our guild door prize for November!
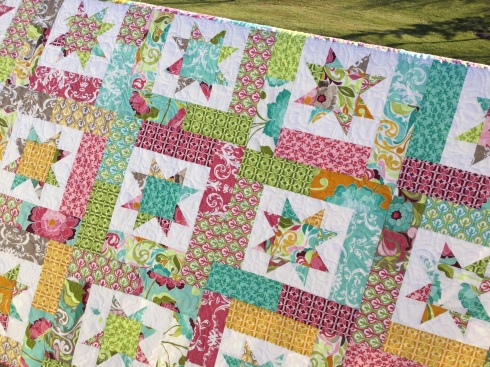
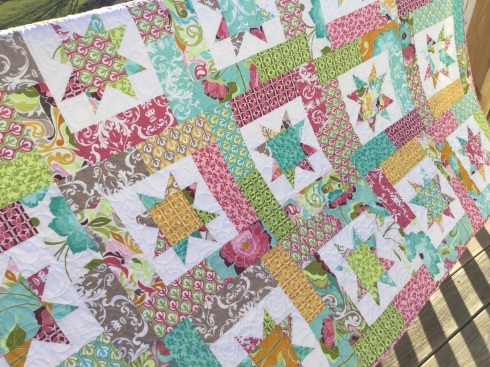
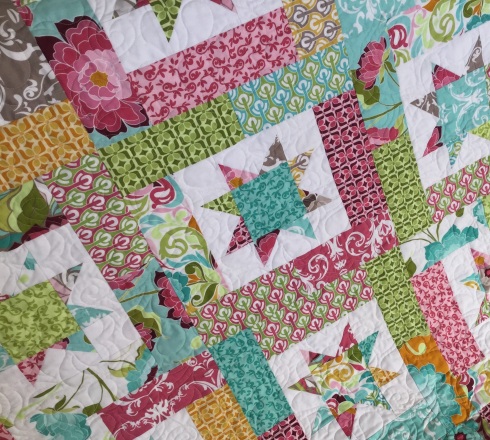
SewMod’s latest quilt kit is made using Lila Tueller’s fabric line Halle Rose from Rikey Blake. It has all my favorite colors…the teals, oranges and pinks of course!
I used the quilt pattern from Atkinson Designs called Lucky Stars. You can’t go wrong with this one ya’ll. It’s so versatile. All you need is some background fabric and a bunch of beautiful fat quarters!
The great thing about Lucky Stars is that you can chain piece almost the entire quilt. I’m not kidding. And that means a quicker finish:) OK, so there’s several great things about this pattern aside from chain piecing…it’s simple with very little seams to match up, an entire line looks and works great with it so there’s no thinking about what fabrics to choose, it looks great with the star points scrappy(like mine) or all the same fabric, and the pattern has all of the different quilt sizes and fabric requirements. That means you can use it over and over. One for baby, one to keep your lap warm and one for your bed!
Paige quilted this one in a pretty, all-over design.
I do have a a tip & short cut on trimming your blocks down to size. Trimming for me is so cumbersome and it never fails…I always screw up at least one block trying to figure out how to trim without having a lopsided block!
Start by cutting a 9-1/2″ square from freezer paper, fold it into fourths and mark the center with a x.
Fold your pieced block in fourths and finger press.
Place your freezer paper on top of the right side of the pieced block, shiny side down, lining up your ‘X’ in the center. Lightly press to keep it from shifting.
Trim the block using your rotary cutter and ruler to the 9-1/2″ square.
Remove the freezer paper and repeat with all of your blocks. Easy peasy! Perfectly trimmed 9-1/2″ squares.
To find the Lucky Stars KIT and/or pattern, visit the SewModDesigns Etsy shop. Kit includes fabrics to piece the lap sized quilt top(60″x75″), binding and the pattern, $68.75 plus shipping. There is also yardage available in the shop as well.
I have been wanting to make a clamshell quilt for quite some time now. I knew this would be perfect to show off all of these fabulous prints.
Now I know that some of you are groaning. Knowing how much I like handwork, you’re assuming that it’s hand appliqued, right? Well, it’s not!! I’m a big fan of Crazy Old Ladies patterns and Emily Herrick designed one called ‘Clambake’.
For all of you modern quilters out there who love a quick fix and instant satisfaction, this quilt assembles fast with a quick cutting method and machine appliqued clamshells.
Clambake measures at approx. 55″ x 62″ for a perfect lap quilt. Or, I’m thinking it would be really pretty hanging in my bedroom!
As I was assembling this beauty, I found a few shortcuts to an already simple pattern. Every little but helps so I’ve listed a few tips & tricks below if you happen to purchase the kit or buy the pattern.
Clambake Tips & Tricks
Use a thicker box to cut the template from so that you can easily rest and guide your rotary cutter along the edge while cutting. I used a leftover USPS box. Cut more than one template from the box just in case you end up ‘shaving’ a bit from your original template while your cut your clamshells out.
Use a new sharp blade to easily cut through multiple fabrics at a time.
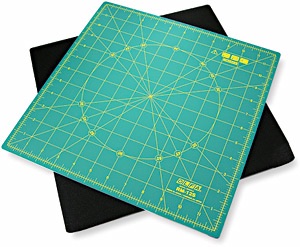
Use a rotating rotary mat, like the Olfa Spinning Rotary Mat.
Spin the mat around while you cut out the template. This alleviates the need to move and shift your fabrics around while cutting. These are also great to use for fussy cutting projects.
If you don’t want to mark the center of each clamshell, you can finger press to crease the center right before you begin lining them up on their rows by folding them in half to find the center point.
Use ‘Perfect Shape’ template plastic. I’ve tried so many template plastics over the years and haven’t found any that can withstand the heat I put them through except this one from The Stencil Company called ‘Perfect Shape’. It never melts and I only used ONE template for all of my clamshells. Trust me, when this product says ‘no melt’, it actually means it!!
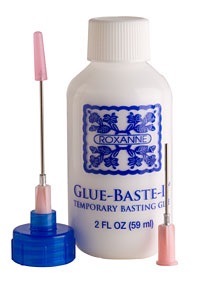
Instead of pinning my clamshells, I used Roxanne’s Glue Baste It. I did not pin ANYTHING while sewing my clamshells! “Roxanne ‘s Glue-Baste-It is 100% water soluble, dries in minutes, and the unique applicator top allows for controlled placement of tiny glue droplets. It does not feel stiff, and does not contain harmful chemicals, dyes, or waxes. It cleans up with water and washes out of fabric with soapy water, even after ironing or sewing.”
Apply the glue along the edge of your clamshell. Give it a good press with the iron, move to the next one and so on until you’ve ‘glue basted’ your row. It bonds quickly so you don’t have to worry about it coming undone when you move it. Take it to your sewing machine and top stitch the clamshell 1/8″ away from the edge. I use this glue on all of my applique projects.
I’d give this quilt ⭐️⭐️⭐️⭐️⭐️. I had fun, it wasn’t too time intensive, and I got to use some of my favorite products. Whew! I love it when I can share my favorite products with you guys!
The Clambake kits are available at all the upcoming shows while supplies last (see Visit SewMod at the top of the blog) along with the coordinating fabrics. If you can’t make it to a show, visit us in the SewModDesigns Etsy shop. Kits include the fabrics for quilt top, binding and pattern. Backing & Batting NOT included.
If you’re buying the kit and are interested in either a sheet of the Perfect Shape or a small bottle of Roxanne’s, I have them available too. Neither of these products are available at your local craft and hobby shops. Only some quilt shops carry them. You can purchase the Appliqué Add-On kit here.
Have a great weekend everyone!
Join us for our first Fall quilt show this weekend in Crystal Lake.
We love to meet our customers! Having an online shop has some really serious benefits (like sewing in your pajamas)but one of the drawbacks is not being able to meet and spend time with our customers, which is one of the reasons I love to do shows. So head over if you have time this weekend and say Hi!
“Winding Path” Quilt Show
Sponsored by Country Quilters Of McHenry
Friday, September 25, 2015 10-6
Saturday, September 26, 2015 10-3
St. Elizabeth Ann Seton
Catholic Church
1023 McHenry Ave
Crystal Lake, Illinois 60014
Featuring:
~ Raffle Quilt
~ Special exhibits
Mickey Apron Co.
~ Silent Auction
~ Vendors
~ Quilt appraiser
~ Civil War Quilts
~ Over 250 Quilts on Display
We hope to see there!
For other local show dates, click on the header “Visit SewMod” at the top of the blog.
Our newest kit, Vintage Snowballs, combines Vintage Noel & Sugar Rush from Blend Fabrics in a snowball block design. A snowball block is one of the easiest blocks you’ll ever make. Not only is it simple, it’s a fabulous block to show off medium to large scale prints. It’s perfect for these fabrics!
You can easily see the Vintage Ornaments, Snow Globes & perfectly cute Gingerbread Houses!
To add some interest I wanted to separate the snowball blocks with a sashing and candy stripe cornerstones.
Then I carried that stripe out to the binding to tie everything together.
Let’s not forget about the backing…it deserves just as much attention to detail. When I have time, I like to use most of my scraps up on the backing. Just randomly pieced and flying by the seat of my pants is usually the way I roll with my backs. I think this one turned out great!
I didn’t stop there though. You know I love Christmas fabric!! So I made up a couple of cute Allie dogs too. This is a pattern by Bunny Hill that’s in the shop. So stinkin’ cute and simple. Ive made these in the past as package toppers for your favorite puppy lover, or ornaments hung from the tree.
I made one when Daisy came to live with us. Her puppy nestles every year in my Christmas tree. Puppy’s first ornament. Too add the extra touch of cuteness, head over to Petsmart and have a few dog tags made to adorn their necks.
If you’d like a Vintage Snowball Kit or the Allie Dog pattern, visit the SewModDesigns Etsy shop. Kit is $47.50 plus shipping. Quilt measures approx. 50″ x 59″ and comes with an instruction sheet, quilt top and binding fabrics. Backing and Batting NOT included.
I’ve had this pattern, Posh Tot by Blue Underground, for awhile. I even sell it in the shop but I’ve never gotten around to making it till now.
Only three different fabrics are needed for this quilt. I used a Kona pink, Riley Blake’s ‘Girl Crazy’ line and a pop of color in the square centers to make this modern baby quilt.
I did choose to make the binding from the ‘Girl Crazy’ stripe to make it a bit more interesting.
I love it when my projects can be completed within the day…at least my quilt tops that is. The directions are so easy, I barely had to give them a second glance. I would have been able to finish it all in one day, but I was going to leave the quilting magic up to Paige this time. The pattern comes with different sizes so I bet once you see how easy & fast Posh Tot is, you’ll wanna make more! Maybe even one for yourself:)
Posh Tot can be easily quilted in straight lines, a wavy serpentine stitch, or an all-over.
The kit comes complete with the Blue Underground pattern, quilt top, binding and backing. Batting NOT included.
My sample was made using the stripe and a solid but the kits are also available using the Girl Crazy main fabric in pink or white as the backing. Your choice!
The finished quilt measures 39″x49″ and the KITS are available in the SewModDesigns Etsy shop for $42.00 plus shipping.
So, get all Girl Crazy and make a special little girl a Posh Tot!


