
You are currently browsing Lorrie’s articles.

Author Archive
I received two Sarah Jane embroidery patterns from my mom for Christmas, Summer Flowers and On Parade.
![]()
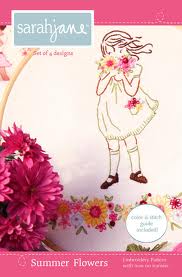
I finally found some in between time to sneak one in and I loved every minute of it. I like a pattern that has several stitches involved and I even learned a new one, which is always exciting.
Here’s Summer Flowers in all her beauty!

I framed it in the hoop and her new home will be proudly displayed in the SewMod bathroom.

The new stitch I learned was the Bullion Stitch. It’s the little bunches of roses that appear to pop off the fabric. Really easy. It’s basically a french knot except wrapped about 15-30 wraps. Once it’s pulled through the needle, the stitch lays curved to create the flower.

If I had a manicure, I’d show you with a little demo, but I don’t and I’m not about to torture you with that sight:) I promise I’ll work on that and do a mini embroidery session for you!
After I finish up the Parade embroidery, this is the one I want to do next, called Make It Do.
![]()
So cute! But before I get started on those, I’m going to be working on a special embroidery project for Paige. So be sure to check back next week for that!
Tomorrow I’ll be showing you some of the prints we recieved from Art Gallery this week and what I worked on during my weekly sewing day with some of the SewMod girls. See you then.
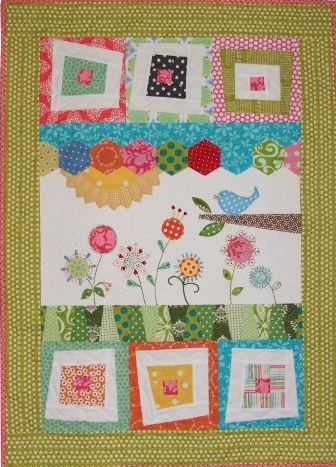
I made another weekend finish, Wonky Wildflowers. Have you ever seen anything soo dang cute!


I really enjoyed doing this. This pattern has many techniques in it that kept me interested. Embroidery of course, applique, both hand and machine, making the hexagons, and using the easy dresden to make all the wedges for the grass and the sun. The one thing I had never done was make the wonky log cabins. I saved them for last and as you can tell by this middle blue and pink one, my first attempt was a little not so wonky.

It’s more difficult than you think to make something not straight! I did let go and not be so uptight when it came to whacking off my edges and finally got the hang of it. But I did notice when I was finished that all my blocks tend to only wonk to one side:)
The only thing left to finish this up is the border. I spent all day Sunday hem hawing over which fabric to use. If you know me, that can be tedious. It has to be right or forget it. After all, I spent all that time and love making it. I’m not going to settle. I did really want to use something from my stash. I had one tiny scrap piece of fabric from the Favorites collection by Me And My Sister and it had to be that.

I had to order it. So I should be able to complete this adorable little wall hanging this week. Then of course the dreaded quilting..ugh! Let the whining begin:)
Can’t wait to show off the finished piece. That will be my motivation!
Next Wonky is…Wonky Winter.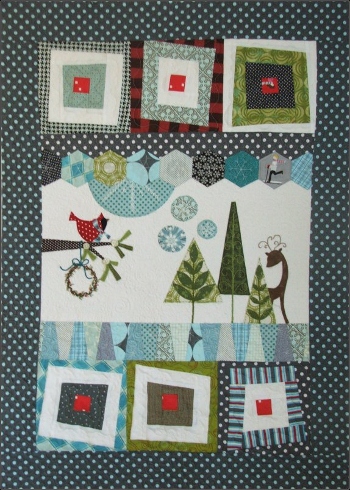
The SewMod group is going to tackle this as a sew-in project hopefully in March. This will be exciting to see all the different versions from our talented group. I already have an idea for mine!
The Wonky Wildflowers sample has been on my list of to-do’s so yesterday I got myself in the mood to make it happen.
I dragged out my 2 tubs of scraps, convinced I could make this entire quilt from what I already had. Scraps need homes too!

First up was to make the hexagon strip that separates the sun from the sky. Now, I’ve done many, many hexies so, I thought I’d give you a little how-to.There are lots of different ways to do these. Some with glue sticks, some with plastic templates and so on, but I’m going to just give you the way I prefer best after trying some of the other methods over the years.
1.) Trace the template provided on a sheet of regular copier paper.

Mine called for a 1-1/4″ hexie. The way to measure a hexagon is from point to point along one side as shown.

2.) After you’ve cut the paper templates out, gather your fabrics and cut at least a 1/4″ around on all sides of the template for easy turning. Use a small pin to secure the paper to the fabric.

3.) Either finger press or if it makes you feel more comfortable until you get the hang of it, iron down all the sides. Once you’ve mastered the hexies you’ll no longer need to iron.

4.) Thread your needle and make a small knot. Starting on one of the points work your way in and out around the hexagon and through the paper.

5.) It’s as easy as that! Hexagons are a great project to pre-cut, stash in a small bag and take with you while your waiting for the kids or to take on a trip!

6.) To attach the hexagons, layer right sides together and whip stitch, grabbing just enough fabric to keep them together, but not going through the paper this time.

Tiny whip stitches make all the difference to make sure your stitching is barely visible from the front. Practice, practice:)
7.) Once your hexagons are attached to one another, clip the threads and release the paper. Iron back into shape.

And here’s the progress I’ve made so far. Hopefully this weekend I’ll have the embroidery done and on my way to another finish!

Have a great weekend everyone!
As promised a little show ‘n’ tell of what I’ve been busy with this week. This quilt only took me a about an hour to get together and it turned out just adorable for a little boy.I made it from the Hootie & Friends pattern that we have but left off the applique. Super easy!

I added an orange flange to separate the charm squares and keep the outer border from blending in and I’m going to use the same fabric for the binding. I do believe it adds just the right amount of pop to the quilt. Isn’t that border fabric just the cutest? I can’t wait till Paige gets it quilted so I can show you the finished quilt. We’ll be taking these kits with us to the Pride of the Prairie Quilt Show in March.

I spent some time with Shelley over at Elsie’s Girl this week and worked on a couple of pot holder samples from this pattern.

Very fast, easy and turned out pretty darn cute!


Sorry for the lack of blogging. Last week I was a little under the weather. Had a bit of a cold that really left me drained. I did do some work though. I finished the binding on a quilt top that I brought home from my mom’s when I was home for Christmas. She hand appliqued this entire quilt in scrappy 30’s prints. Paige was generous enough to quilt the top and and now it’s on it’s way back to OKC.


This Sunday was our SewMod Sew-In and I have to share with you the desserts we snacked on. Pattie is our talented cookie maker. Delish! Beautifully decorated and always tastes sooo yummy. Pattie, if you were missing a couple when you got home, Russell said he snagged 3 of them! I can’t really blame him though:) Vicki brought the cute little Lemon Tarts and the fabulous Valentine Cheesecakes.

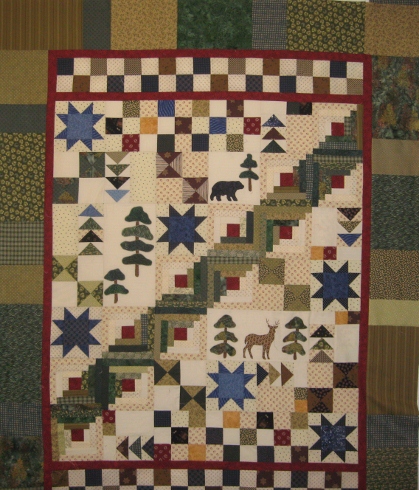
We’ve also been working on a commission quilt for one of Paige’s friends. A real outdoorsy, cabin quilt. Lots of greens, browns, blues and reds and some appliqued forest friends. We finished that project up during our Sew-In.

We all made pretty good progress on our projects. This weeks to-do’s are a baby quilt to be kitted with the BackYard Baby line and potholder samples for an upcoming show. So be sure to check back later for those pics. Here’s hoping everyone has a great sewing week!

Oval Elements & Bespoken from Art Gallery, Secret Garden and a new fabric from Blend stacked to make a warm and fun bundle. Half yard bundle was $22.13, now 15% off $18.81.
Bolts from the new company Blend arrived in the shop. Ric Rac’s from Kitchy Kitchen. I don’t think I’ve ever felt such soft cotton before. I love this company and they’re quality!


And this bundle called Calypso. I’m lovin’ these stripes!

All of these are available in the Etsy shop!
I’m a lucky girl! I sent my mom the supplies to make this envelope by CrabApple Hill, which I had every intention of making at some point in my life. I guess I got tired on waiting on me and she’s so darned good at it. I love wool items but I just can’t bring myself to enjoy Thank goodness she picks up my slack and completes them for me!
I don’t know how else to describe it but beautiful!

Lots of embroidery and beading on it. Intricate work between all of the cutting, attaching rick rack, and buttons.

It’s pretty big. It measures 9″ x 15″ and holds everything you’d need for a trip, which is perfect for me! A place for scissors, a pen, needles. It has an envelope inside for a small notepad or your flosses. It even has a pincushion.

A this is so clever…the needle case is detachable for smaller projects.

And mom, if you’re wondering what I’ll be sending home next for you to work on, I’ve already got something picked out! I just can’t help myself.
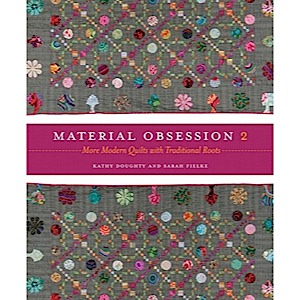
During Christmas break Paige and I decided to do something totally un-work related and for ourselves. So we picked a day and a project...The Seasons, from the book Material Obsession 2. I love both book 1 & 2. Lot’s of inspiring works of art. We love how she takes traditional ideas and uses modern fabrics to bring new life to quilts and projects.

We chose to do a season each instead of the whole quilt so that both of us would have a little wall hanging of our work. I made summer. But we decided that we liked Night & Day for our quilts instead of Summer & Winter.

I found the perfect background in my stash, cute little birdies! And I’d have to say some pretty perfect grass! I added some little crochet flowers and green embroidery to spruce it up. I even added french knots in the border along some of the orange flowers.

Most of my fabrics were Central Park & Fandango by Kate Spain. I made the tree leaves from just a charm pack. And trees can’t grow without sunshine, right?

Paige chose winter for her project. Deep, rich colors with a winters night background. p.s., don’t mind the wobbly binding. It’s pinned on. Ran outta time:(

She added a wool black kitty. He’s out for his evening stroll.

I wish the camera picked up all the beading she added to her quilt. It’s along the grass line, the kitty’s eyes, and in the leaves.

This project was a lot of fun & would make a really fun class for a quilt shop. We used the Easy Dresden tool instead of the paper template. We had it completed and the leaves appliqued in just one sewing day!
Thanks for all the kind and encouraging comments left for the Celebration Giveaway! We really appreciate every one of our customers and blog followers. Random.Org picked #44.
Your the lucky girl Melanie!
Just found your shop and love your fabrics. congratulations on your anniversary! Hope to win some fabric.
Melanie
Congratulations!
Snips and snails and puppy dog tails. That’s what little boys are made of! At least mine was. I think I’ve mentioned before that Russell had a tub of toy snakes, worms, beetles, and critters. He would take them outside, play with them in the dirt or arrange them in the house.
This new line from Michael Miller reminds me of those times long ago when the creepy critters, which he called “buggas”, kept him entertained. Now it’s girls, hanging with friends and video games…oh, the teenage years. It was so much easier when he brought bugs home:)

The bug jars are my fave from this line.

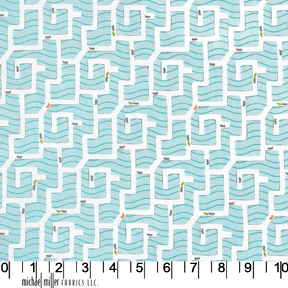
I’m also loving this cute ant maze. We tried that once. Didn’t end well for the ants.
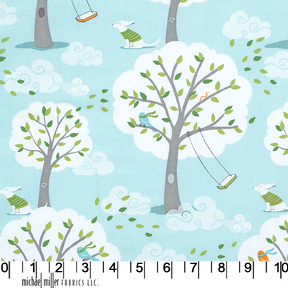
This one is backordered and I can’t wait to get it in. Look for it to come in a couple of weeks, called Windy Day.
Patterns also arrived this week. Several from Bee In My Bonnet, Lori Holt.


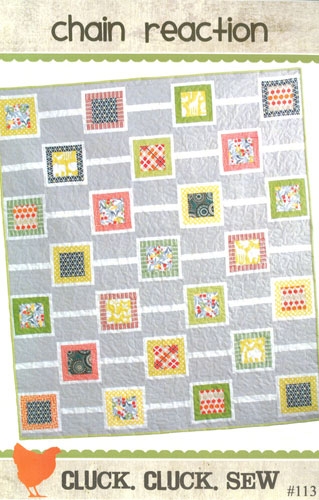
And these from Cluck, Cluck Sew.

All of these and much more are on SewModDesigns & Etsy. More pics and patterns are available on FaceBook if you’d like a peek. And don’t forget, today is the last day to sign up for the giveaway. Tell all your friends!
Have a great weekend!


