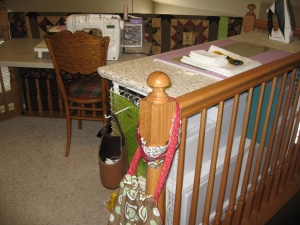
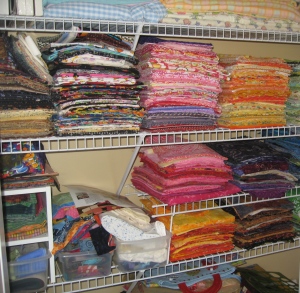
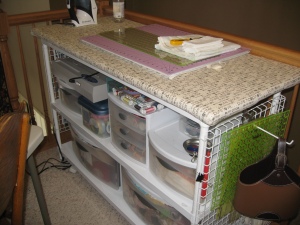
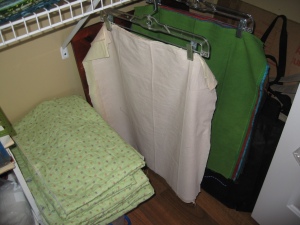
I went from this………

To this……….

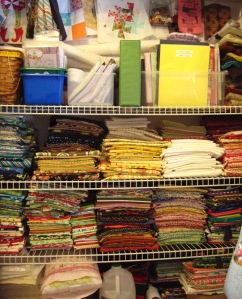
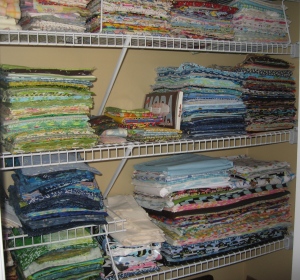
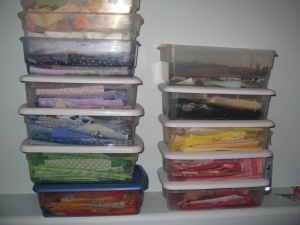
I cut all my scraps into usable sizes, 5″ and 2-1/2″ squares. I decided on this because I seem to use these the most and these sizes will still allow me to use these as applique scraps.

I thought a lot about this and knew I would have a considerable amount of waste. But what’s even more wasteful is the fact that I’d collected all these scraps and wouldn’t even open the bin because it was so unorganized and overflowing. It was too overwhelming to go through. At least now I can see what I have.

I bought a container at Joann’s but ideally I want to make a trip to the Container Store for a better one because I think I would prefer to not only have the squares organized by size but also color. If I need a red square for applique, I would know exactly where it is. But this will have to do for now.

Someone told me once to save all of my extra bindings and if I was to ever make a scrap quilt, I could just sew them all together. You wouldn’t believe how many strips of those I had.

And if there is any doubt that a scrap quilt can be amazingly awesome, just check out the one my mom made from her scraps a few years ago.

A couple years ago I designed this quilt journal for a machine quilting class I taught at Quilt in Joy and thought I’d share it with you as your next free motion quilting challenge. It is a great project to document the quilting doodles you’ve learn thus far in my tutorials and to learn a few more filler designs.

You will need the following supplies:

  • Sewing machine in good working order with attachable table and ability to drop feed dogs.
  • (6) @12”-14″ square quilt sandwiches
    -For the first page/sandwich choose a large print
    -For the remaining choose a solid, marble, or subtle monochromatic patterned fabrics with a cohesiveness will work nicely.
    *I used a variety of batiks and majority of the sandwiches I used the same batik on the front and back.
  • Cotton Batting
    *I chose Warm & Natural batting.
  • 40-50wt Cotton or Cotton/Poly contrasting top thread and 50wt matching bobbin thread.
    *I used Superior King Tut Variegated for more fun and impact and Master Piece in the bobbin! My machine likes this combo.
  • Topstitch or machine quilting needles (extras in case one breaks). I use 90/14 size with the King Tut thread.
  • 2-3 bobbins
  • Darning or free-motion foot
  • Blue washout quilting marker and/or chalk marker
  • Safety pins for basting – you will only need to use 4-6 pins per sandwich
  • Scissors & Pinking Shears
  • Notebook and pen/pencil for doodling practice
  • Optional: Quilting Gloves, rubber finger tips

Today’s post we will work on Pages 1 & 2 which are using the techniques you learned in Parts 1-5. Don’t worry about finishing off the edges of the sandwiches yet like in my pictures we will address that step in the last post in this series.

Page 1:

Begin with your large print basted sandwich and free motion quilt around the design similar to the project we did in Part 5: Doodling with a Purpose.  Have fun and let loose. Fill in the pattern to enhance the design – here I added tiny loops in the center of the sunflowers which provide a distinct texture from the petals.

Page 2:

On this page you will set up the sandwich with horizontal lines same as in Part 3: Doodle Sandwiches and quilt it with the doodles practiced in Part 4: Doodling on Fabric. Use the layout in the image below for a guide you are welcome to fill the space with your favorite fillers… this journal will be a great reference tool when you are quilting an actual quilt!

Happy doodling!

First we would like to say thank you to all the peeps who left kind comments! We do truly appreciate you!

http://www.random.org picked #4

Jeanne

Woo Hoo a giveaway! I must confess I actually like this block ALOT and have never understand why you weren’t happy with it. I really like the blue background because the stitching shows up on it really well.


Congratulations Jeanne!!

I know… it’s Thursday. But tomorrow is the big day for the pillow giveaway, so I thought I’d move Fabric Friday up a day.

As some of y’all know, I began working at the LQS, Quilt In Joy, earlier this year.

It’s a great quilt store specializing in Batiks and Brights. They carry a lot of novelty prints as well as a good color wall.

I asked Kathi, the store owner, if I could feature some of our new lines on the blog, and she thought that was a great idea!

The line I’m working with this week for the store sample is Beetle Boy. Cute little “buggas” all over it….that’s what my son used to call them when he was “bitty”.

This pattern is called Beetle Boy and is available here as a freebie from Clothworks. The store also has several kits for these if anyone is interested. I made this in 1 day!

Love those giant appliqued bugs! My son would have loved this quilt when he was little. He had a giant tub of bugs and snakes. He used to arrange them in rows and play with them.

We even had a bugga birthday party!

I decided to tackle the overflowing scrap bin and it has taken me longer than I anticipated. I swear, every time I’d grab a handful of fabric from it, it would get bigger. I guess it was so compacted that i didn’t realize how much was actually in it.

This is what I’m working with….

What a mess, huh? So, I’m going to give myself a couple of more days to work on this. I’m almost there.

I would like to share something I’ve been working on with you. I began working at the LQS and was asked to make a sample for an applique class I might be teaching in April. I came up with a cute little design for a wall hanging. I used “It’s a Hoot” charm pack for this and a linen looking background. I seem to have a thing for turquoise lately.

I’ve never had to do something like this before and I didn’t want to disappoint and I think that’s when things start to go wrong. I didn’t trust my instincts that I’m good at this and was forcing my process.

It’s definitely not my best work and had many “issues”.  I’m not a quitter though. I know that my next project will be better and I’ll find my confidence.  I’m working on a cute bug quilt for a store sample that I hope to show ya’ll later this week.

I’m very excited to be a part of a team again!

The last month has been stressful finding out my uncle Bobby (and godfather) had pancreatic cancer and now with his passing last Sunday our family has gotten really small. When someone close passes you realize you never spent enough time with that person and how short and precious life is. Be sure to slow down and find time for the people in your life that really matter!

By the way, he was a huge Packer fan so I wasn’t too crushed they beat the Bears today…I think they had a little help from above! :) 

So, since I didn’t have time to pull together a machine quilting tutorial I pulled together some quilts I quilted. Enjoy.

This is my first run at McTavishing!

I saved this dresden top from a resale shop and practiced echo quilting and feather circles – I luv this quilt!

These hand sewn basket squares were set in a 1″ bright green sashing and tied with green polyester yarn. I had to save the quilt, the blocks had so much potential. I found the perfect green fabric and used various colored fabrics around each block. Then used a thin black border to provide impact and to distract the eye from the different sized baskets -there was a 2″ difference between the smallest and largest blocks. I’m pleased with how it turned out. This was the first quilt I quilted on the Gammill almost 4 years ago.

Sun rays are fun to free motion quilt…

This was a giant queen size quilt. I used a tracing of a template in the light areas and free motion waves in the star. Wool batting which has a higher loft gave the quilting a more dramatic impact.

Rest in peace Bobby…and go Packers!

It’s our 1st giveaway! This is so exciting!

I decided to turn the turquoise Birdie Stitches Block 1 that I’m not using into a giveaway for the blog.

The giveaway runs from Thursday, January 20th through Thursday, January 27th. I’ll announce the winner on Friday the 28th. All you need to do is leave a comment on this post and please make sure your email address is also attached to the comment so we can notify you.

I also decided to include a skein of embroidery thread that I purchased from the crochet4u2dye4 Etsy shop. I used these threads to make his earmuffs and scarf. I hope you love them as much as I do!

Be sure and tell all your friends and check back next Friday for the winner!

I finished block 1 of the Birdie Stitches BOM. These fabrics are sooo cute!

Originally, I had done this in the turquoise background, but the longer I looked at it, I knew it was too overpowering.

This time I used Moda’s Grunge in white. I like this version much better. I do wish I’d done the snowman in a darker pink and when all is said and done, I’m sure this block will be on its 3rd version. I’m just that way. I want it perfect!

I did a cluster of french knots in his earmuff and a fringed scarf.  I used a hand dyed variegated floss for the scarf and earmuff. I found an awesome store on Etsy that dyes all their threads and flosses. Its crochet4u2dye4. They sell embroidery and crochet threads. Check it out! You won’t be disappointed in the variety they have.


As some of you know, I use my loft space as my sewing room. Sure, it’s small but I’ve grown accustomed to the spot and I’m not sure I would be happy sewing anywhere else in my house. In order to keep my sanity though, I’ve got to be organized and I can’t keep too much of a stash on hand, so I try to use what I buy.

What little fabric I have, I organize by color, unless I’m not ready to break up the line just yet. I wish I had a “before” pic of this closet. Every time I’d open it, stuff fell at my feet. Embarrassing…yes! Paige suggested organizing by color and folding flatter than the fat quarters to optimize my space and be able to find things faster. I gotta tell ya…I’m loving it!

I bought a big binder and added these clear pocket liners to keep track of all my loose papers and patterns.

I built an ironing table with the help of the Container Store. It has a heavy board about 2 yards long as the top. I covered it with batting and then decorator weight fabric for the ironing surface. I bought a June Tailor Quilting Square from Joann’s and glued a cutting mat on the back of it to use as my cutting surface on top of the ironing table.

The bottom has container storage which houses a giant, annoying, unbearable to look in, overflowing, and I don’t dare open scrap bin, precuts, trims, supplies, to-do and current projects.

This used to be a batting covered board propped up against the wall. I would bump into it, the dogs would knock it over and it was just plain ugly. I had a neighbor frame it and we hung it on the wall. One of the best things I did for this tiny space.

*******

A visit to Paige’s sewing room….

Paige has an amazing workspace in her basement. Lots of natural light and open spaces. A large wall space that will soon be her design wall. and a double closet for all her fabric. Let’s take a tour…

This is her new work table. A huge table top with lots of cabinet storage underneath.

She keeps a lot of her supplies stored in these blue boxes, like buttons and marking tools.

She organizes her to-do projects in basket cubbies.

Her fabric closets are also organized by color.

Hanging your  “waiting to be quilted” projects or these hand dyed fabrics  from hangers is a great idea.

And I gotta say, her scrap bins are way more organized than mine.

I think I’ll go organize my scrap bin now…ugh:(

Happy Monday!

I can already hear the moans out there:) But if you’re one of the lucky ones who get the day off, it’s the perfect opportunity to get something done. I’m a big believer in any task, small or large, that you can accomplish in the day is rewarding. It makes us feel good. It’s satisfying and always makes me geared up to take on the next task.

Our SewMod group had 1 year to make 7 rows, each of them different, for each member in the group. Each of us provided a fat quarter for focus and we took off from there.  For example, I made stars for Andrea from her fabric, dresdens for Shelley from hers…etc. In the end we will each have a completed quilt. I know, it’s a little confusing. It took me forever to figure it out.

We do our row swap in just 2 short weeks at our monthly meeting.

So, I’m using today’s post to encourage any of the group who haven’t finished to git”r”done!

Here’s a few of the girls’ rows completed so far.

Aren’t they awesome! Their creativity amazes me and I’m ever so honored that I was invited into this group. It’s literally changed my life….but more on that subject at a later date:)…. I know, the suspense will kill you, won’t it?:))

I can’t wait to show you my completed rows in a couple of weeks. My focus fabric is Halloween!

Enter your email address to follow this blog and receive notifications of new posts by email.

Email Address:

MineCraft Tutorial

Crayon Embroidery Tutorial

Machine Binding Tutorial

Blog Archive