
You are currently browsing the category archive for the ‘Tutorials’ category.

Category Archive
Paige and I spent last Thursday evening vending at a local guild in Algonquin, IL. We did a little intro about what our shop was about, demonstrated how to use the Easy Dresden tool by Darlene Zimmerman, and gave a trunk show with all of the quilts we have made in the past year. We had a great time and we’d like to thank all of the ladies who welcomed us into their guild!
Since we are so Dresden happy, a demo on the Easy Dresden tool was just that, easy! I’d like to also share with you the steps to make one and also provide a refresher just in case some of the ladies from the meeting visit the blog.
This is the Easy Dresden, which can be found at your local quilt shop.
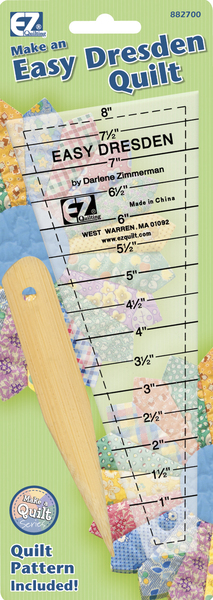
First, you’re going to want to determine what size you want your Dresden to be and cut a strip of fabric to that width. For example, if you’d like a 5″ Dresden, cut a 5″ wide strip of fabric. The Dresden I’m working with today is 8″, so I cut an 8 inch strip of fabric.
Start cutting your wedges from the strip by alternating the tool. This will cut down on any waste from your fabric.

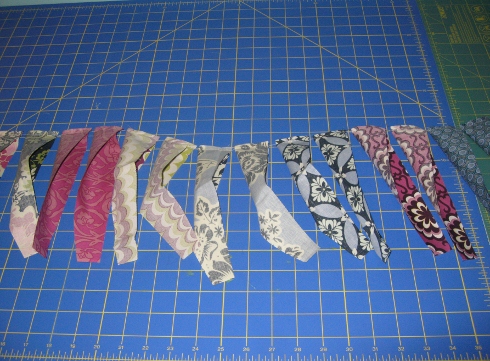
Take your cut wedge and fold it lengthwise, right sides together and sew using a 1/4″ seam allowance, begin sewing at the widest end.
Chain piece all your wedges.
Clip your corner, being careful not to cut too close to your seam.

Turn the wedge right side out. Use the turning tool provided to turn out your point. Don’t push too hard. You don’t want to push your stitches through.

Press the wedge flat, making sure the seam is pressed open. This helps remove some of the bulk.

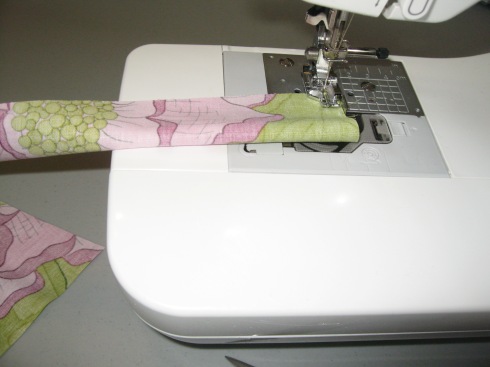
Sew the wedges, right sides together to begin making your plate. Always start from the widest part and work your way down. A tip to hide all of the loose threads, is to start 1/4″ down, reverse your way back up to the beginning, and continue to sew down the side of the wedge.

Press in one direction, careful not to stretch your plate.
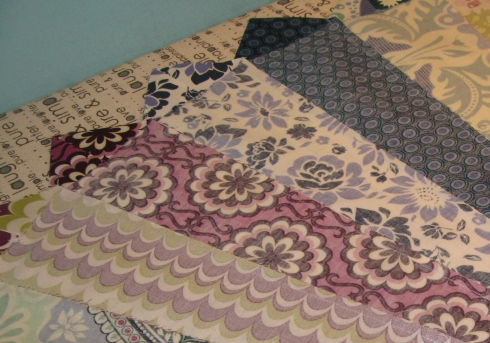
I find it best to sew the Dresden together in sections. For example, our Dresden has 20 wedges. I sew 10 each together to make 2 halves and then sew the 2 halves together to make a Dresden.
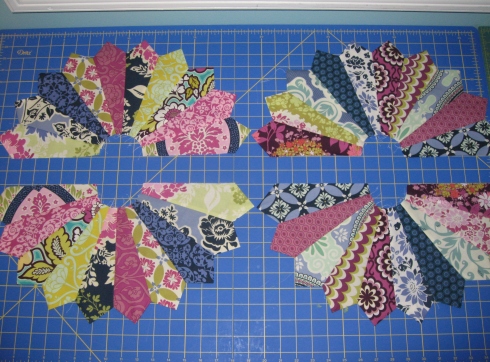
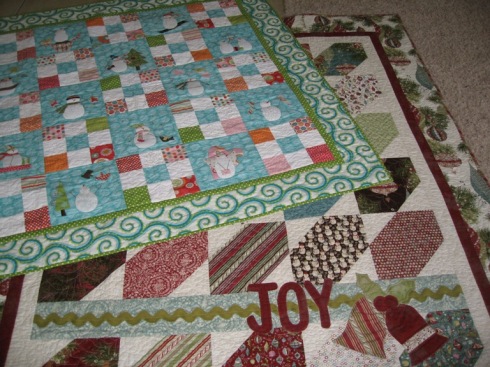
Here are some examples of Dresdens that we have made using this Easy Dresden tool and this technique. This is our new Christmas Dresden Table Runner made from our SewMod pattern called North Garden. It’s made with 8″ wedges. This kit is now available in the Etsy shop. Just in time to get started on some of those Christmas Projects. We used the new Tinsel line by Maude Asbury for Blend fabrics and the kit comes with the free pattern!

The corner Dresdens on the Cannon Beach pattern…

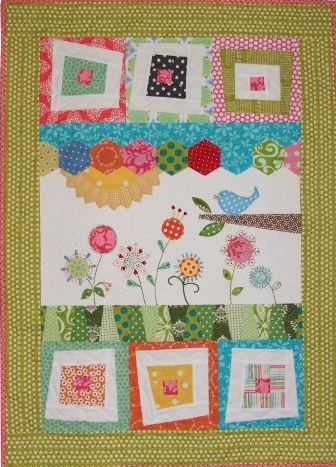
I used a 2-1/2″ wide blade for the “grass” wedges on my Wonky Wildflowers wall hanging.

And instead of using the template provided for the this quilt, I made it easier by using the Easy Dresden tool. Neither the Wonky Wildflowers or this quilt required a pointed blade. The “grass” was sewn into the seam and the “tree” blades edges were turned under using hand applique.

And last, Paige’s sewing machine cover…

I hope our Demo has inspired you to make a Dresden. It really is that easy!
The Wonky Wildflowers sample has been on my list of to-do’s so yesterday I got myself in the mood to make it happen.
I dragged out my 2 tubs of scraps, convinced I could make this entire quilt from what I already had. Scraps need homes too!

First up was to make the hexagon strip that separates the sun from the sky. Now, I’ve done many, many hexies so, I thought I’d give you a little how-to.There are lots of different ways to do these. Some with glue sticks, some with plastic templates and so on, but I’m going to just give you the way I prefer best after trying some of the other methods over the years.
1.) Trace the template provided on a sheet of regular copier paper.

Mine called for a 1-1/4″ hexie. The way to measure a hexagon is from point to point along one side as shown.

2.) After you’ve cut the paper templates out, gather your fabrics and cut at least a 1/4″ around on all sides of the template for easy turning. Use a small pin to secure the paper to the fabric.

3.) Either finger press or if it makes you feel more comfortable until you get the hang of it, iron down all the sides. Once you’ve mastered the hexies you’ll no longer need to iron.

4.) Thread your needle and make a small knot. Starting on one of the points work your way in and out around the hexagon and through the paper.

5.) It’s as easy as that! Hexagons are a great project to pre-cut, stash in a small bag and take with you while your waiting for the kids or to take on a trip!

6.) To attach the hexagons, layer right sides together and whip stitch, grabbing just enough fabric to keep them together, but not going through the paper this time.

Tiny whip stitches make all the difference to make sure your stitching is barely visible from the front. Practice, practice:)
7.) Once your hexagons are attached to one another, clip the threads and release the paper. Iron back into shape.

And here’s the progress I’ve made so far. Hopefully this weekend I’ll have the embroidery done and on my way to another finish!

Have a great weekend everyone!
These scarves are sooo easy, and the best thing…. is that you get to use more of those scraps!
Supplies:
Scrap pieces of fabric
½ yard linen
Thread & basic sewing supplies
Pieces are sewn using ¼” seams.
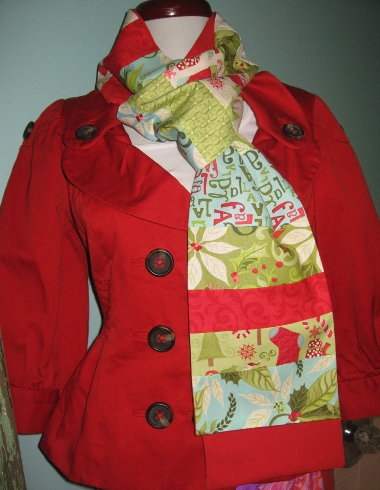
The fun part is gathering your fabrics. I chose Kate Spain’s 12 Days of Christmas fabrics and a red linen background which I bought on sale at Joann’s. I like the linen because it gives the scarf a nice weight to it.

Cut your fabric scraps into 2” to 4-1/2 inch wide x 7” long. The number of pieces you cut will be determined by how long you want your scarf to be. I stopped cutting when my scarf came out to be approx. 87” long.

Cut your linen into (2) 7” strips WOF. Sew them, right sides together on one of the short ends. Press the seam open, set aside.

After you’ve arranged your scrappy pieces to your liking, sew them, right sides together in a row.

Iron all your seams in one direction.

Measure your pieced scarf and cut your linen to that measurement. With right sides together, pin the scarf to the linen. Pin well, all the way around. Linen tends to slide a bit.

Place the pieced side up under your machine. This will help you see and keep all those seams gpoing in one direction. Starting at the beginning of one side and working your way around, sew the scarf to the linen. Leave one end open for turning.

Clip your corners on the sewn end.

Turn your scarf inside out and press. Turn the seams under at the open end. Press and whip stitch closed.

Enjoy your new scarf!
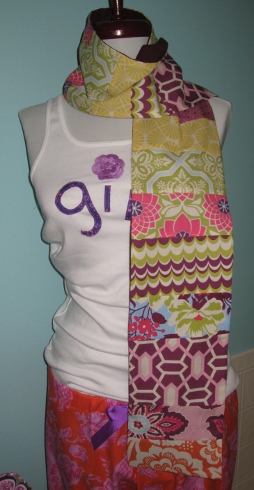
Here’s one I made using Joel Dewberry’s Heirloom line. I used plum linen on the back of it.

I think it’s time to hit the gym. My dress forms shouldn’t look better than I do in my own clothes!
**UPDATE 5/1/15 To make the coffee cozy without embroidery stitches and view the updated tutorial click here.
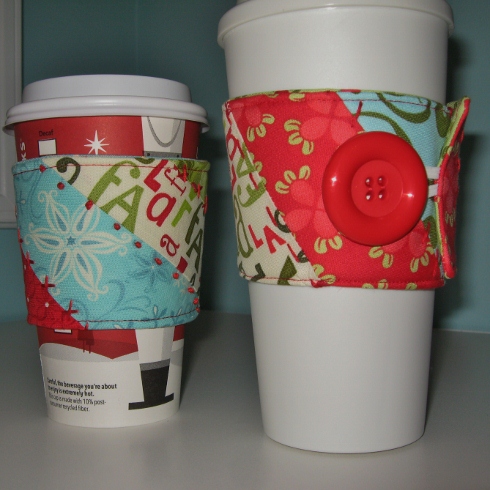
Welcome back to Handmade Holidays on Friday! We’ve got just the project to keep you busy this weekend. Coffee sleeves and cozy’s to fit your favorite cup or mug. Or maybe you have someone you’d like to give this to as a gift,… a teacher, a neighbor, or your favorite coffee lover?
We’ve made this sleeve unique by adding simple embroidery stitches to the seams. If you prefer not to embroidery, that’s fine too. Embellish any way you like. Have fun with it by making it your own!
This pattern fits a Starbucks disposable coffee cup. We’ve also made one to fit an Eco-friendly one as well. If you’re making the Eco-friendly sleeve, add 1/2″ seam allowance all the way around the pattern lines.
You will need….
Pattern
7 to 8 scrap fabrics varying in width from 1-1/2″ to 3-1/2″ and approx. 13″ long
Fabric for the backing
Scrap piece of batting
Elastic hair tie, Button and Embroidery floss
Let’s begin!
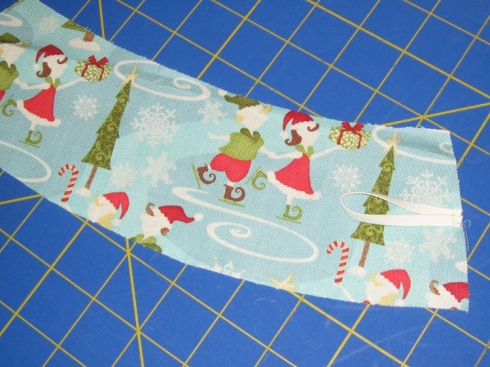
Cut your fabrics into strips and sew them with right sides together as shown.
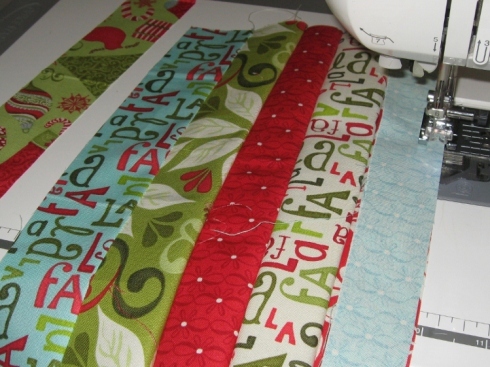
Press all your seams in one direction. Layer your batting and then your pieced fabric with right side up.

Place your pattern on top and position it on the fabric at a diagonal. Pin. Cut the fabric and batting using your pattern as the guide.
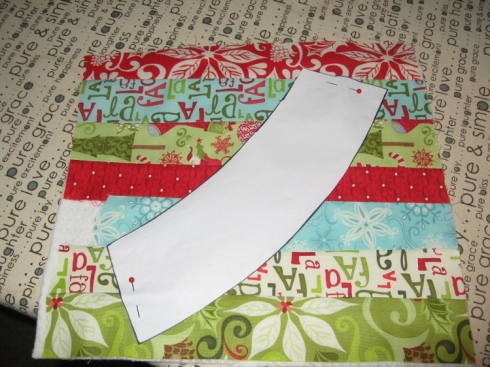
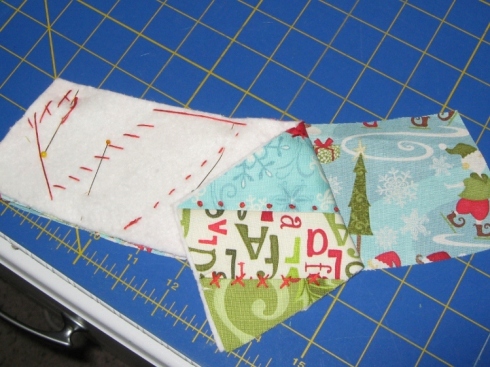
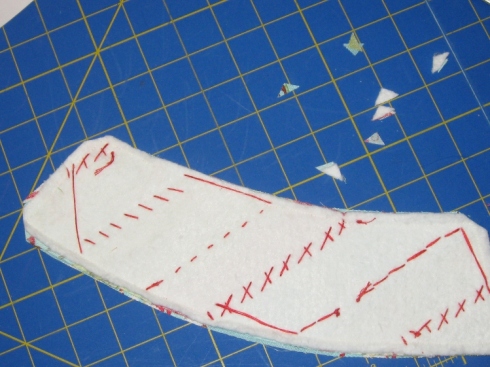
Keeping your cut pieces layered and using 4 strands of floss, embroider on top or close to all your sewn seams. I used a french knot, whip stitch, and back stitch. We’ve added a few helpful stitch guides on the pattern for you. Be Creative!
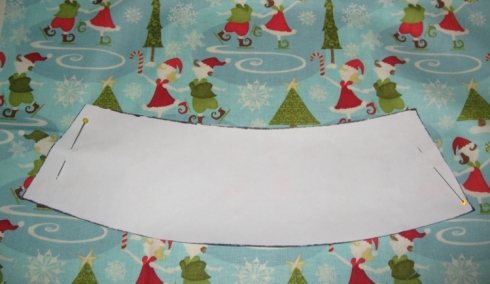
Cut out your backing fabric by placing the pattern facing down on the right side of your fabric.
Place elastic tie as shown with the loop facing toward the sleeve and on the right side of fabric. Sew across to secure.
Layer your embroidered fabric piece and the backing right sides together and pin.
Using a scant 1/4″ seam, sew around the sleeve, leaving a 3″ opening for turning.
Clip the corners and turn right side out. Making sure to push your corners out.
Iron flat. Top stitch around the sleeve to secure the opening.
With your sleeve positioned on your cup, mark the button placement, making sure that its snug.
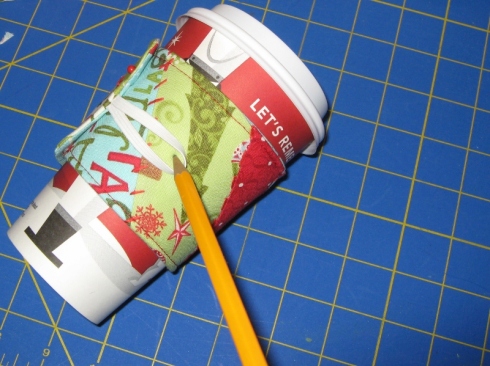
Sew on your button and you’re finished! Now, go show off your hard work! Or, place a gift card inside the Eco-friendly cup and you’re one present ahead of the season:)
If your interested in crocheting a mug cozy and coffee sleeve, we found a couple on these links..cozy & sleeve
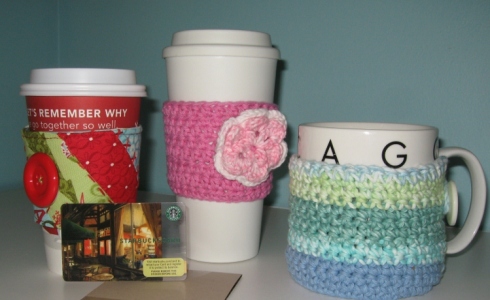
My mom was gracious enough to demo those out for us. They turned out so cute. She added the big flower on the pink one. Be creative and add something special of your own. Maybe a crocheted stocking since it’s Christmas. There are lots of free crochet patterns out there. I love the mug cozy too because I can still read the Chicago around the rim and it’s made in our favorite colors here at SewMod…blue and green!
I hope you’ve enjoyed our tutorial this week. Have a great weekend everyone and try to stay warm!
I’m sure some of you noticed the free patterns/tutorials button at the top of the blog. We also have a tab for that on sewmoddesigns.com if you happen to be on that site too. Over the next few months we are going to try to load some extras on there for you. What better thing to start off with than Halloween!
Paige drew up a spooky house

And I thought I’d add retro kitty to a giant pumpkin. She’s so sassy, isn’t she?

I usually cross stitch something for Halloween but didn’t have time this year. I’ll show you some of those projects next week. Embroidery work is so much faster for me to get done. So, to get my Halloween fix on this year, I added retro kitty to a tea towel and used giant rick rack to embellish the bottom.
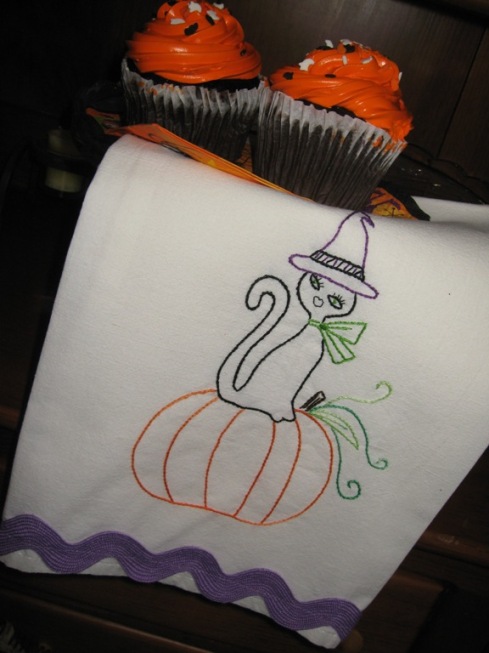
Now for my reward…the cupcake!
I’ve been trying to get some of my bindings done over the last few days. I don’t like to have something unfinished. It haunts me:) I had a couple of the Christmas quilts left. One of them was the Fruitcake quilt with blue marker on it. As much as I wanted to throw it away and forget it ever happened, I just couldn’t do it.
Now, I’m a firm believer in hand stitching your binding to the back and take great pride in how my stitches are buried. My mom taught me well! The first quilt I made, I whip stitched and quickly learned that was not the “proper” way to hand stitch binding down.
No way am I going to spend hours hand stitching this quilt. In some instances, I can accept where it’s appropriate to machine stitch the bindings. A seasonal wall hanging, a table runner, place mats, even a kids quilt that will be repeatedly washed, or…….. a ruined quilt.
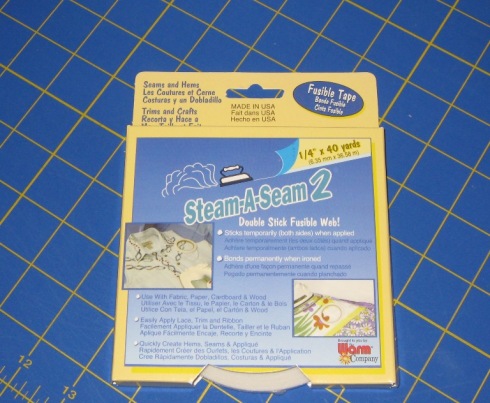
Vicki, over at Accio Fabric, gave the SewMod girls a tutorial on quick binding with Steam-a-Seam. I had never done this before and found it kinda fun. It took the pressure off hand binding all those extra items. I thought I’d share it with you.
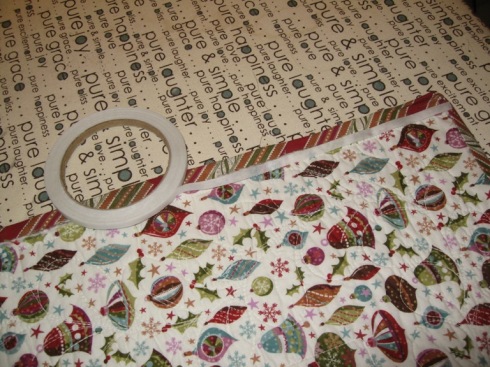
It’s Steam-a-Seam 1/4 ” double stick fusible web, available at Joann’s.
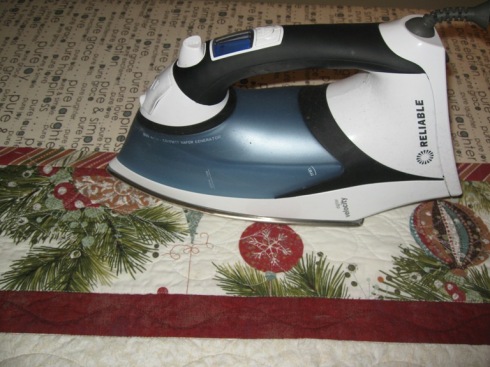
Attach your binding the way you normally do. **My bindings are cut at 2-1/8″ to 2-1/4″. This is an even distribution on binding on the front and back and allows you to just catch the back binding while using this machine binding technique.** After the binding is sewn down, iron your binding flat. This helps you pull it around to the other side. BTW, this is the best iron ever! I didn’t think anything could ever replace my Maytag cordless iron but this Reliable iron is sooo awesome!
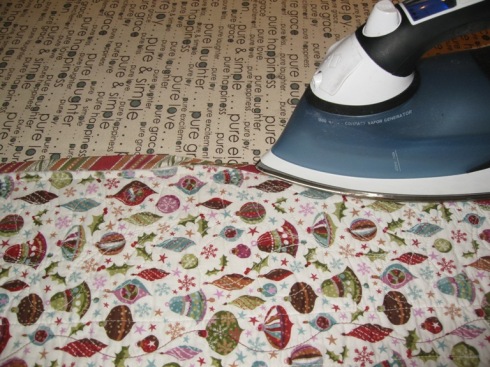
Turn the quilt to the wrong side. Cut a strip of the Steam-a-Seam the length of one side of your quilt and begin pressing it along the 1/4″ seam that you created while sewing your binding on. Make sure it’s sticky web side down and paper side up.
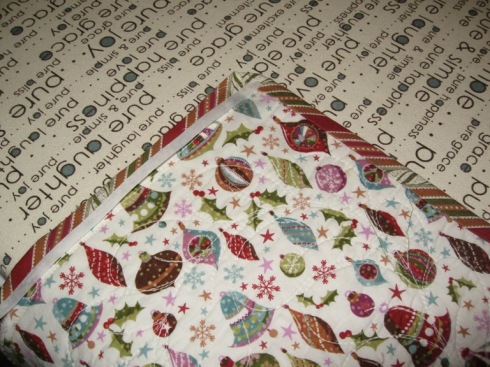
Working one side at a time, peel the paper side off the strip and press your binding around to the back of the quilt. Make sure the binding is overlapping your 1/4″ binding seam.
Now do the next side, working your way around the entire quilt. Tip: Don’t go all the way to edge of the binding when attaching this next strip like you did the 1st strip because your mitered binding wont cover the Steam a Seam and you will be left with a sticky residue at the corner. Go in just enough to “catch” the corner.
Using an open toed foot and matching thread, stitch into the “ditch” on the front side of your quilt. Go slowly grasshopper…it does require concentration to stay in that ditch.

You will always catch the backing with this method. Here’s a view of the Snowbound binding I attached using this method.
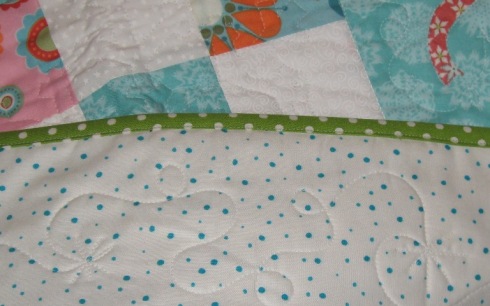
And your done in a fraction of the time it took to hand stitch!
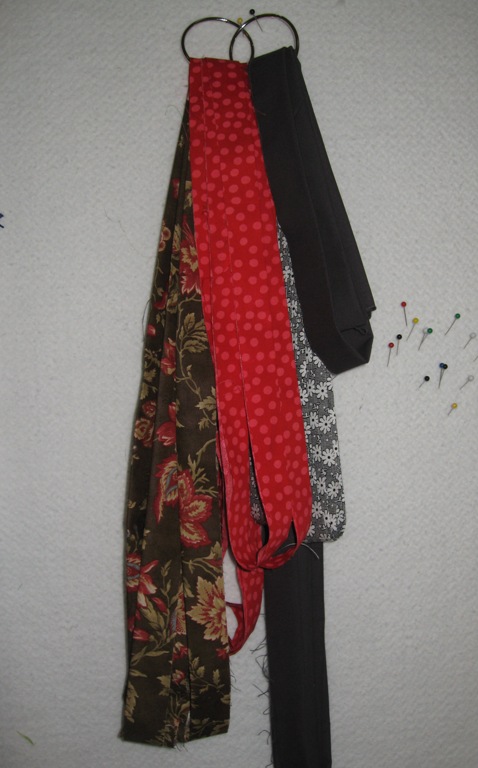
Another tip to speedy binding…always cut your binding right after you finish your quilt top. That way there’s no procrastination when it’s time to sew it on. I keep all my binding hanging in my sewing room. I told my mom-in-law that if something should ever happen to me, she could just count the binding hanging on the clasp and she would know how many quilt tops I have in the closet or at the quilter:)
Page 5 of Journal: (for Pages 1-4 click here)
This journal page we will be filling in a defined space like a 1/2 square (or triangle) which is very commonly used in block designs.
Set up the sandwich with a vertical and horizontal line to create a 4-patch then in Square 1 & 4 add a second line to create an “X” in the square as in my sample below.
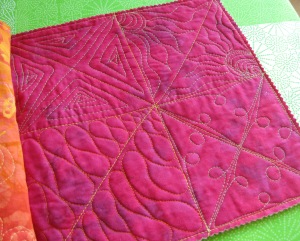
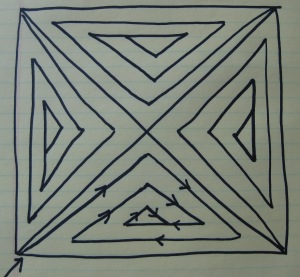
The following images can be printed then placed under a white sheet of paper to practice, I used a heavy black marker so it would show through.
Square 1 – Spiral Lines –Starting with the bottom left corner sew a line somewhat paralleling the seam line to just below the top point of the triangle then down paralleling the right seam line but not all the way into the corner and move back left continuing to spiral into the center finishing with a small triangle. The goal here is to create equal spacing as you spiral inward so you end up with the small triangle fairly centered. Use your seam lines as visual guides for spacing and line straightness.
You can use this technique in large 1-piece square blocks if your challenged with filling a large blocked space. (Beginners -try using this on a Yellow Brick Road pattern!)
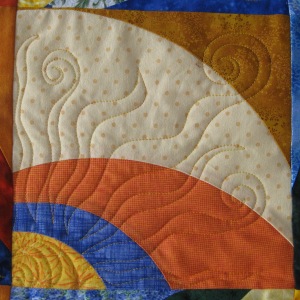
Square 2 – Sunburst – Start at the right angle corner of the triangle here I started at the bottom right with a tear drop shape echoed multiple times (or clam shell design) same as in Page 3 Square 2 tutorial. Echo out about 5 times or however many times needed to produce the center of a sun. As you move outward start rounding the curves a bit so your sun center doesn’t get elongated in shape.
Once your sun center is done, without stopping move right into the rays of the sun by sewing a wavy line outward away from the center toward the corner and the long side back to the opposite corner of the triangle. Depending on the size of the block you can adjust the number of sunrays. In this block I used 5 – an odd number of rays tends to look better. This design fills space quickly and is quite forgiving – have fun with it, I use it a lot!
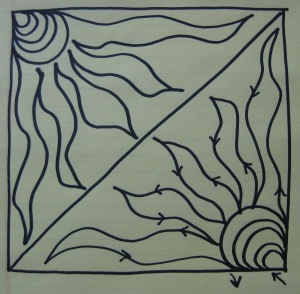
Be daring and add a swirl at the end of some of the sunrays!
Square 3 – Ribbon Candy – The next pattern reminds me of Peppermint ribbon candy and can fill a triangle space very nicely or sashing around blocks. It definitely will take practice if used in a triangle because the length and width of the curves vary with each pass (or fold in the ribbon) and to determine which way is more comfortable moving thru the space -left to right/top to bottom. I started from the upper right corner and worked to the bottom left then flipped the sandwich over and repeated the other side.

If you have to stop to adjust your hands it is best to stop when you touch the previous line or in the seam area to avoid any bumps in the curves.
I used this design in the star block below in the pieces around the star to enhance and make it pop. I slightly opened up the spacing for a more casual relaxed feel. Since this was a small 6″ block if I would have quilted tighter and more densely it would have made the star pieces pucker too much – a very important tip to remember…make sure your quilting is always balanced across the block and quilt otherwise the non-quilted areas will look too puckered and wavy.
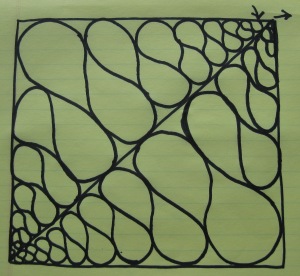
Square 4 – Not sure what to call this design but sort of reminds me of a section of an old wrought iron fence -check out this link for all the free-motion design possiblilites!
For this design, start in the lower left corner and begin moving right slightly increasing the space from the seam line then create a loop at the center of the line then decreasing the space until you end in the corner of the triangle. Repeat this design in each of the other triangles.
The loops can be big like in the actual quilted page at the top or smaller like in the drawing below. Keeping the loops consistent size and in the centers of each leg of the triangle will create a pretty overall block design.

A few tips:
1) Practice doodle each design on paper first.
2) Watch your tension and adjust as needed.
3) You may find quilting gloves helpful with maneuvering the fabric.
4) Strive for consistency in stitch length, spacing and loop sizes and you will find the overall quilting impact will be very satisfying!
We’re in the homestretch, one more page to go!
Page 4 of Journal: (for Pages 1-3 click here)
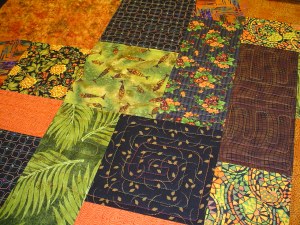
This journal page we will be filling in the space with slightly more challenging designs with a masculine feel for men and boy quilts. A couple are also great on art quilts for landscape textures such as pond water, tree bark, or mountain ranges.
Set up the sandwich with a vertical and horizontal line to create a 4-patch as in my sample below.

The following images can be printed then placed under a white sheet of paper to practice, I used a heavy black marker so it would show through.
Square 1 – Starting with the top left square of the 4-patch meander around the space with a jagged / haphazard motion. Add variety by varying the length of the lines and angles. This is a great basic overall pattern to fill in small areas or on borders. I love using this on black fabric with black thread for lots of texture or variegated thread to add interest when the black area is too bold.

Square 2 – Start at any corner you are most comfortable I tend to work this pattern from top left to bottom right. Basically this is a swaying motion back and forth as you meander across the space. This pattern gives you the effect of a water if you follow my lines you will see how that works. I have used this design on a landscape panel with a pond -the water came alive. It can also be used in a sky to create a eerie stratus type cloud perfect in those Halloween panels!

Square 3 – This pattern is very similar to the water design above it has the same back and forth motion but instead of a soft curve as you change directions you create a sharp point. I found this pattern easier to quilt by going up and down rather than side to side.
The design reminds me of flames or tree bark. You will create more interest by varying the length of the flame and width. I love the positive space the quilting lines create.

Square 4 – This pattern reminds me of mountain ranges and can be quilted fairly quickly. I started in the upper left corner and moved right then dropped down to the next line echoing the previous line as I moved back left. I didn’t mimic each line exactly to create more interest but if you do I would recommend varying the spacing between the echo -this will create a controlled modern feel. If you are having trouble seeing your previous line start from the bottom instead and work to the top.

A few tips:
1) Practice doodle each design on paper first.
2) Watch your tension and adjust as needed.
3) You may find quilting gloves helpful with maneuvering the fabric.
4) As you fill a space with any of these designs and find yourself in an awkward location with no way out – stop, you can always take out some of the stitches back to a point where you can easily start up again like a point, where one line crosses another or where a change in direction occurs. If you are near a seam just bury your stitches in the seam and start over at another area where you can start up your pattern again.
My goal here is to help you get over the fear of quilting and tackle all those wonderful tops you made that are sitting lonely and folded in your closet for no one to enjoy! Your quilting does not have to be perfect once you quilt everything you will see the overall consistency in your quilting not each individual imperfection. Keep practicing!


